Documentation splash

First Steps

Pulze - Post Manager enables you to create Render Post Production Photoshop documents based on custom, and built-in templates, easily update your documents with your latest renders and more-and-more upcoming macro scripts, to make your work easier and streamlined.

Installation

Please close your running Photoshop. Run the downloaded exe and follow the installer’s instructions. After the installation is done start Photoshop and go to Window > Extensions > Pulze Post Manager to run the application. You can dock the lunch button, to your toolbars.


Getting Started

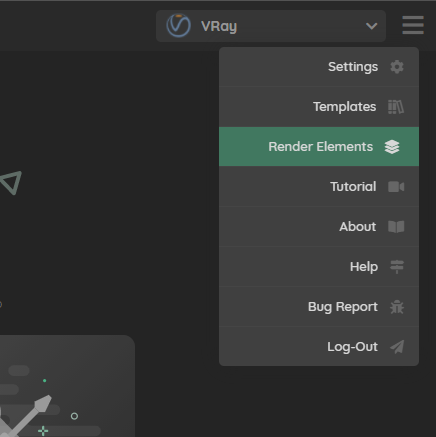
After starting up the Post Manager for the first time, you have to login with your Pulze account. If the login was successful the main user interface will load, where you can choose from the three main menu options.

pm main.jpg

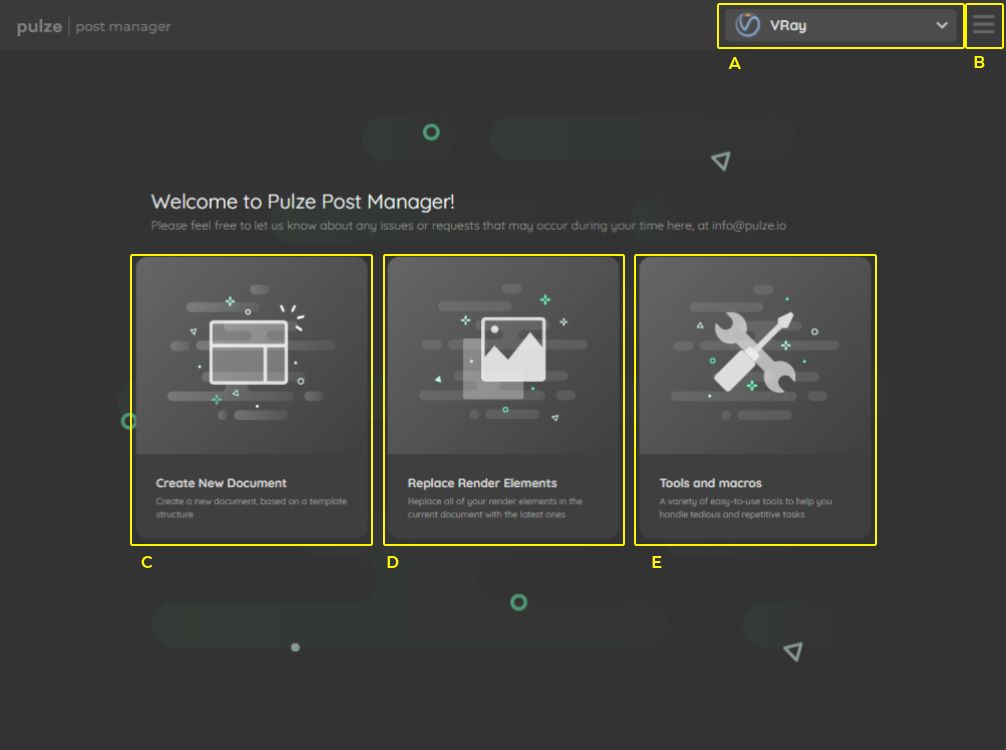
  • A - Choose your Render Engine
  • B - Menu
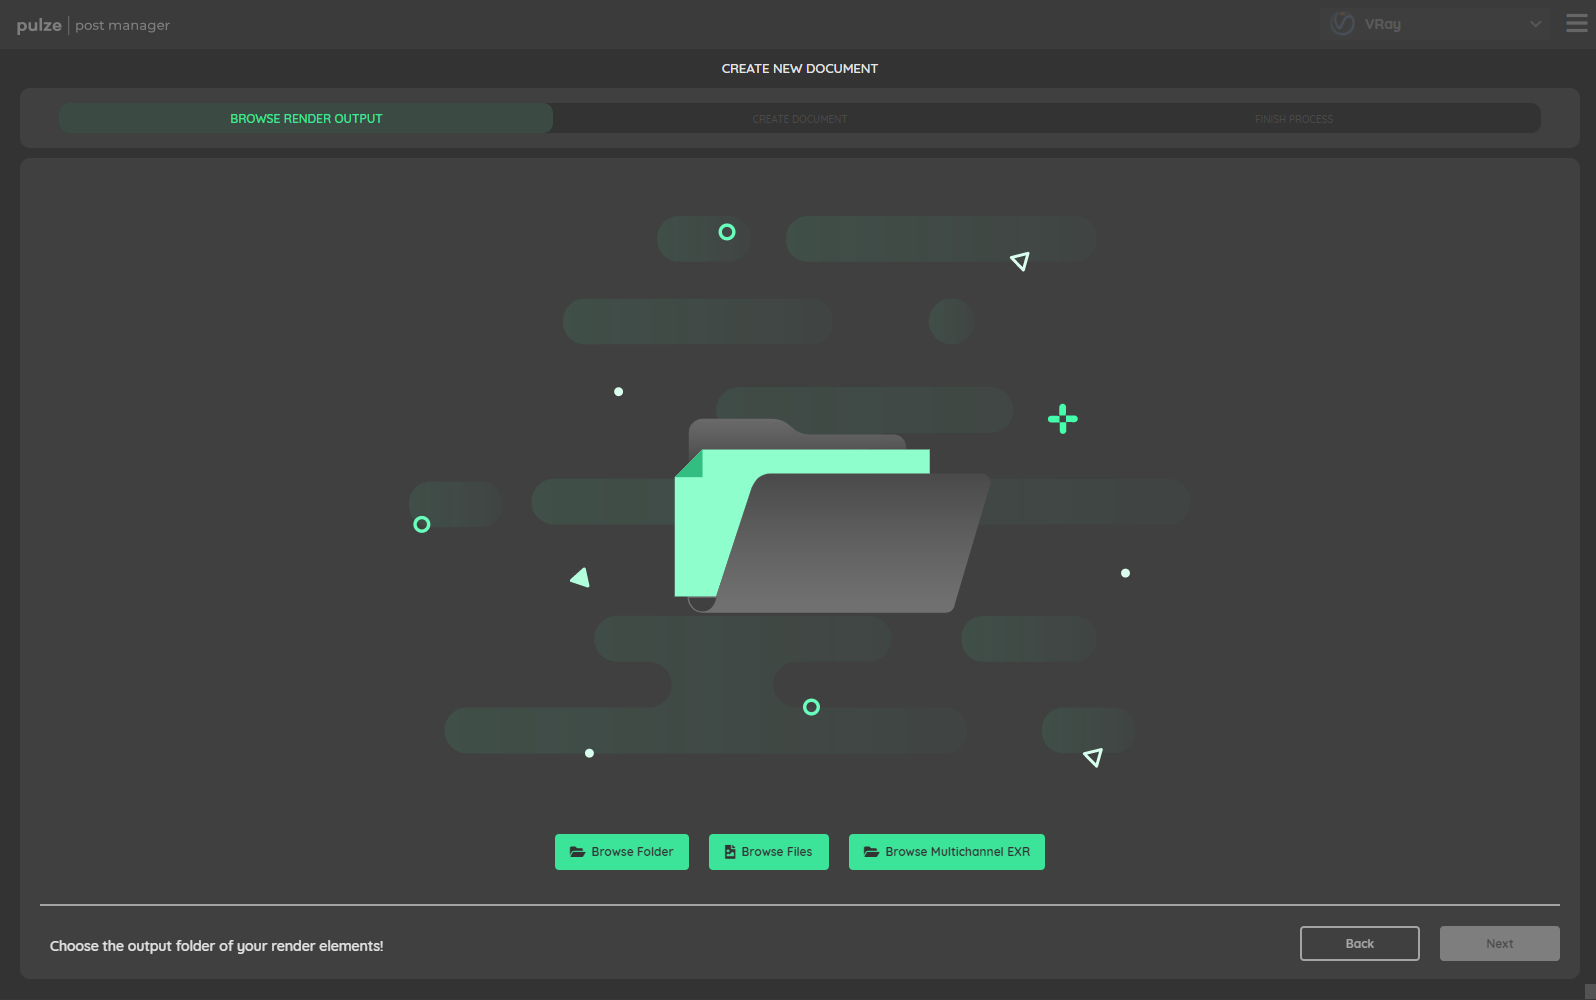
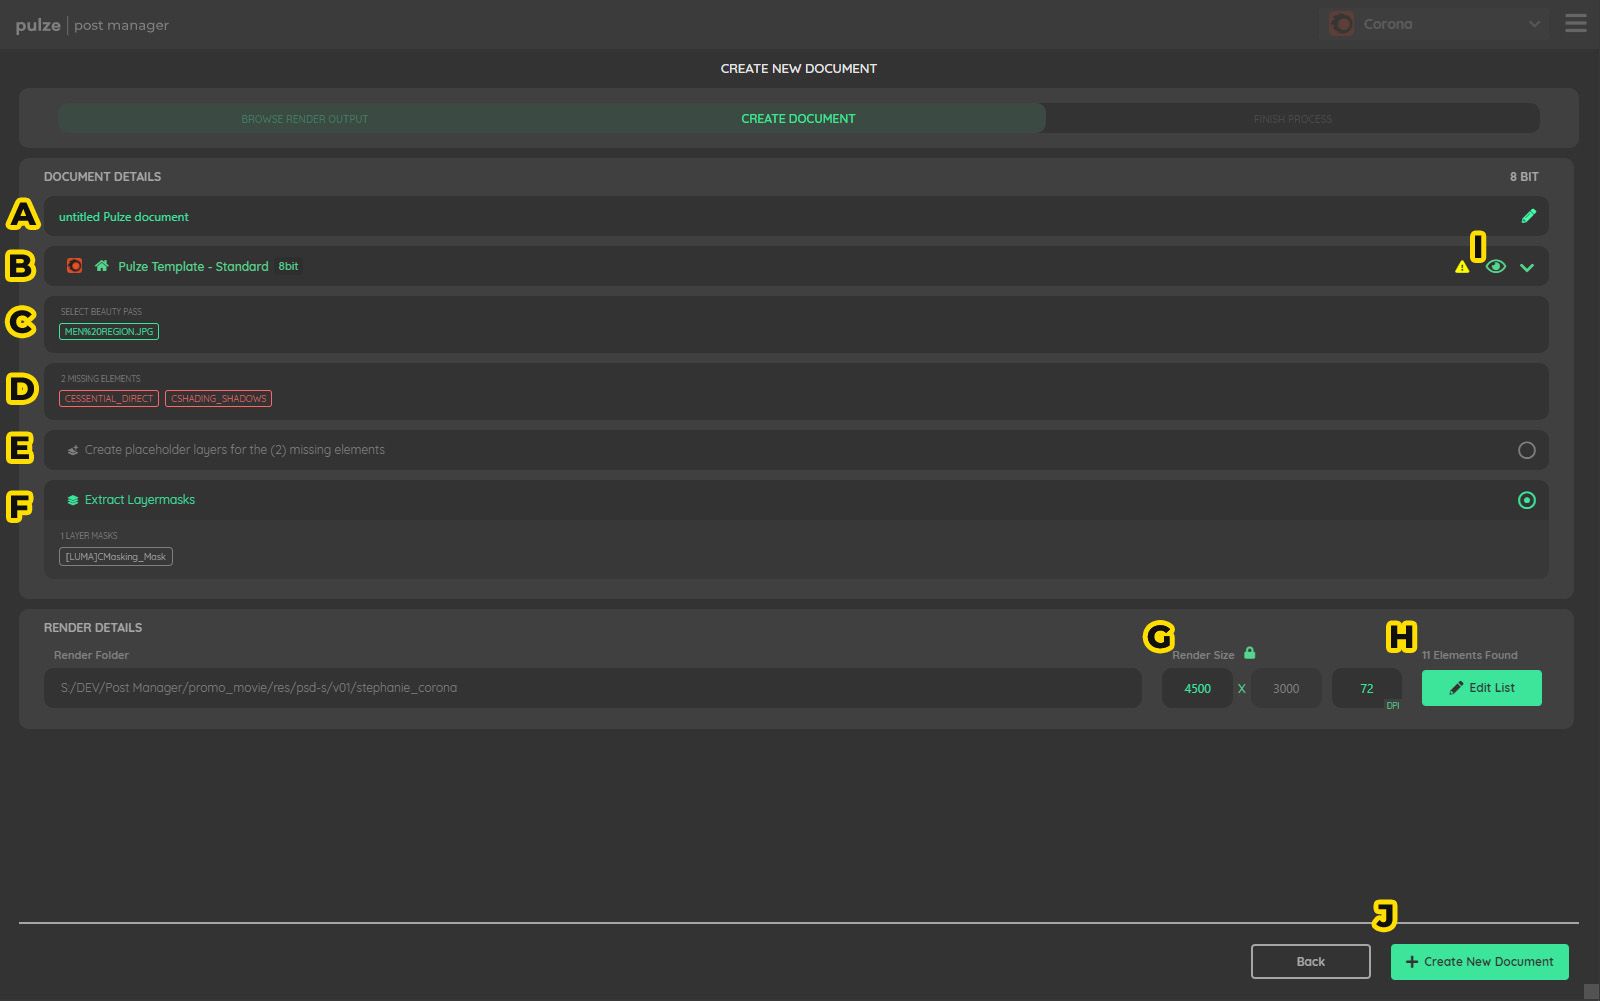
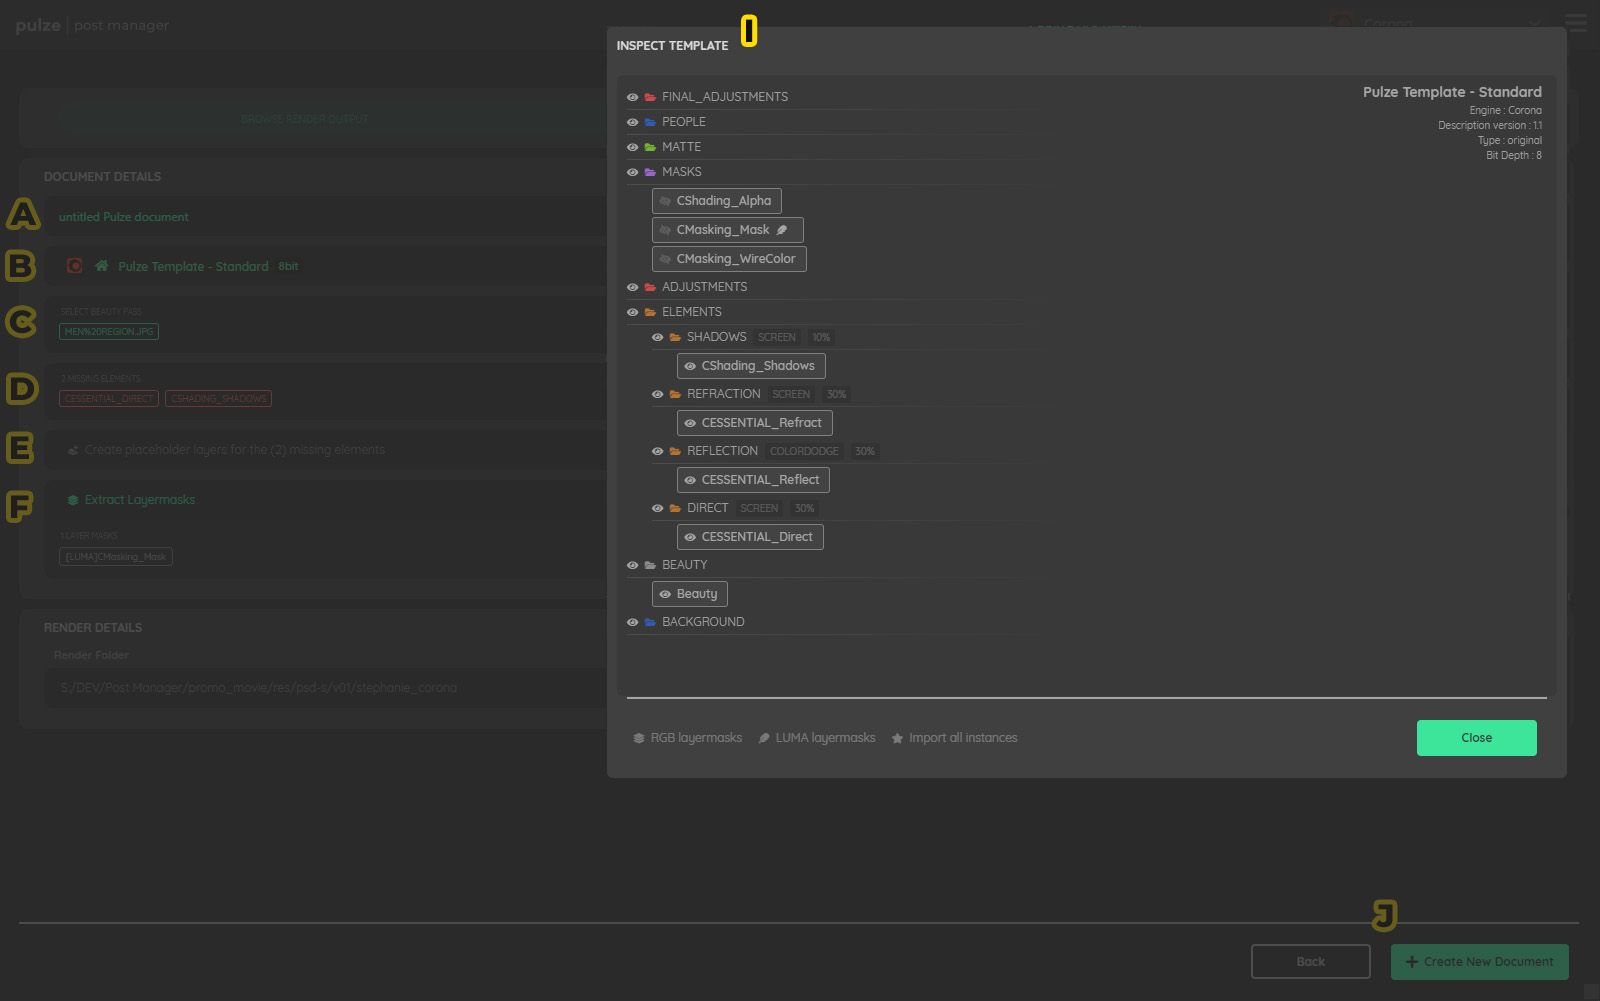
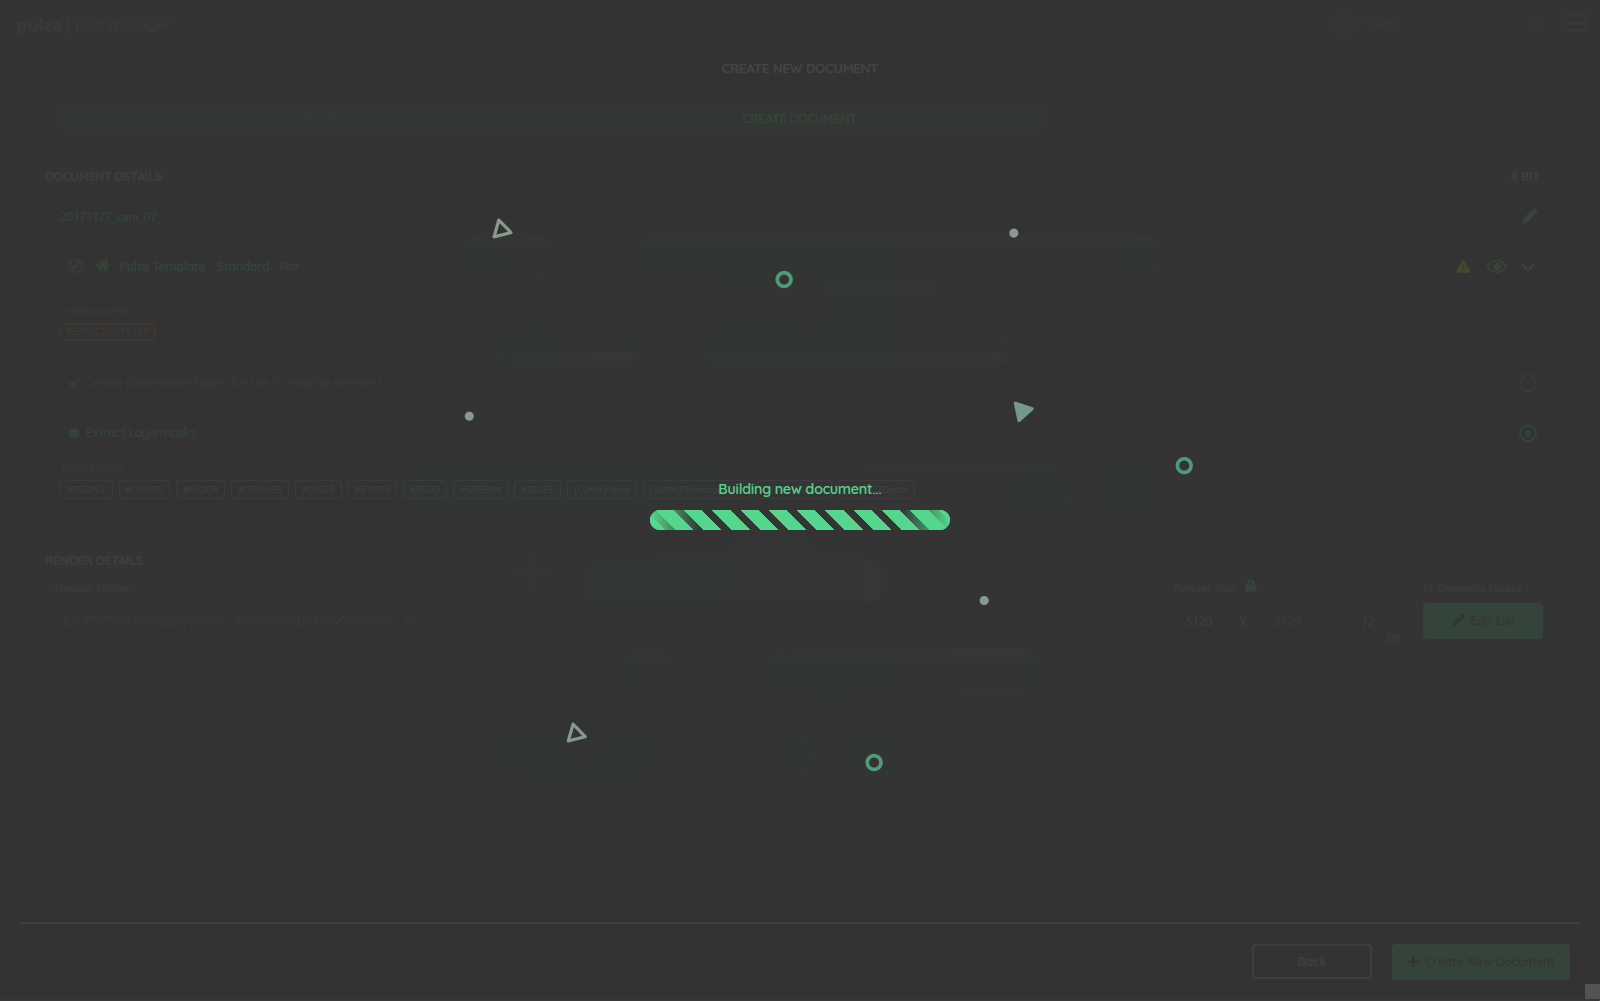
  • C - Create new Document from File
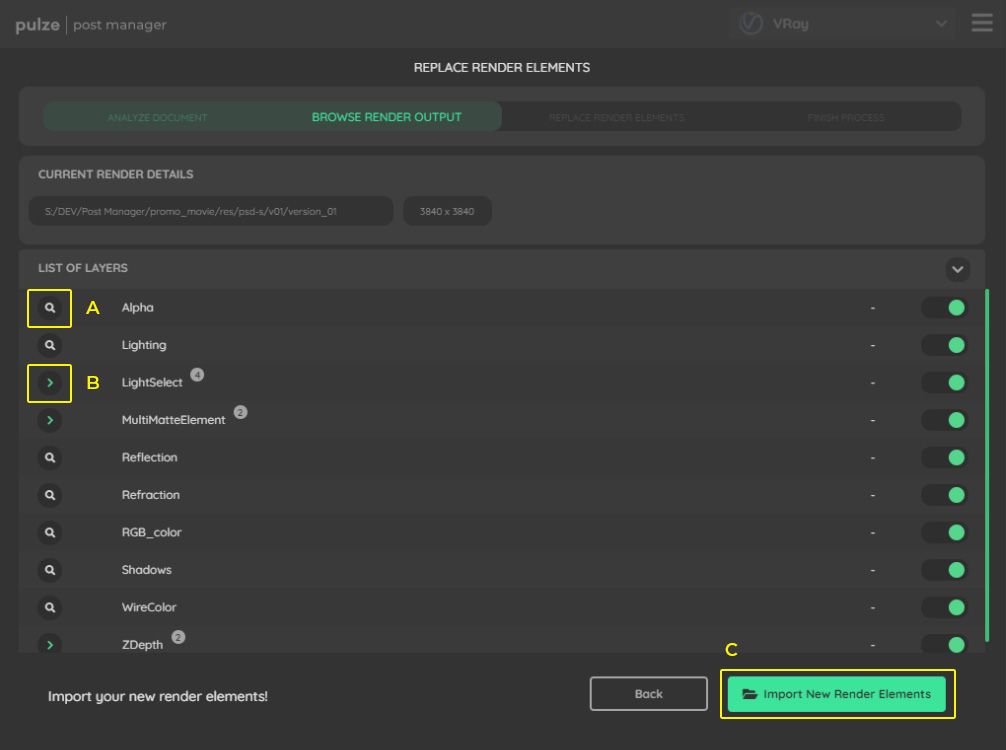
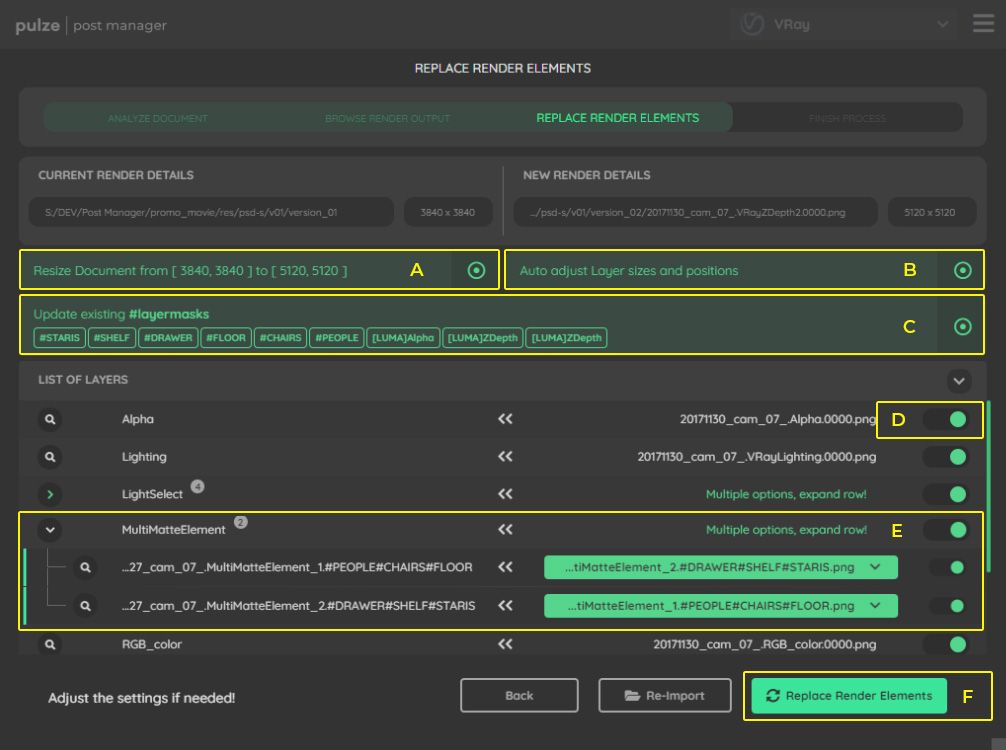
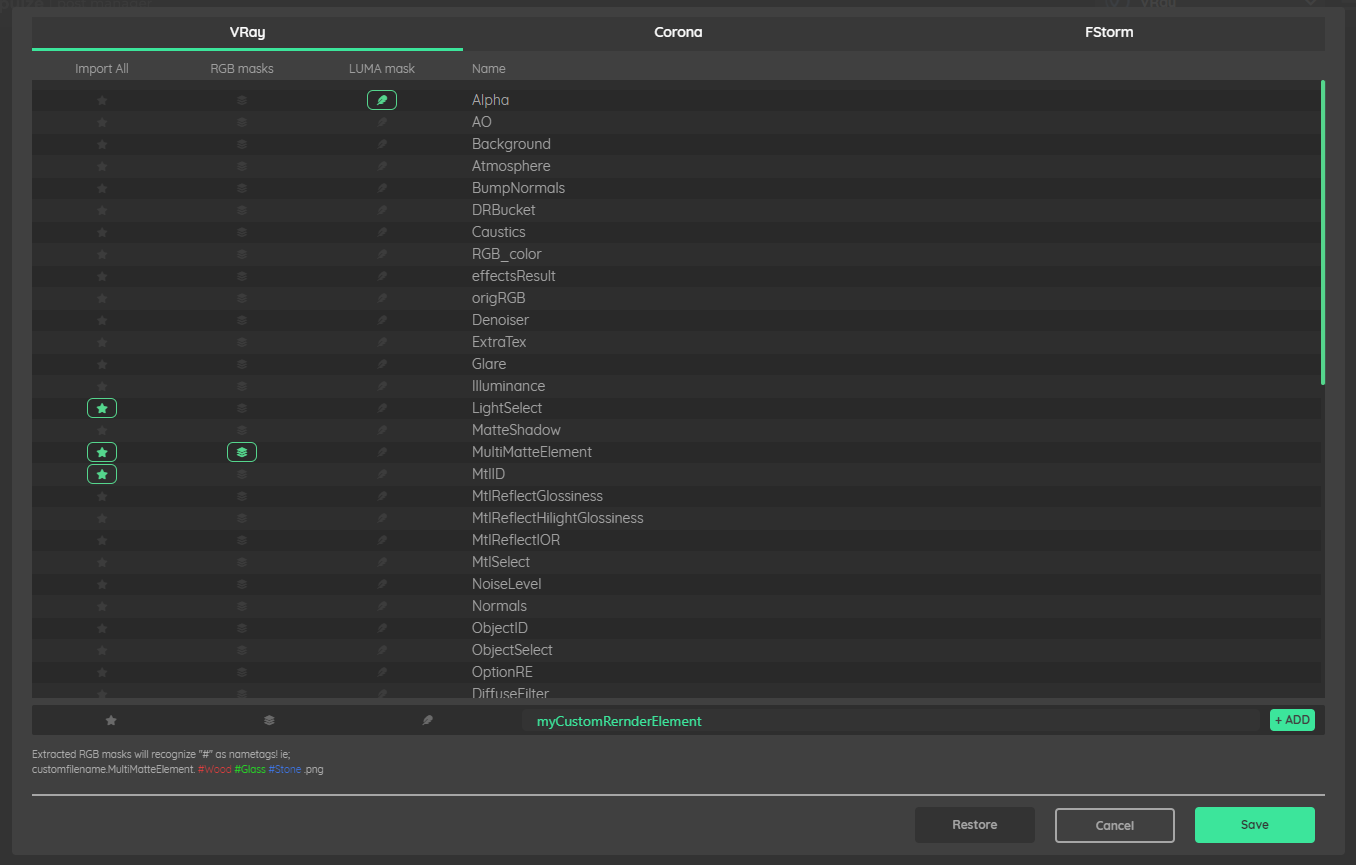
  • D - Replace Render Elements
  • E - Tools and Macros

Compatibility

Compatible Hosts

Photoshop CC 2018+

Compatible Render Engines

  • V-Ray
  • Corona
  • FStorm

Document Creation

Here you have the ability to create a new Photoshop document based on a built-in, or a custom template, with your new render elements

1 - Browse

The first step, is to select your rendered images, so post manager can gather all the render elements that might be needed.
Choose your Browse style, then navigate inside your desired folder, and select your files/folder.
pm_browse.jpg
Please note, that in case you are using “Folder” browsing style, than in the browser window, your images will not be visible in the browser window!

If the folder you selected has recognizable render elements, you will be automatically taken to the next step.


2 - Create Document

In this step, you can review your settings and inputs:

pm_setup.jpg

  • A - Give your document a name
  • B - Use the dropdown menu to select your desired template.
  1. A template defines folder structure, blending modes, opacity, and label colors, at the moment
  2. Press the Eye icon to inspect the selected template
  3. Alert icons will appear, when your imported elements are more, or less, than the template will use. Click on it to see the list of conflicts.
  • C - Select RGB or Beauty pass, when not recognized automatically.
  • D - List of missing elements, that the selected template would require.
  • F - Enable/disable the Extract Layersmasks option

Extract Layersmasks will create three folders for each Multimatte element in your list, and apply their primary color channels as a layermasks! (Red,Green,Blue)
It will also generate Layermasks from the Luma channels of “ReflectionFilter” and other monochrome render elements. You can change the list of these in the settings menu.

Furthermore, if your multimatte elements have “#” separated nametags in their names, for example; yourprojectname.MultiMatteElement.#Brick#Glass#Concrete.png
than it will name the masked folders respectably.

  • G - Change your documents dimensions
  • H - Check the list of imported render elements
  • I - Inspect selected template
  • J - When you are ready, press “Create New Document”

pm_setup2.jpg

loading.png

Please be patient, it may take a few seconds to finish!
Once it’s done, your document is ready to use, and you can close Post Manager.
pm_flags.jpg


Element Replacer

This feature lets you replace all render elements in your Photoshop document with a brand new one, with just a few clicks!

1 - Analyze Document

Click on Replace Render Elements, and wait a few seconds for Post Manager to look through your file, and find your Render Elements.
It’s important, that these has to be Smart Objects, otherwise they will be ignored.

discover.jpg

If the folder you selected has recognizable render elements, you will be taken to the next step.


2 - Browse Render Output Folder

In this step, you can review the list of elements Post Manager has found
browse.jpg

  • A - Locate them with the little Magnify icon, next to their names.
  • B - Where there are multiple instances for a Render Element, a dropdown icon will reveal all occurrences.
  • C - Click Import New Render Elements, to import your new render’s elements

3 - Replace Render Elements

settings.jpg

  • A - If your new render elements has a different resolution, you can toggle Resize Document! All your non-included layers in your document will be resized as well, accordingly.
  • B - Resize your new elements, to match their original size in your document. ( Most of the times, your should keep this on)
  • C - Update your existing layermasks with “#” Multimattes, and Monochrome layers.
  • D - You can toggle your Elements to be included or excluded in the replacing process
  • E - Where there are multiple images with the same Render Element name, you have the option to individually specify which one should replace which. Chose from the dropdown menus.
  • F - When you are ready, press Replace Render Elements

4 - Finish

Lay back, get a coffee as it may take up to 3-5 minutes to finish!
pm_flags.jpg
Once it’s done, your document is ready to use, and you can close Post Manager.


Tools and Macros

Continuously expanding toolset!
This part of Post Manager is designed to host a handful of one-click tools and solutions, to overcome some of the repetitive and tedious tasks, that you run into during post processing work!

Let us know if you have a suggestion, and if possible we will implement it!

Features

Create Template from Document

Launching this script, will generate a template file based on your currently open document. It saves folder structure, blending modes, opacity, and label colors, at the moment.
You can inspect, import and export these templates in Menu > Settings

Extract Layermasks

Launching this script, will create three groups for each layer selected in your document, and apply their primary color channels as masks! (Red,Green,Blue)

Furthermore, if your multimatte elements have “#” separated nametags in their names, for example;
yourprojectname.MultiMatteElement.#Brick#Glass#Concrete.png

Refresh Merged Layer

Launching this script, will save the Opacity, Blending Mode and Applied Smart Filters, on your selected layer, delete it, then Merge All Visible layers, and apply saved properties.

Manage Render Elements

It will open up the Render Element List Editor, where you can assign “Import All”, “RGB Multimatte” and “Luma Mask” roles to each of your elements, as well as add new Supported render elements to the list.

Collapse Folders

Launching this script, will collapse all folders in your currently open document.

Reset Layer transforms

Launching this script, will rasterize, than convert all you layers into smart objects, resulting in having all layer shown as 100% in scale.

Batch Convert : Smart Objects

Launching this script, will convert all your Supported Render Elements into smart objects

Batch Convert : Smart Objects

Launching this script, will rasterize all your Supported Render Elements


Manage Render Elements

Whenever you need to add Render Elements to the list, either because Post Manager does not recognize it yet, or it is an entirely custom Render Elements, you can do so in the Render Element Manager menu.

  • Import All : Whether to import all occurrence of a Render Element, or only the first. Use this for multi render elements like. ( MultiMatte or LightSelect, etc… )
  • RGB Mask : Create layermasks from this elements Red, Green and Blue channels. ( MultiMatte )
  • LUMA Mask : Creeate a layermask from this elements Luminosity channel. ( Alpha, ZDepth etc… )

You can reach it in the dropdown menu
cre01.png
cre02.png


Settings

Here you can set up how Post Manager behaves, and handles different scenarios.
postmanagersettings.jpg

Usage Metrics

s1.png
Allow Post Manager to send anonym usage data to Pulze’s servers to help future development.


Reset layer transforms

s2.png

This settings allows Post Manager to reset layer size and position upon element replacement. This settings is a must have, if your composition is bigger than your render elements.


Created layer type

s3.png

When importing render elements, you can choose to import them as Smart Objects, or Linked Smart objects, to save up on your psd’s file size.


Created layer name

s4.png

You can choose to either have your layers named after your file name, or just simply their element name.


Active multimatte channels

s5.png

By default Post Manager will create masks from all 3 colors of your multimattes.
In some cases you don’t want this, so you can select what colors will be extracted by default.


Wildcard

s6.png

This is wildcard character that helps Post Manager to name your masks from your Multimattes.
For example MultiMatteElement01#Table#Chair#Pot.

You can change this wildcard to search for different characters. For example : MultiMatteElement01&Table&Chair&Pot.