Documentation splash

Getting Started

Prerequisites

Network

  • All render nodes and workstations should be visible to each other on the network where you wish to use Pulze

Internet connection

  • Render Manager in Workstation mode requires an internet connection, and in Node mode requires a Workstation to be connected

Firewall / Antivirus

  • Pulze Service.exe (located at C:/Program Files/Pulze Service) should be added as an exception to your firewall and antivirus software
  • In certain cases when allowing the executable is not enough, make sure that you allow TCP port range 3005-3009 through the firewall
  • 3dsmax.exe should be also added to the firewall exception

Operating system

  • Windows 10 & 11

Supported software

3ds Max 2014 - 2024

render engines:

V-Ray, Corona, FStorm, Arnold, Redshift

(All other 3rd party and built-in render engines for 3ds Max will also work, however, you can only submit Single Frame or Animation jobs)

recognized plugins:

Anima, BerconMaps, CityTraffic, CloneModifier, ColorCorrect, ColorEdge, ComplexFresnel, FloorGenerator, Forest Pack Lite, Forest Pack Pro, Glue, GrowFX, Laubwerk, MadCar, MultiScatter, MultiTexture, Phoenix FD, Psd Manager, RailClone Lite, RailClone Pro, ReDeform, RichDirt, SigerNoise, SigerScratches, SiNi Software, SmartRefs, SplineOffset, Substance in 3ds Max, ThinFilm, tyFlow, VRayPattern

V-Ray Standalone

Arnold Standalone

Chaos Vantage (version 1.5.0 or higher)

V-Ray Swarm

Fusion Render Node (version 17)


Installation

Installing Render Manager on a workstation

The very first installation should happen on a workstation. Please make sure that this computer is connected to the internet.
install_001.jpg

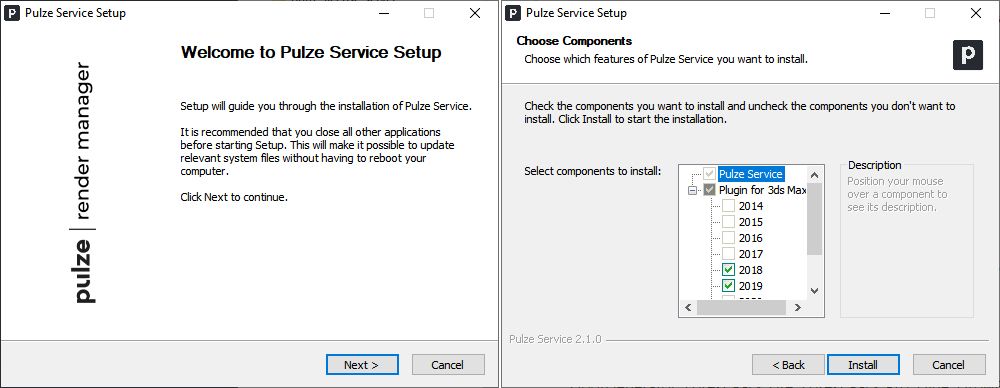
Run the downloaded installer and go through the usual setup procedure.
install_002.png

Once the installation is finished, Render Manager will start automatically.
install_003.jpg

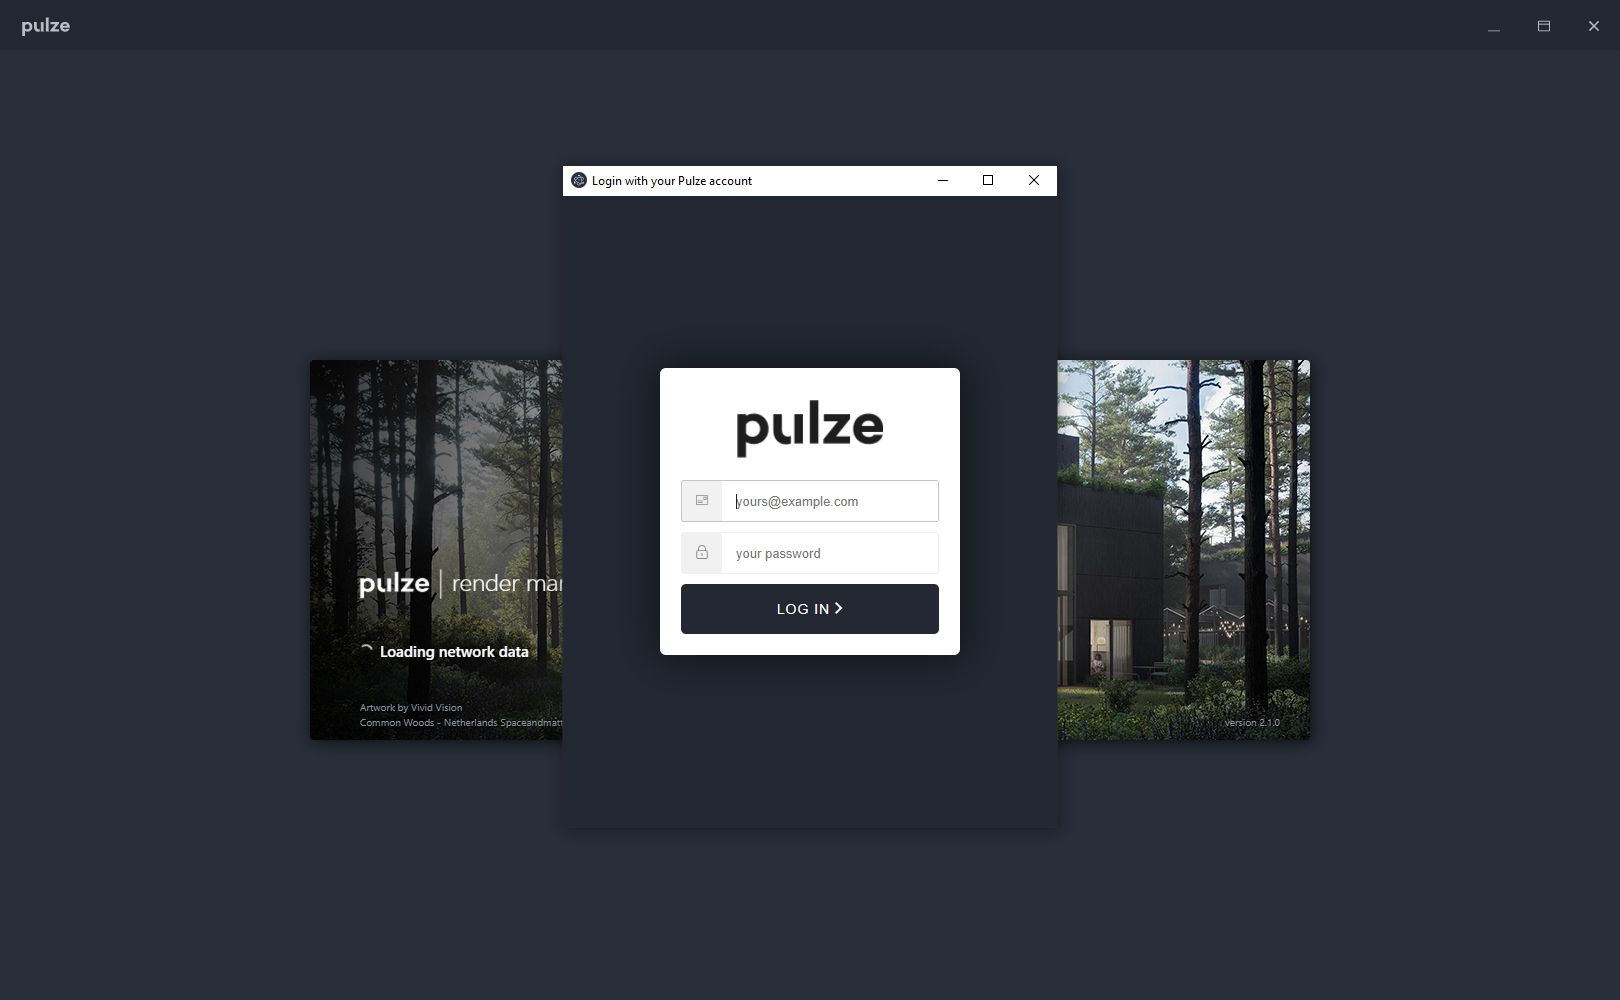
If you have not done it before, Render Manager will ask you to sign in with your Pulze account. Enter your user name and password that you registered with.
install_004.jpg

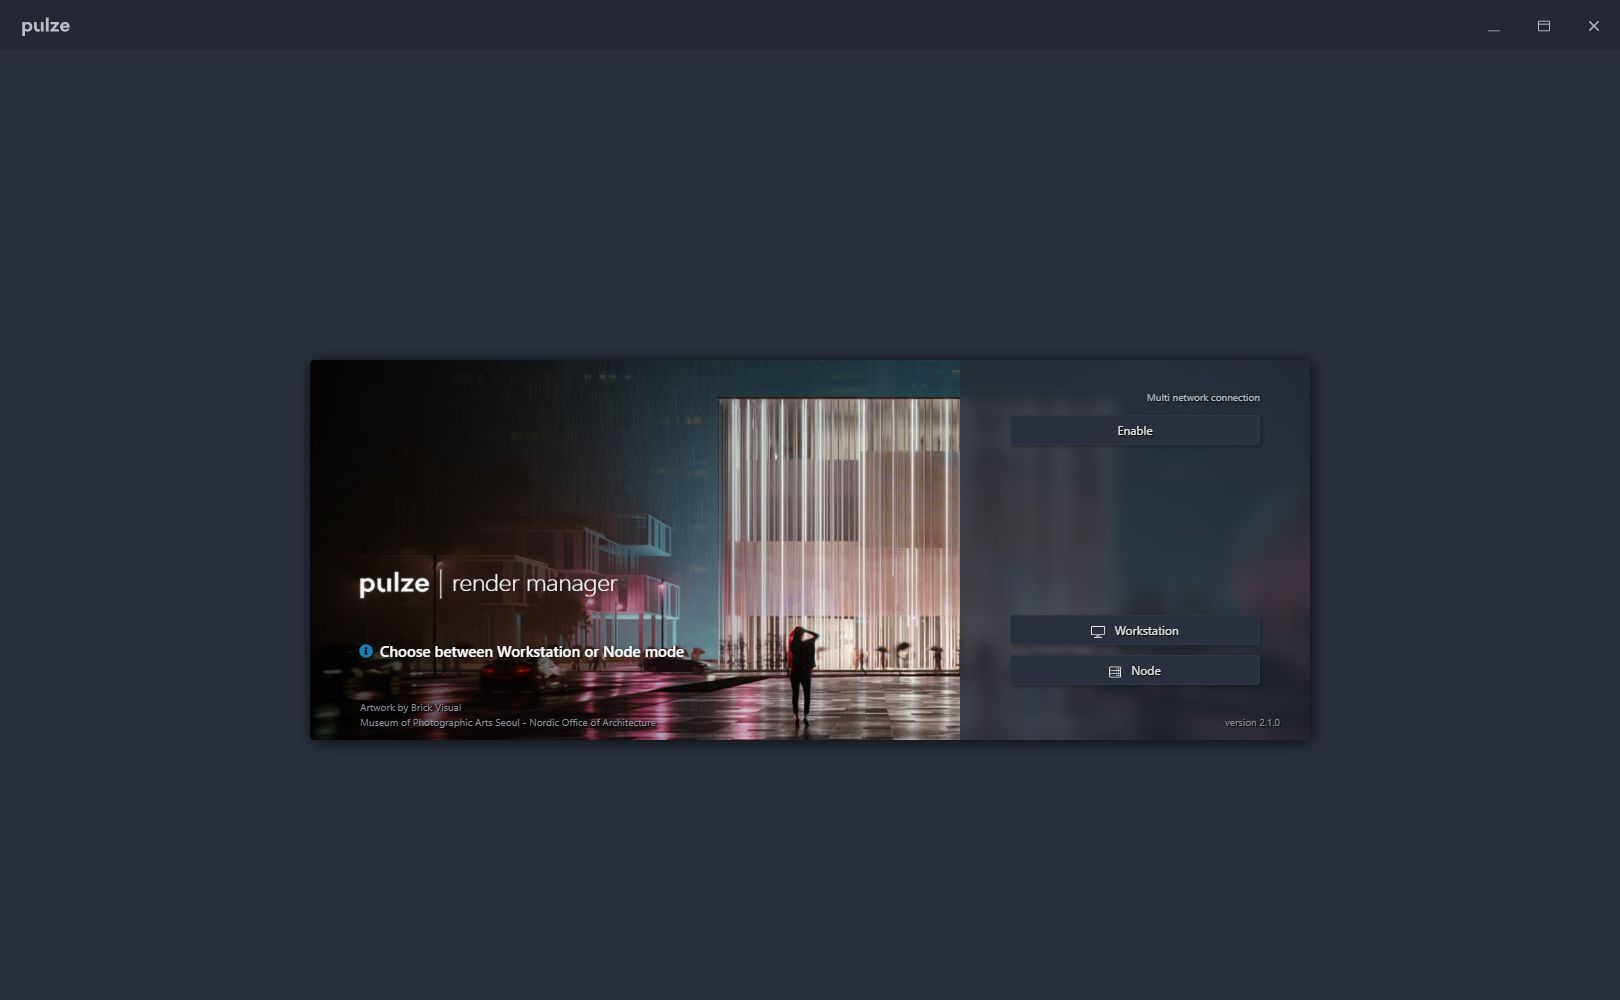
The next step is to choose between Workstation or Node mode. Choose workstation to continue with.
install_005.jpg

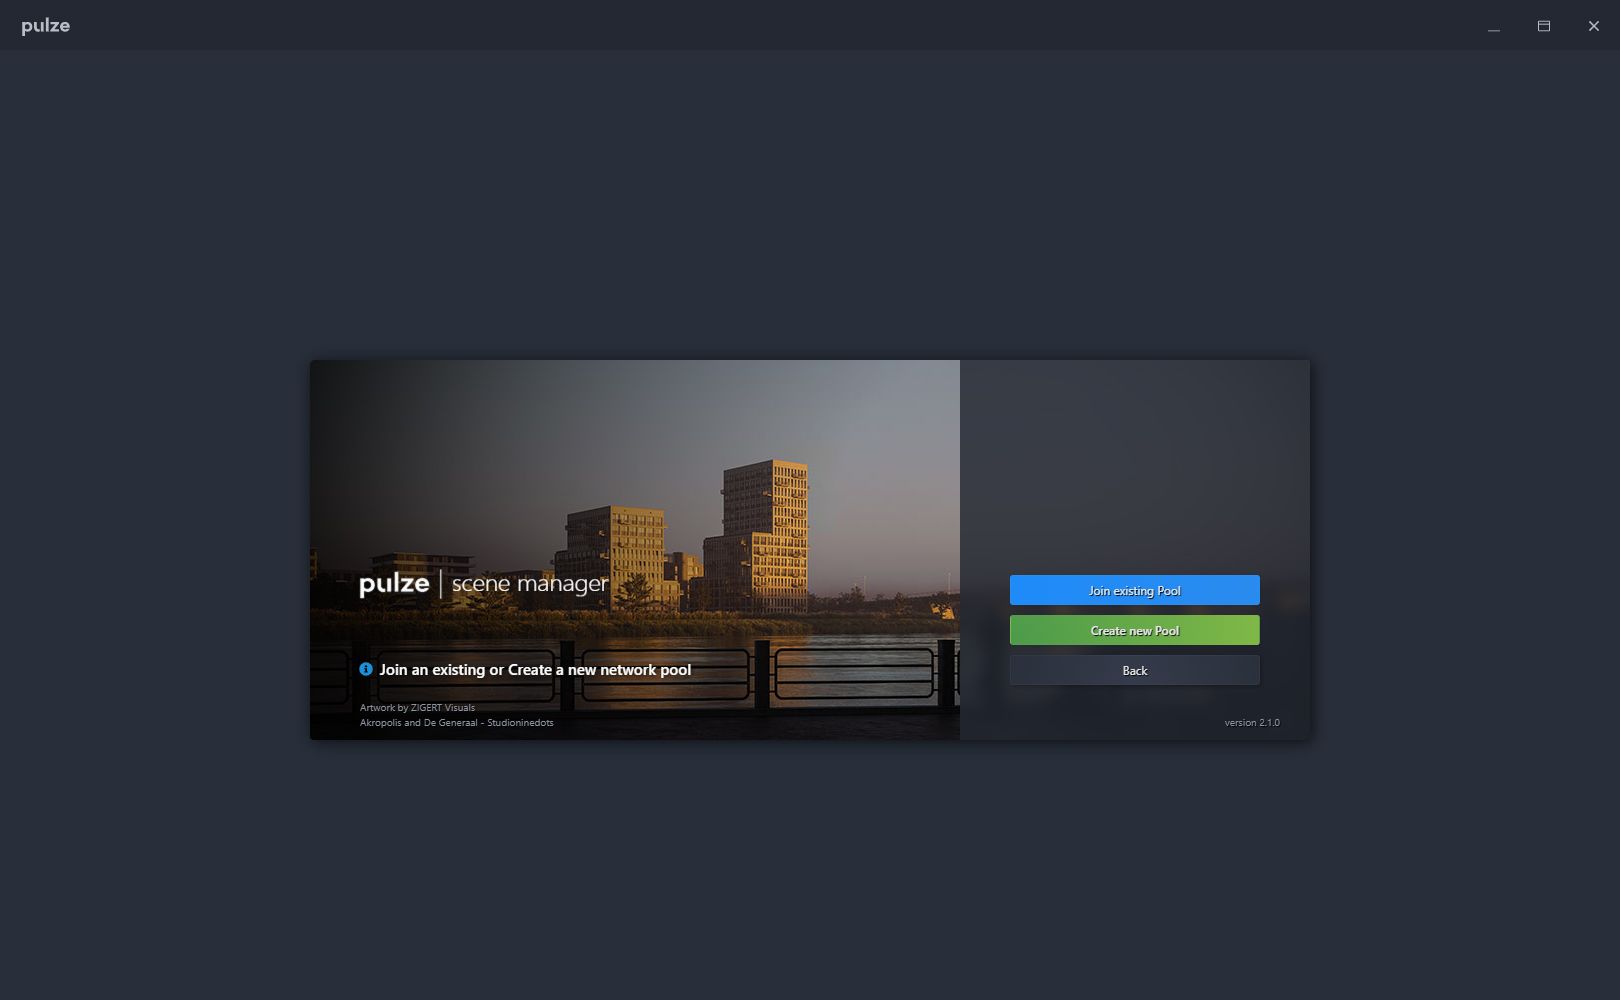
If you haven’t created a pool yet, then click on Create new Pool.
install_006.jpg

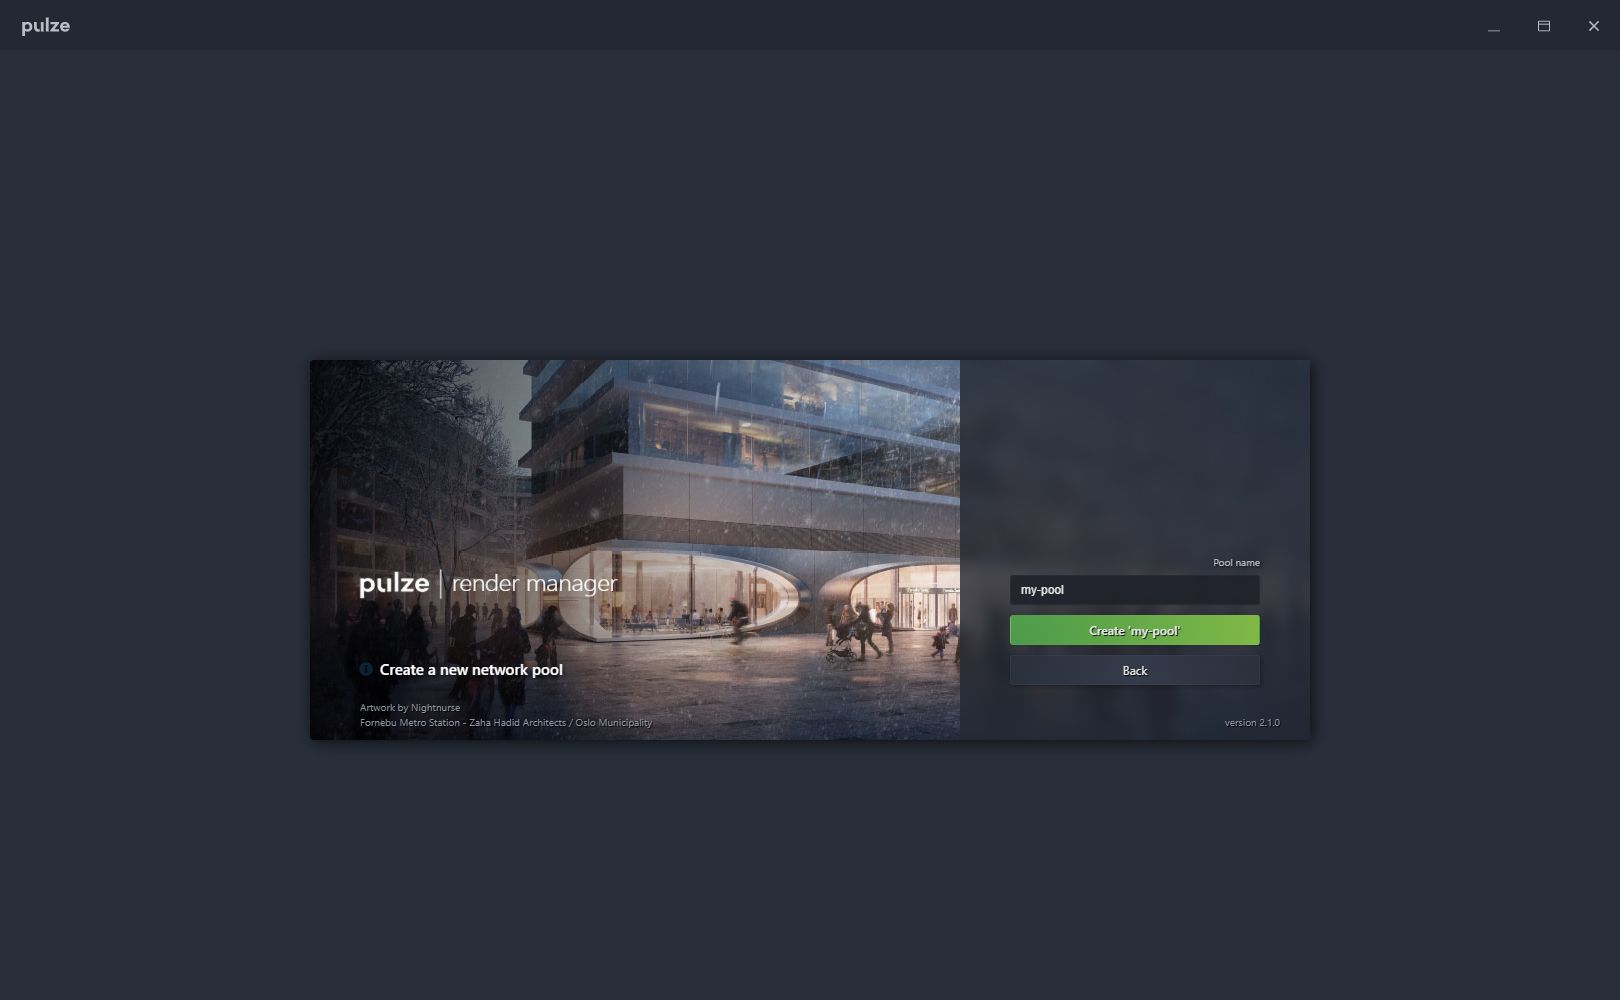
Name your pool and press Create.

install_007.png

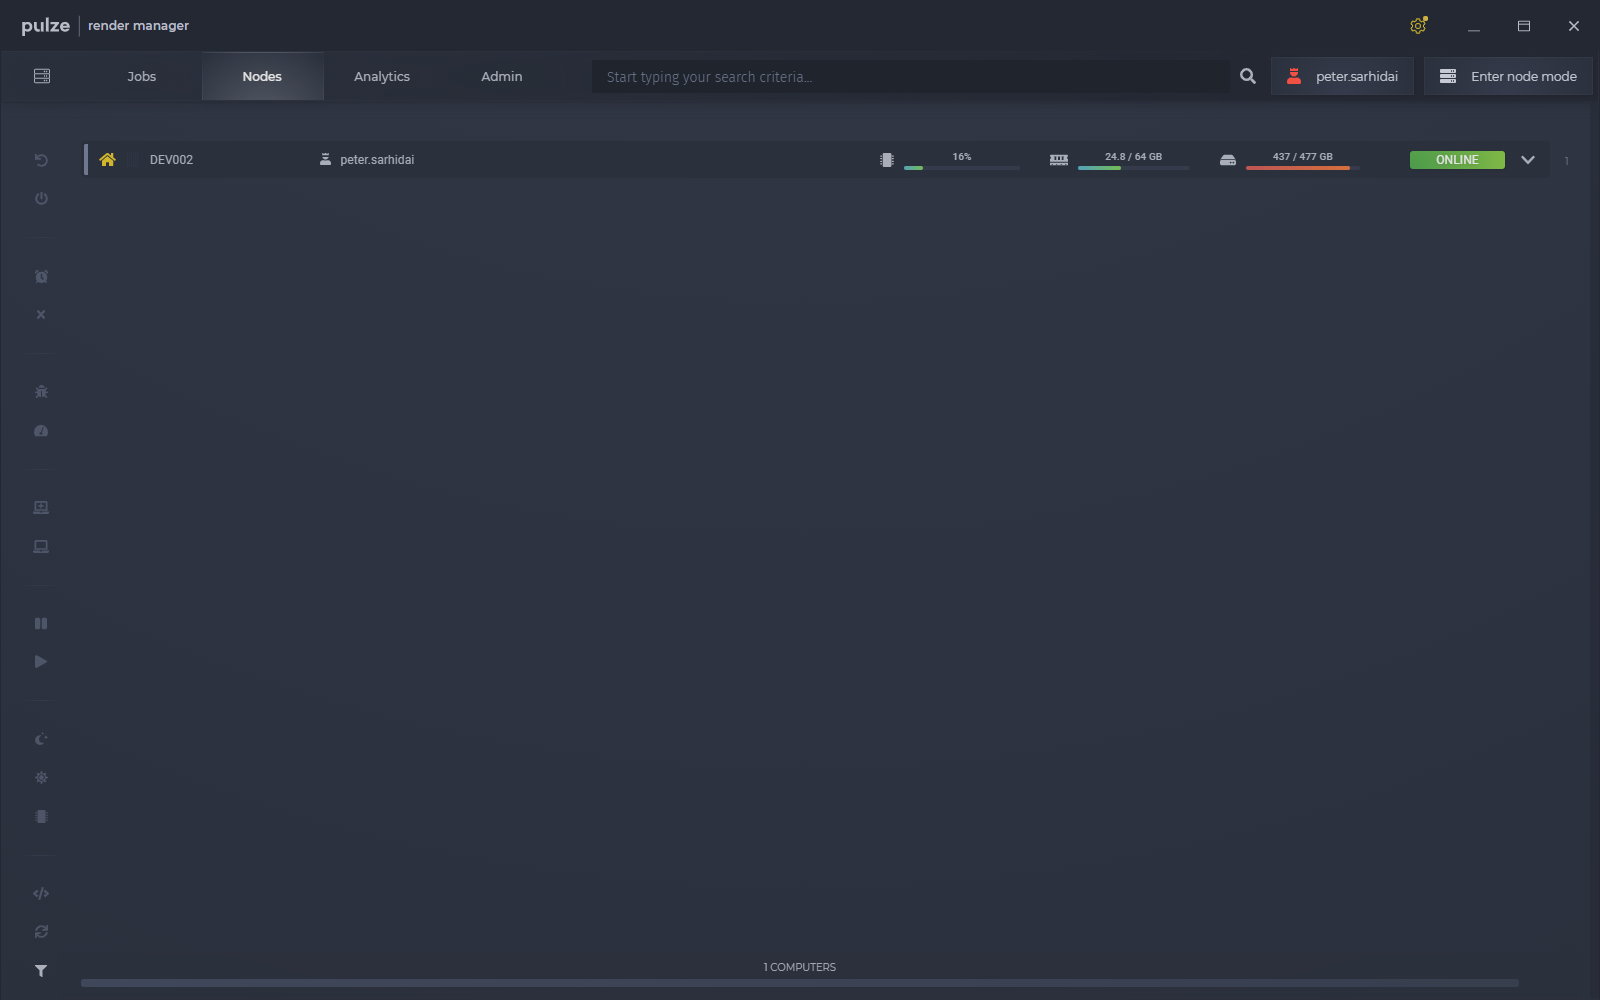
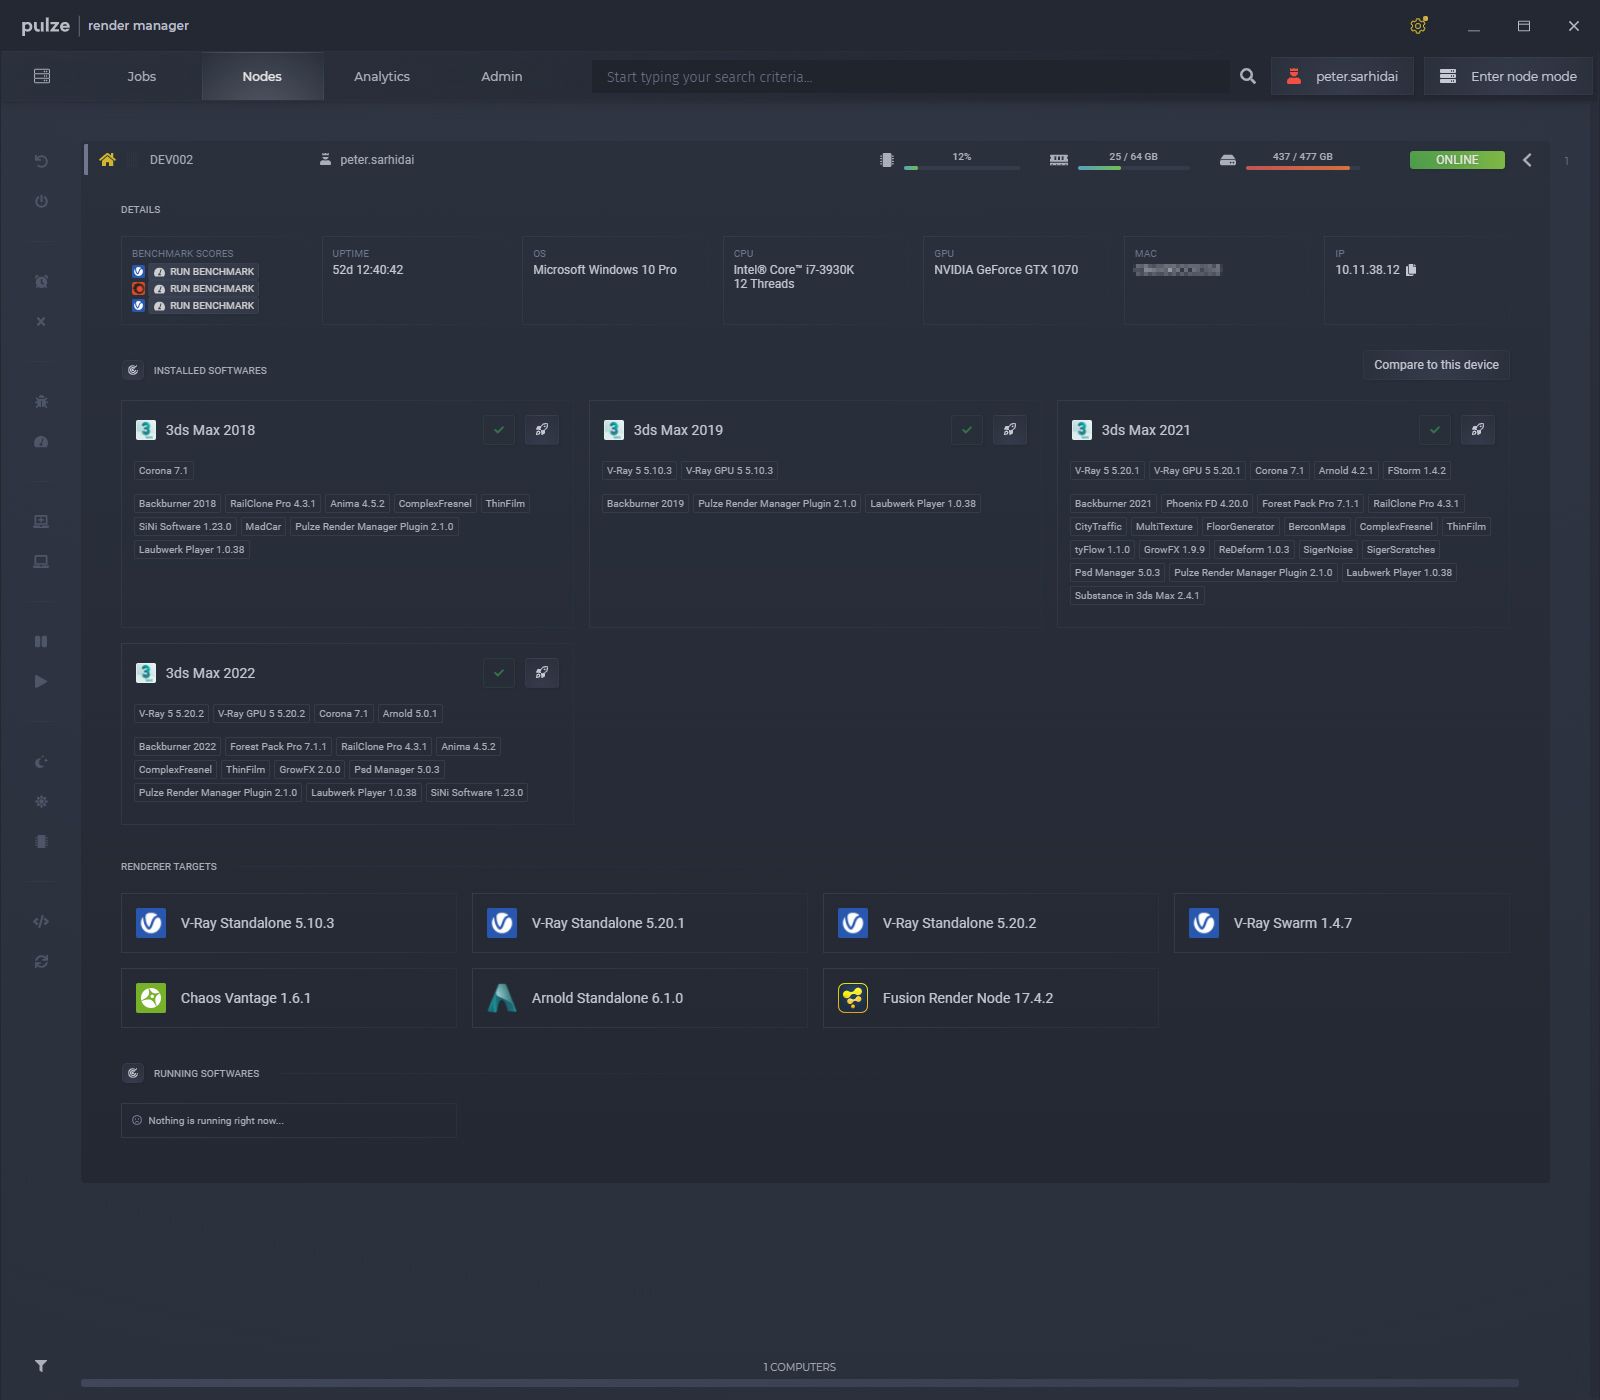
After a short loading time, you should arrive at the Nodes tab where you will see your computer at the top.
install_008.jpg

You can expand your computer and see the installed softwares that are recognized by Render Manager along with some basic hardware information.
You can read more about the computer details here:

Installing Render Manager on a render node

The installation procedure for a render node is almost the same. In this case, internet connection is not mandatory because the workstation (where Render Manager is already running) will handle the authentication and licensing procedure for us.
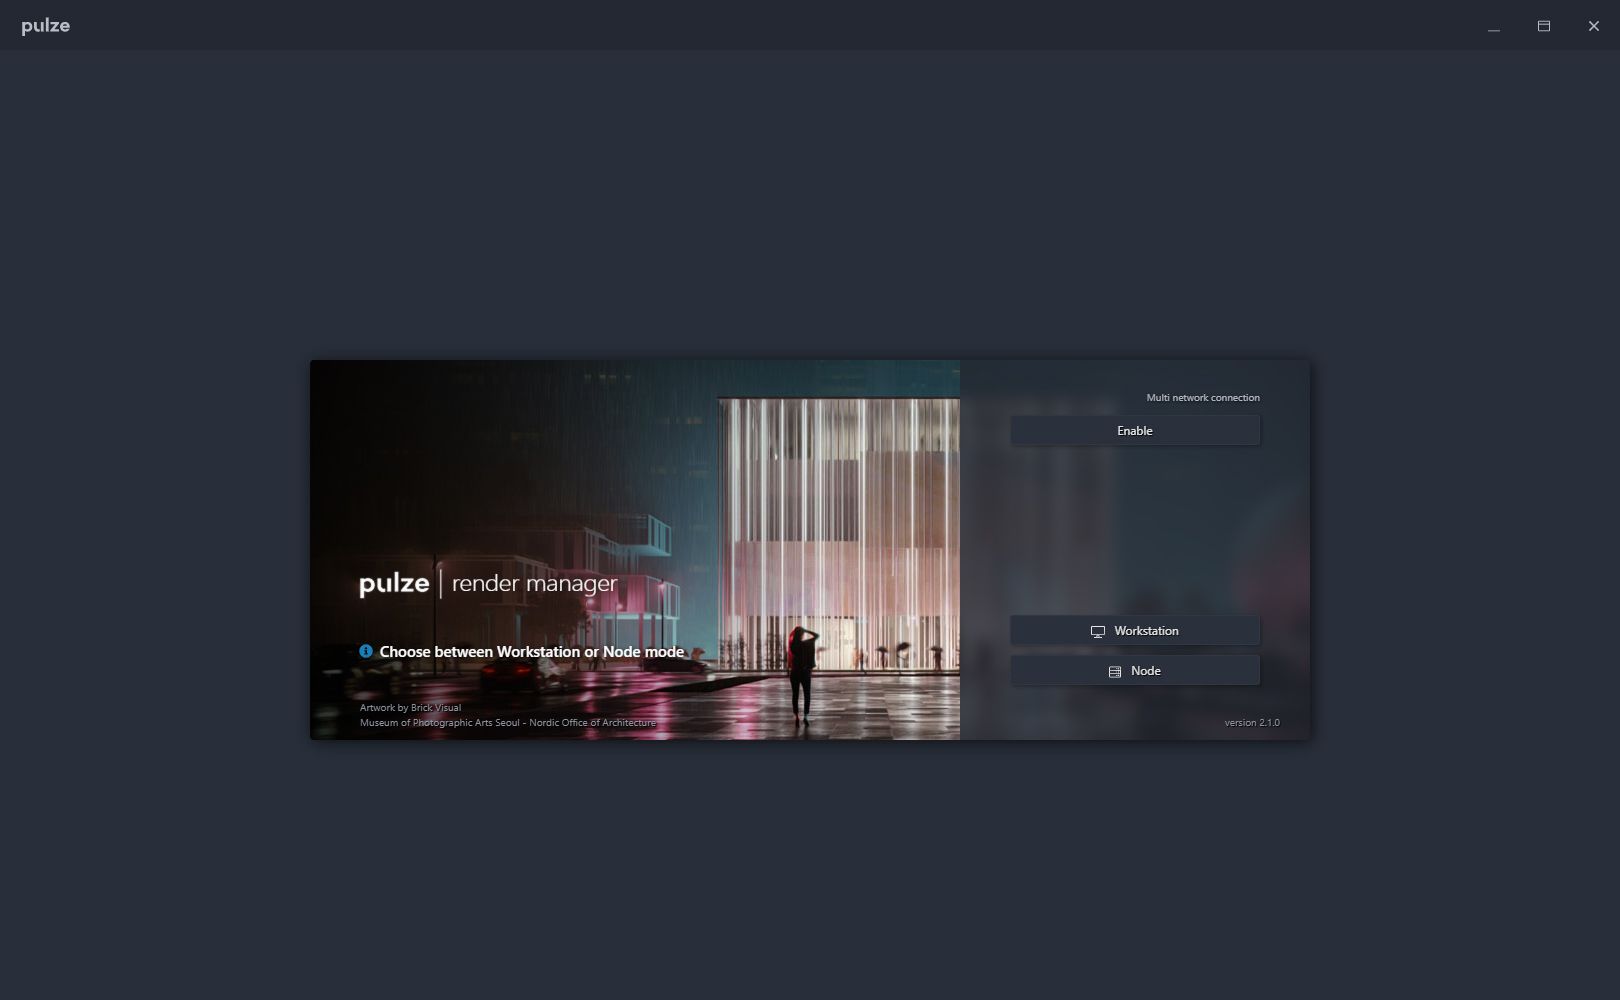
install_009.jpg

Choose Node to continue to the next step.
install_010.png

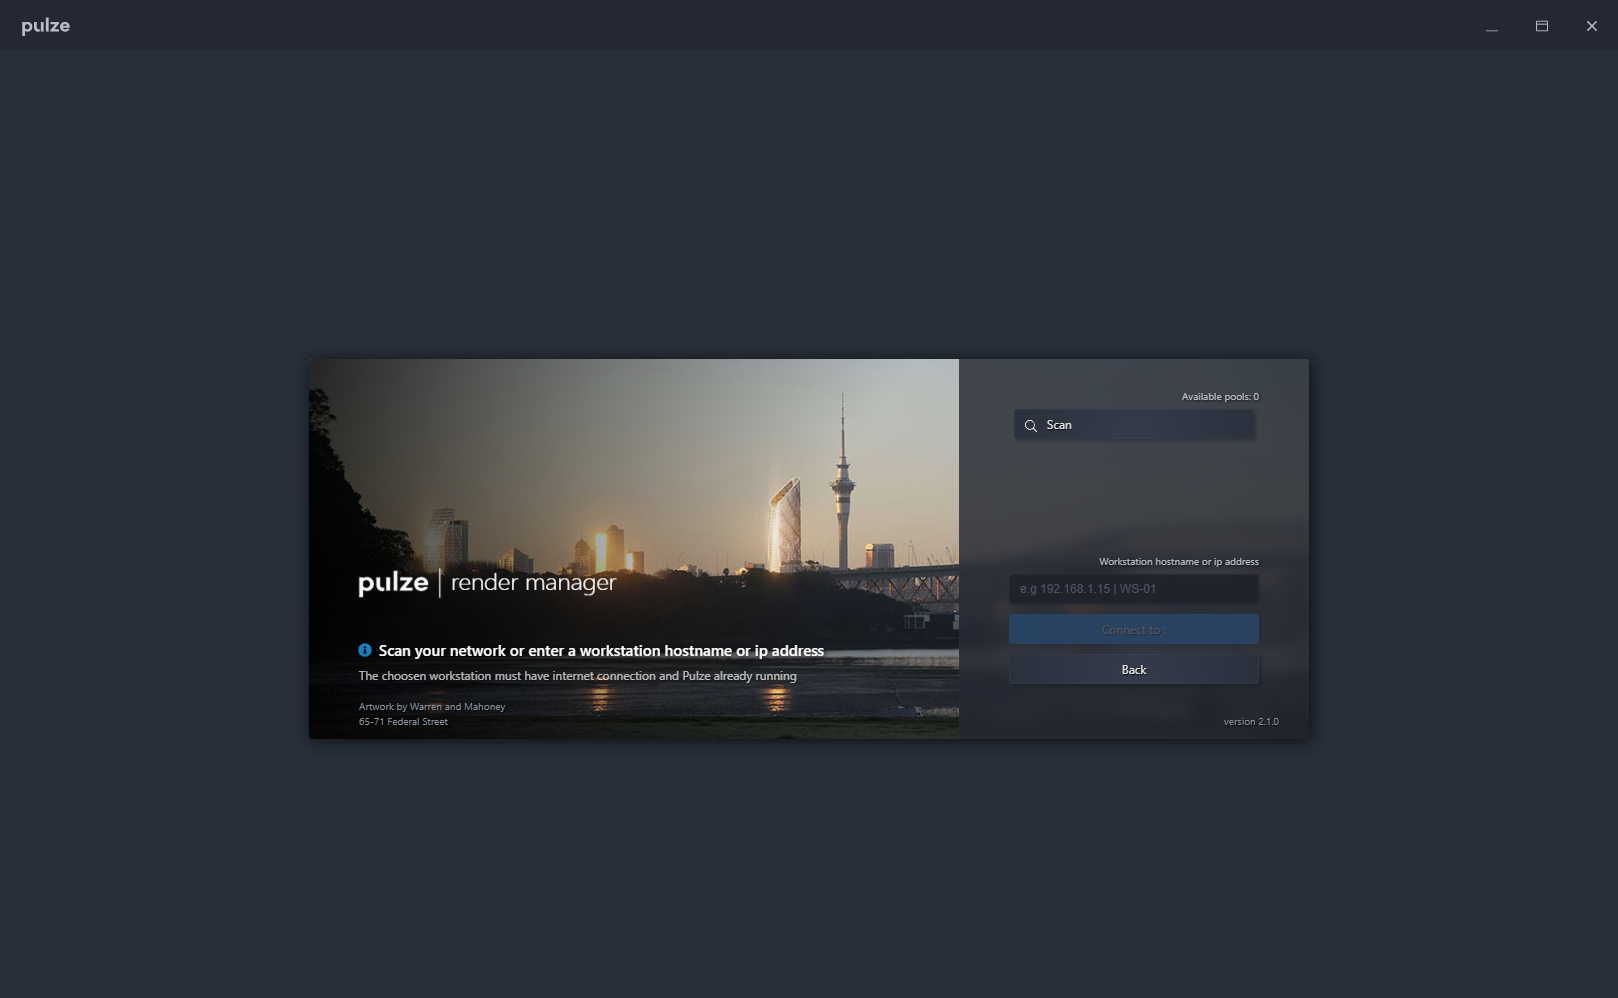
There are two ways to connect to the pool that you previously created. You can enter your workstation’s IP address or hostname and press Connect, or you can hit Scan which will try to find the computers on your network where Render Manager is already running.
install_011.jpg

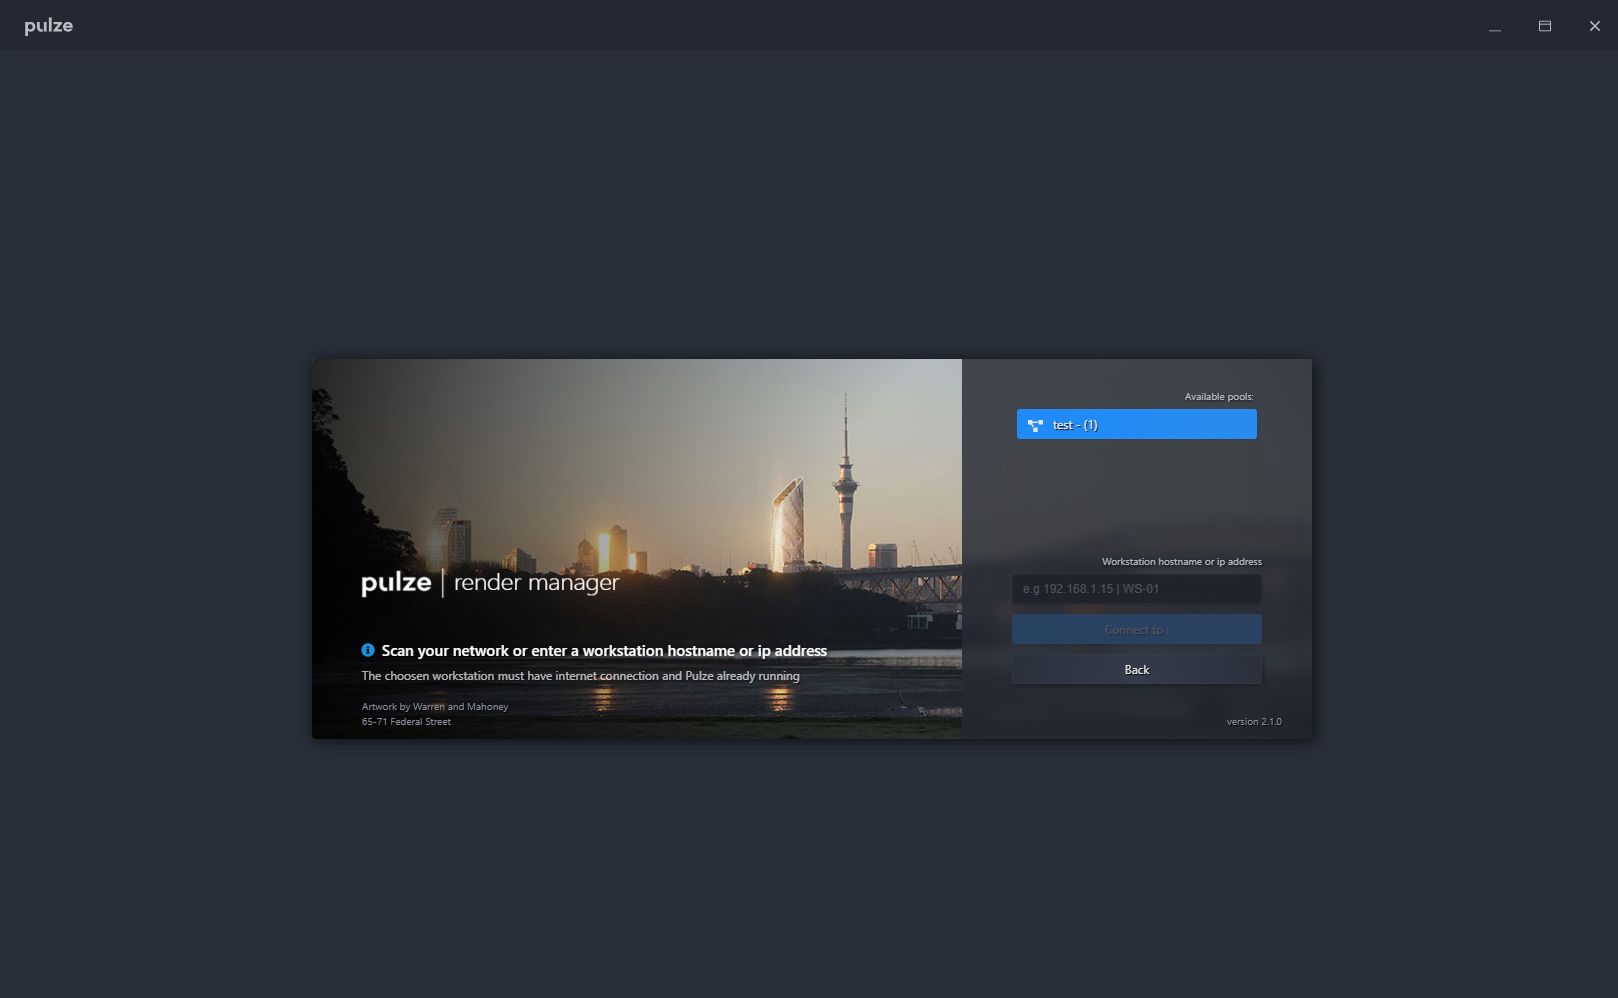
Here you can see the results of a Scan. Render Manager found a pool named test, which has one computer connected. By clicking on the name of the pool you will join it.
install_012.png

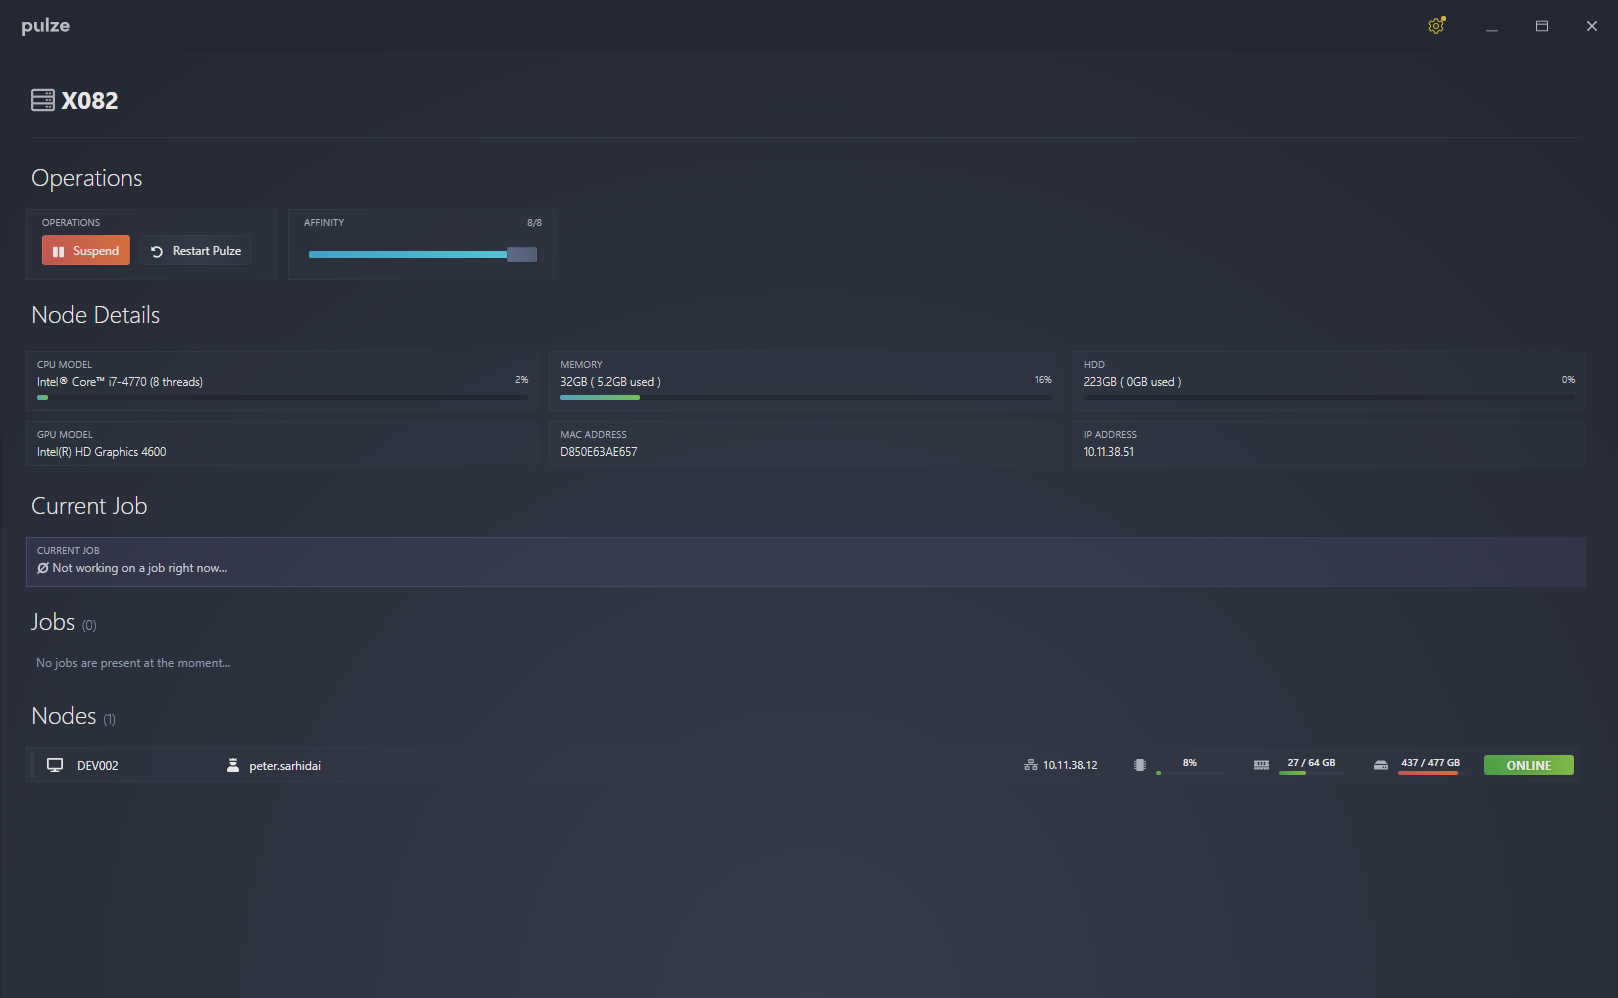
After some loading time, your render node should successfully connect to the chosen pool. The user interface for the node mode is much simpler and besides a few basic operations like suspend or restart, it is only for monitoring purposes.
install_013.png

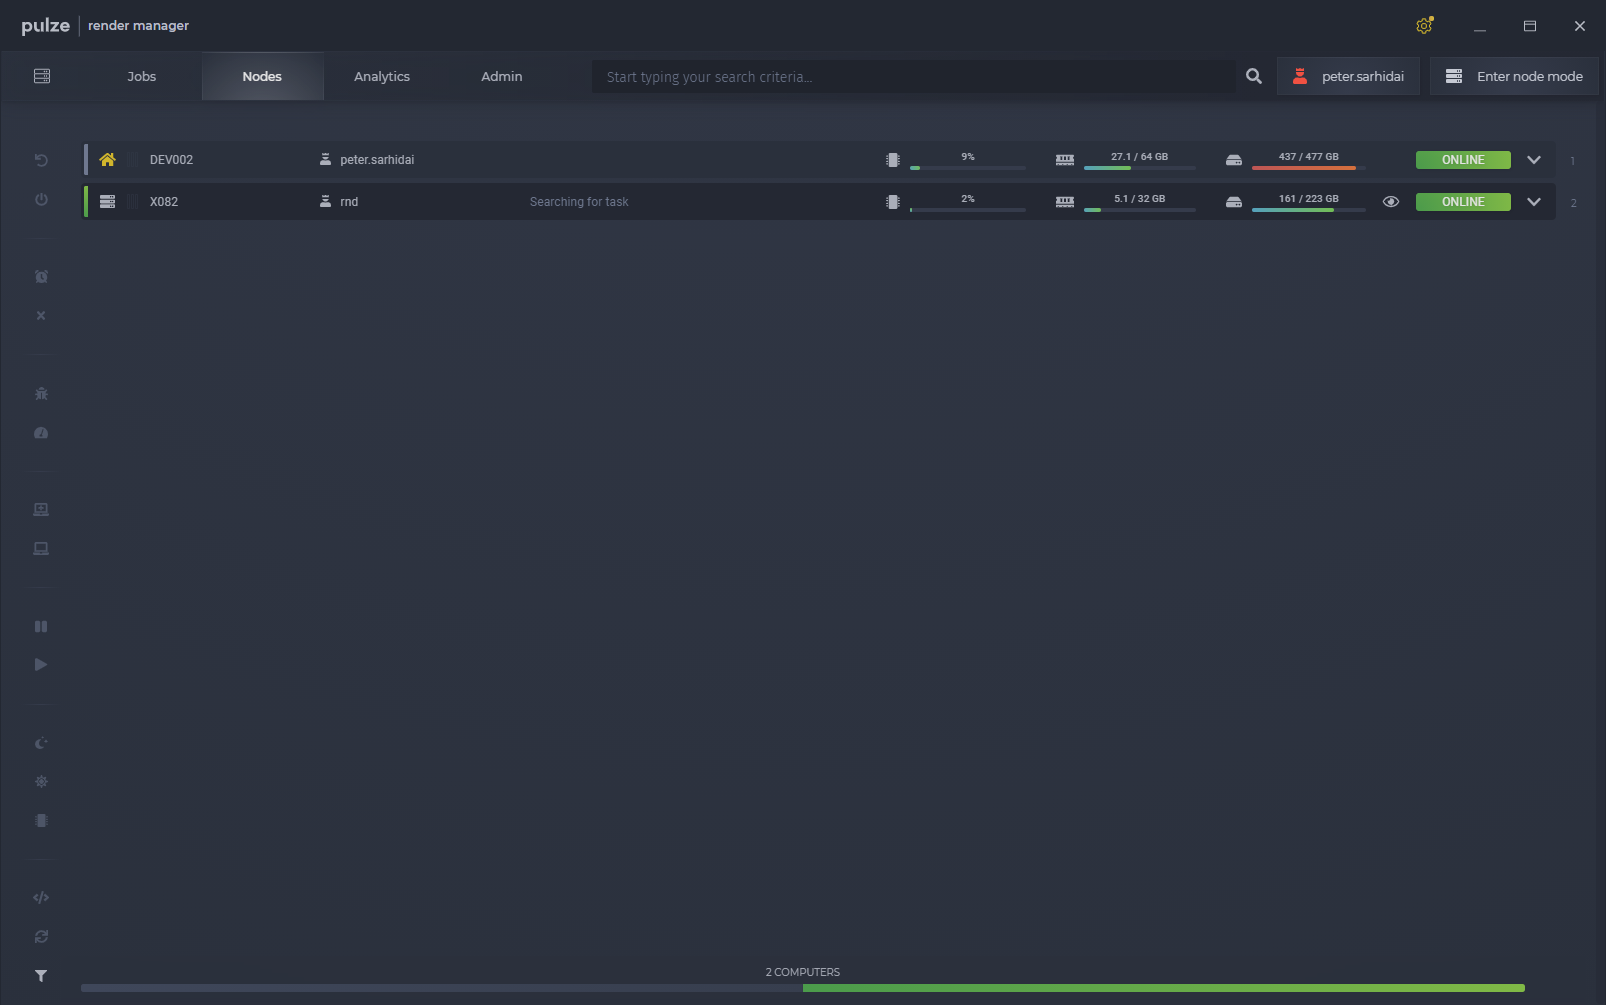
If you jump back to your workstation you will see that our render node is now connected and ready for action.
install_014.jpg

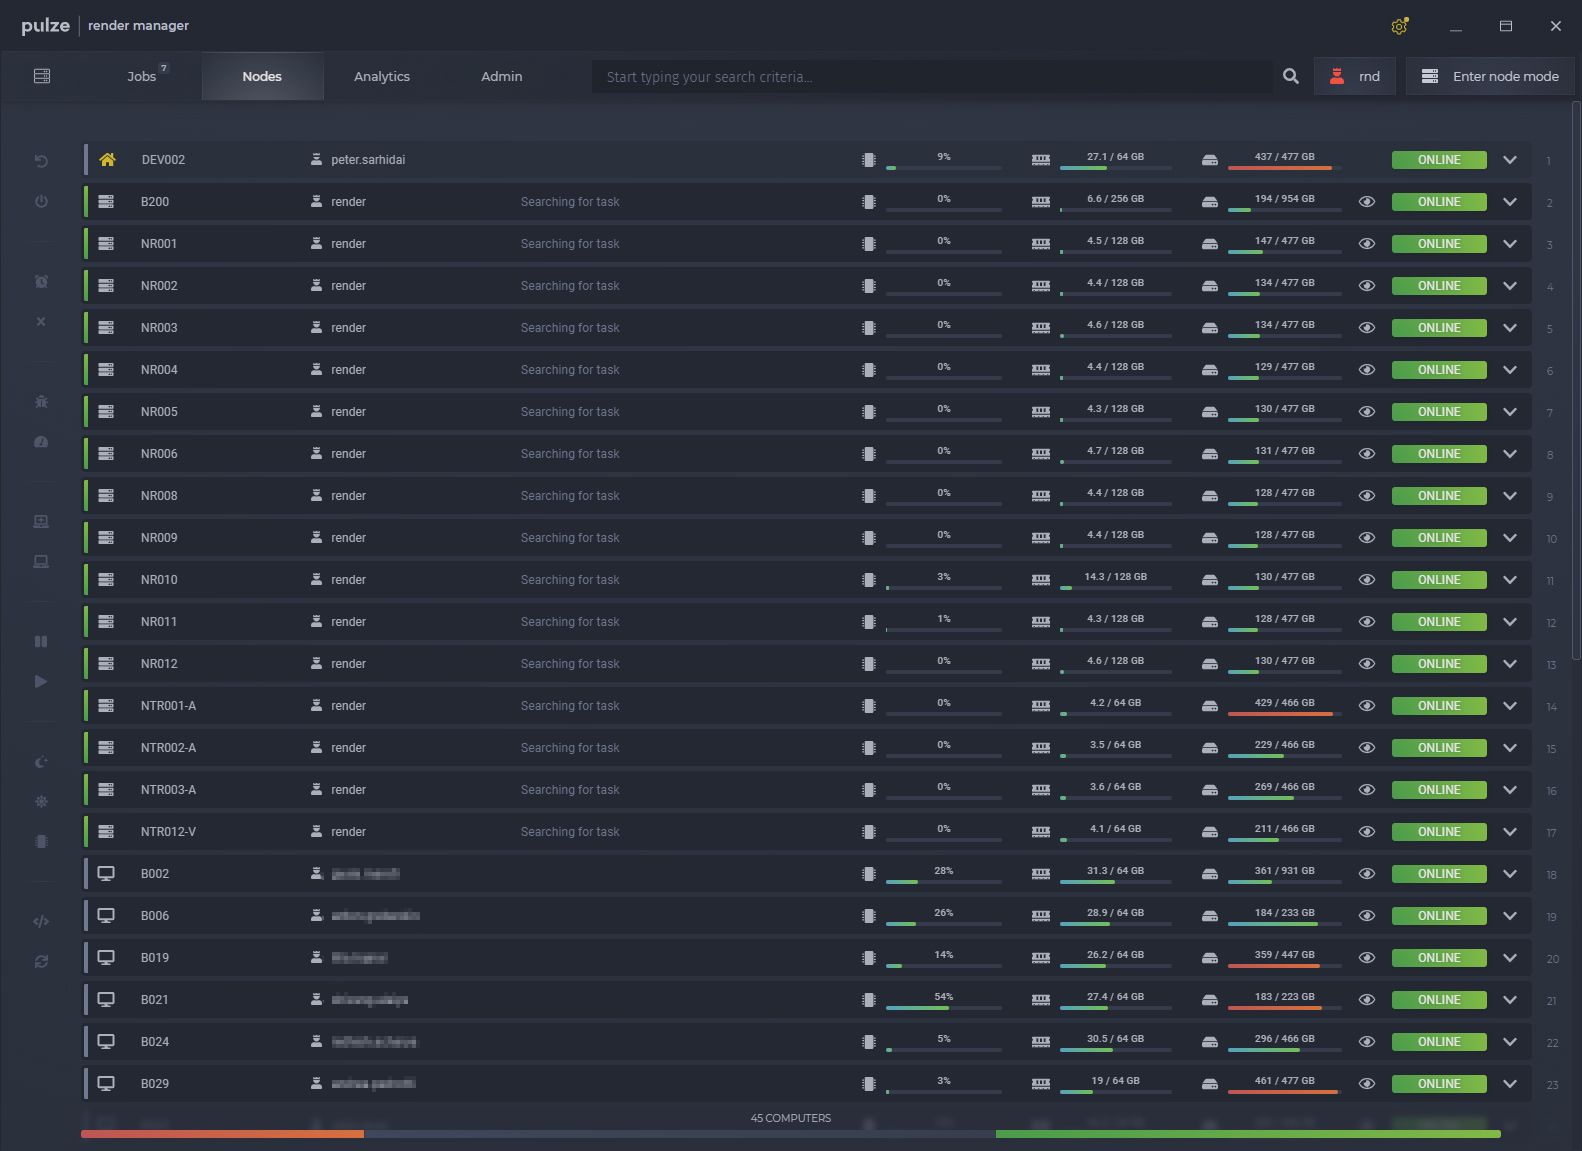
Keep adding in your nodes and workstation one by one.

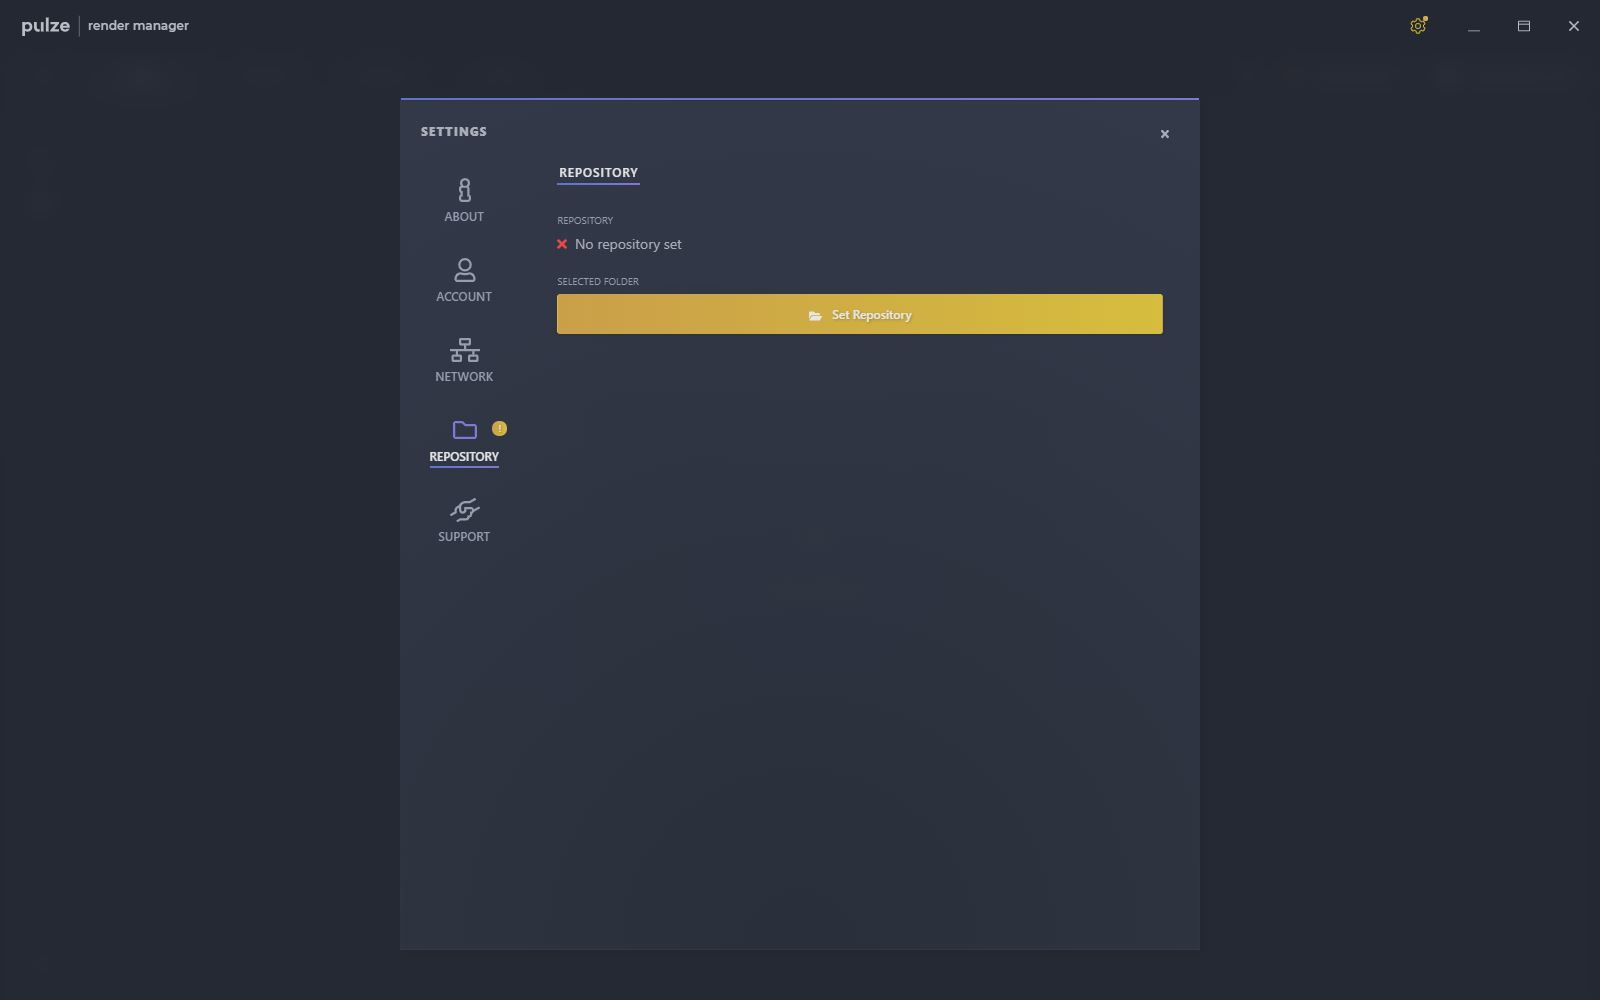
As a last step, let’s configure the repository folder which will be responsible for storing our active and archived jobs as well as statistics, reports and other files.
install_015.jpg

install_016.jpg

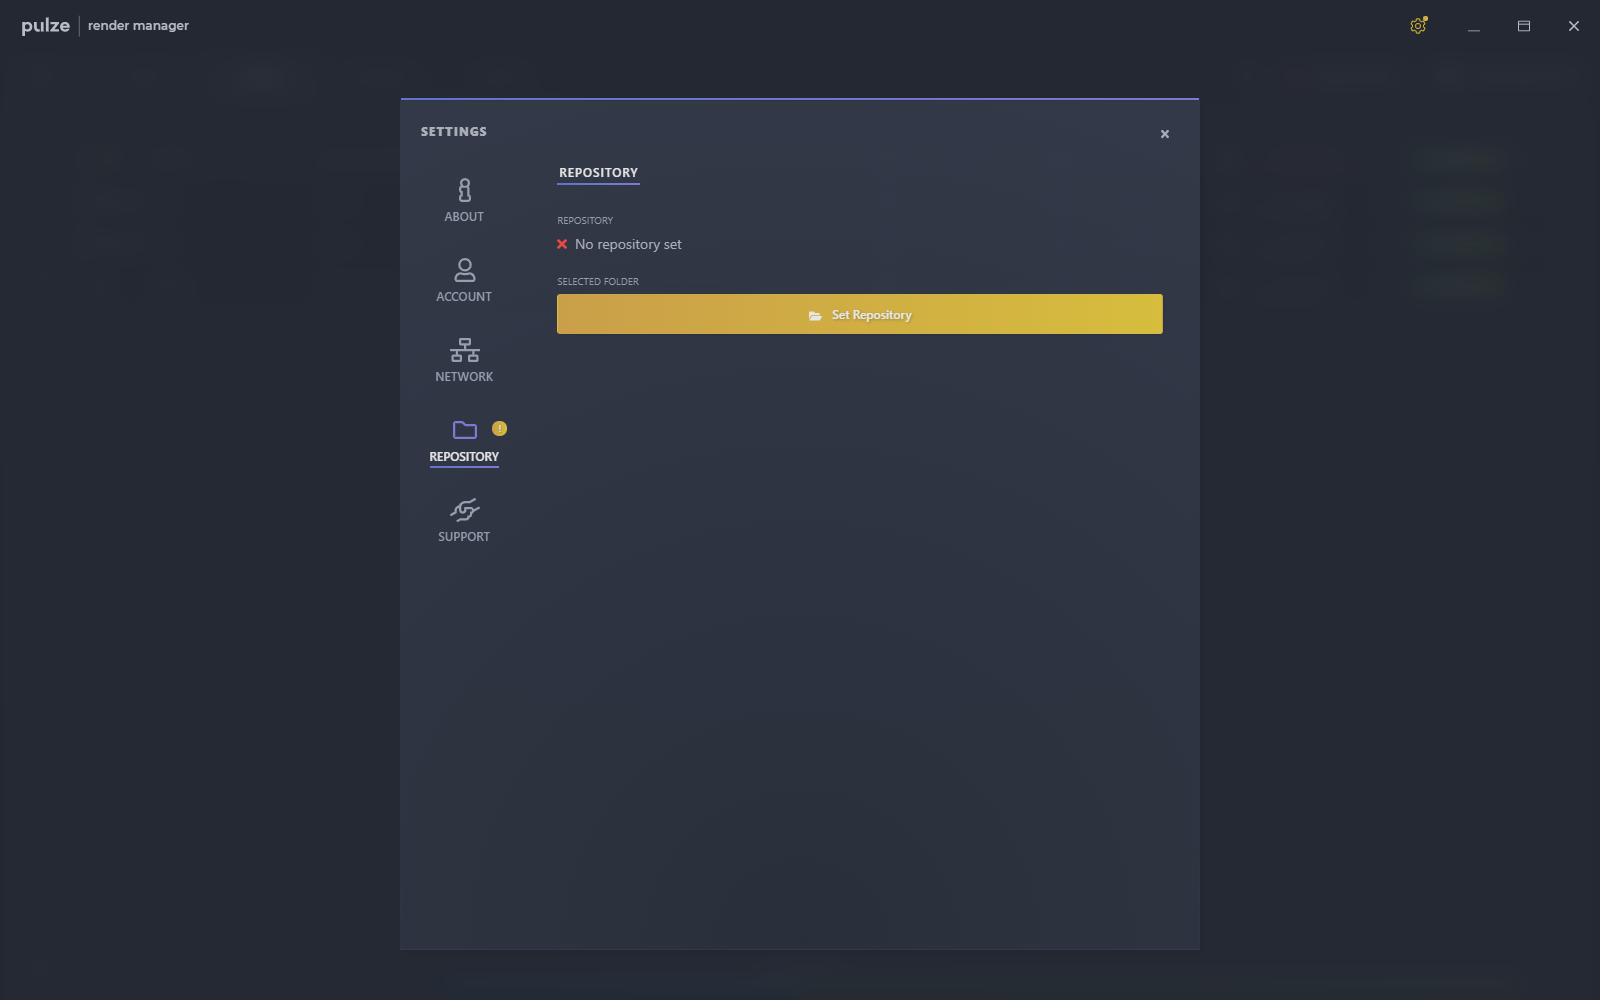
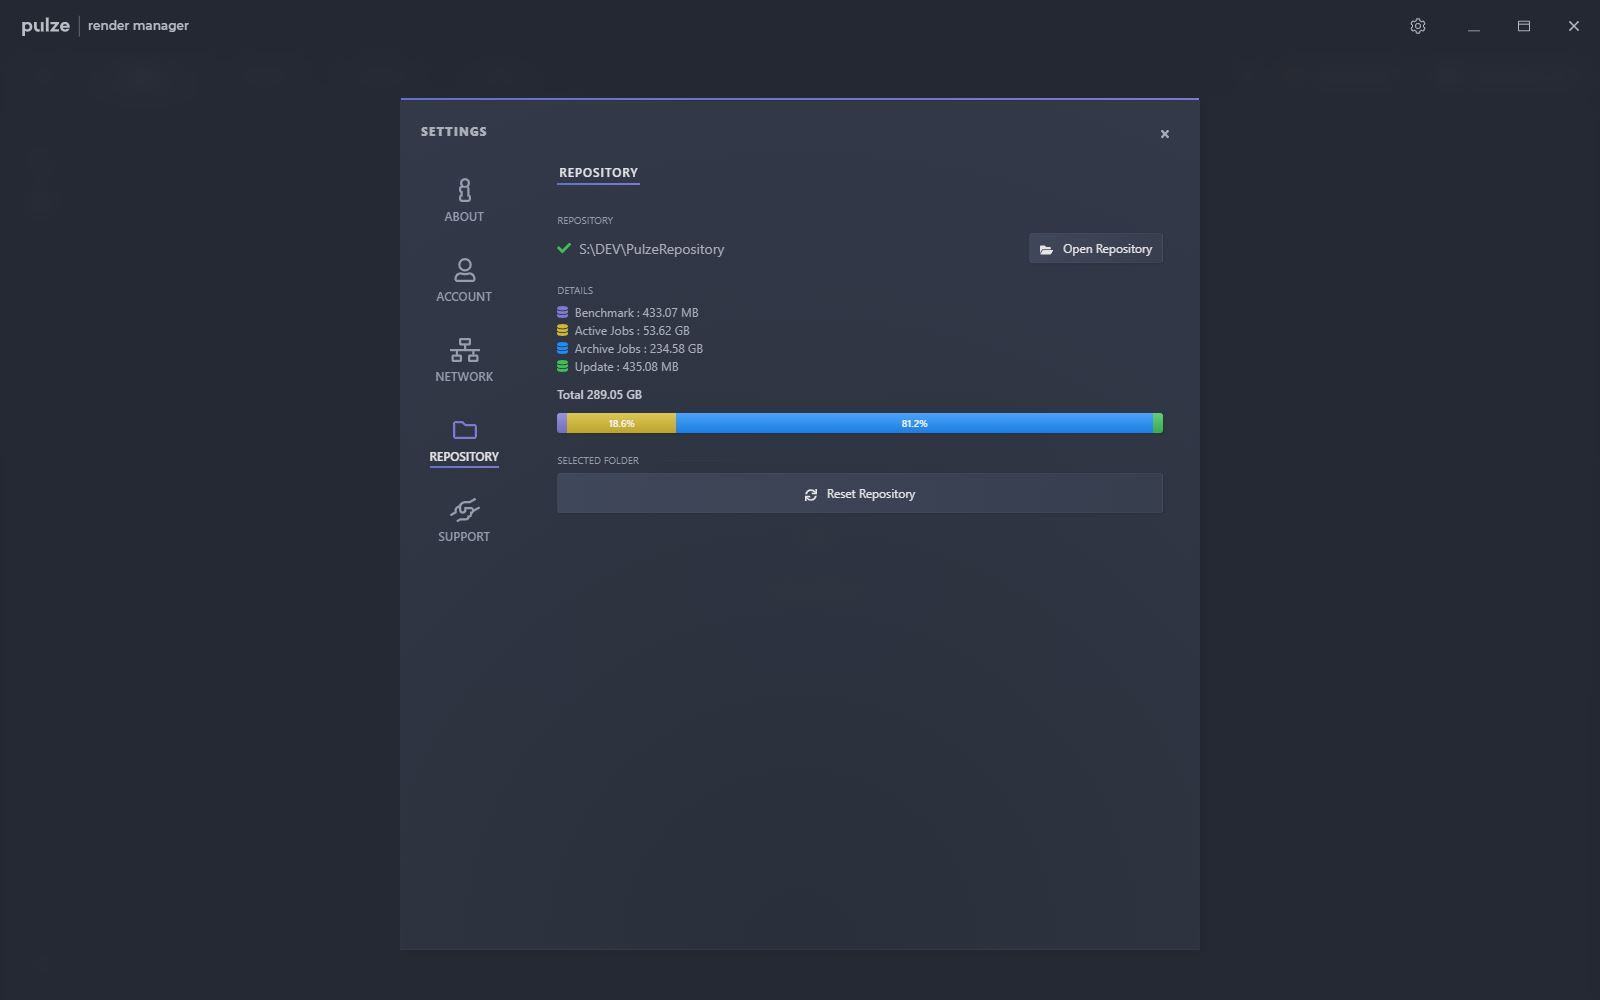
Go to the Settings, choose the Repository tab and browse in a folder by pressing Set Repository. This folder should be shared and available to every node and workstation in your pool.
Nodes

Details

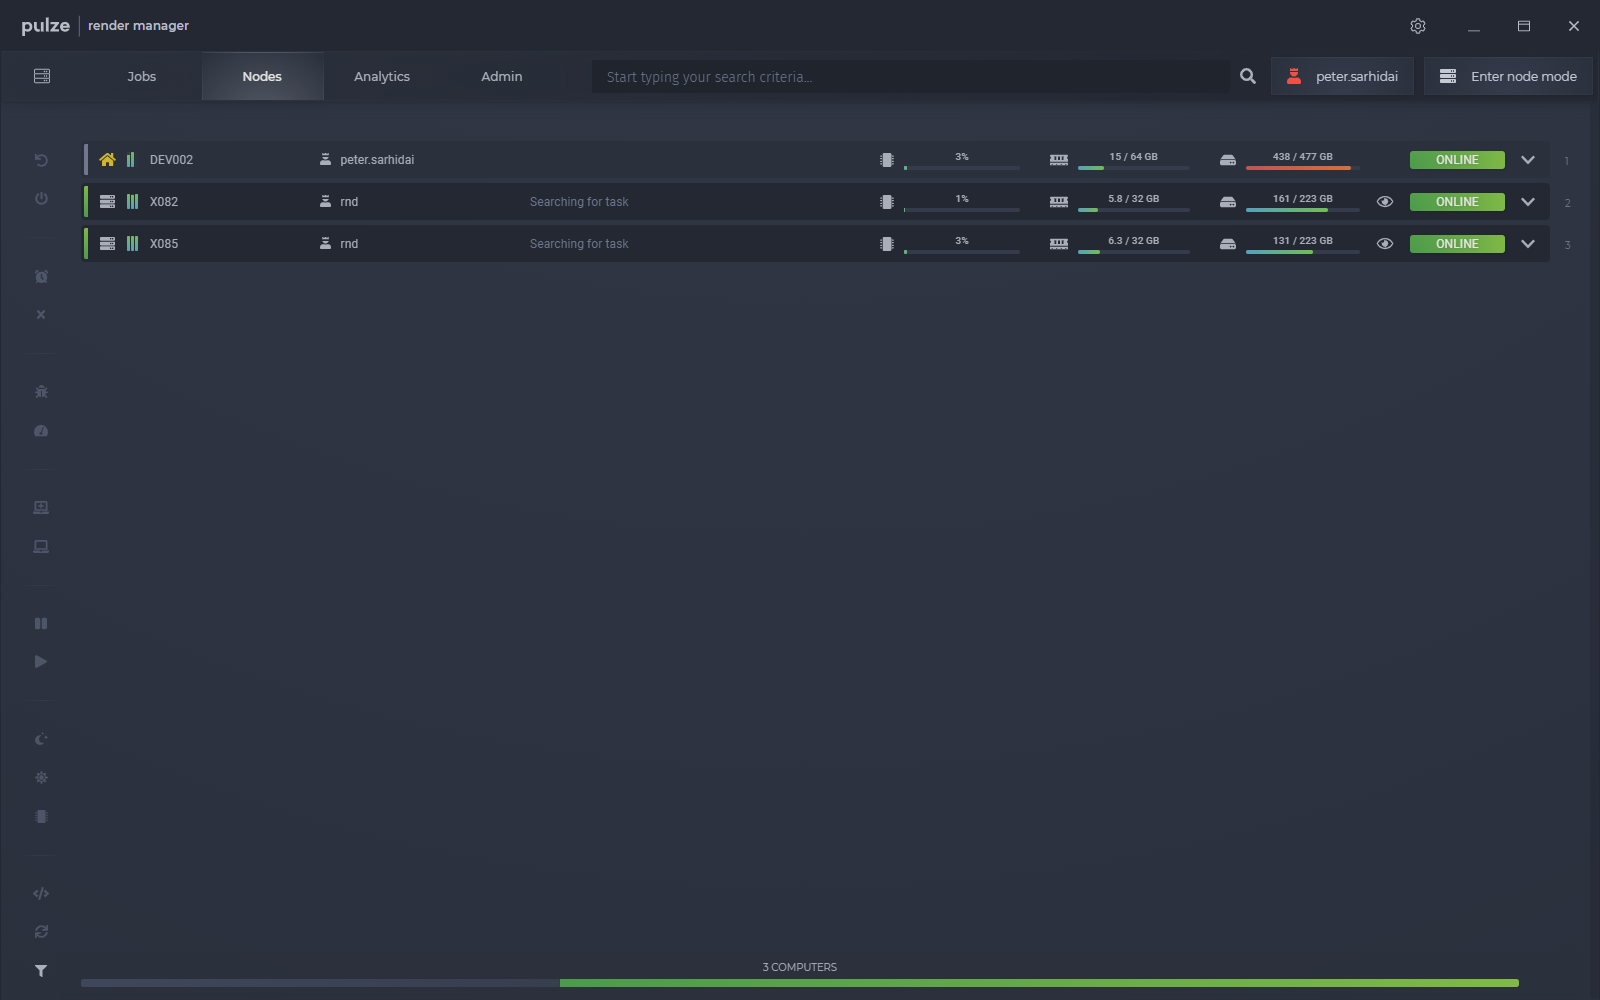
The nodes tab contains a list of computers (workstations and render nodes) that are currently in your pool. The following guide goes through each feature and explains the possibilities in detail.

rm_nodes_000.png

Each workstation and render node is represented as a row which will show the most relevant information such as the name of the computer, the current user, CPU, RAM, HDD performance and the current status in Render Manager of the computer.

rm_nodes_001.jpg

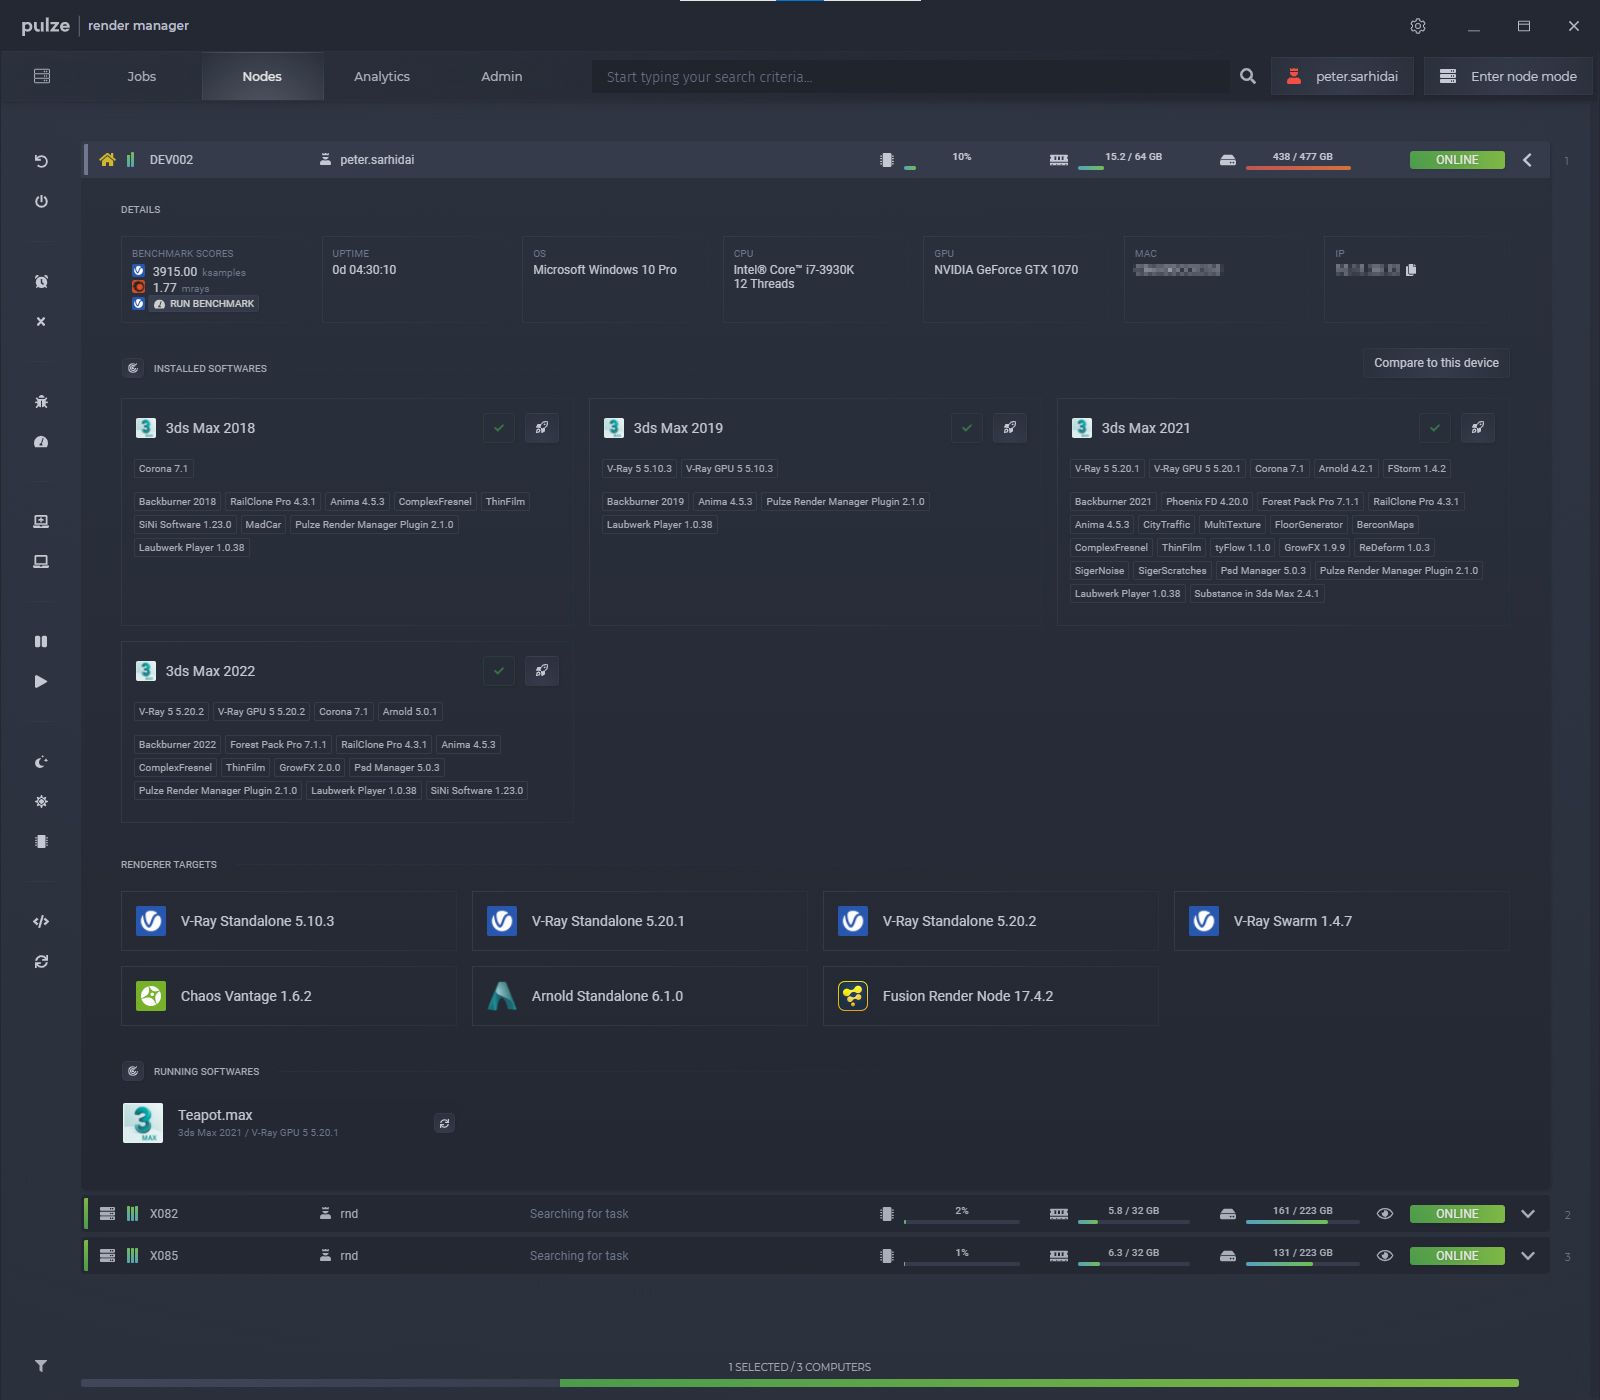
You can get more detailed hardware and software information by clicking on the expand arrow.

rm_nodes_002.jpg

By expanding a node you will get more information like CPU model and thread count GPU model, ip and mac address as well as the ability to run V-Ray or Corona benchmarks.

rm_nodes_003.png

Installed software

The next section is all about your installed software, render engines and plugins that Render Manager can detect and compare.

rm_nodes_004.png

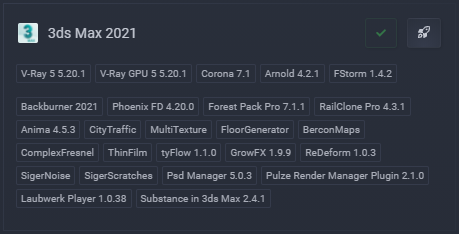
You will see each installed 3ds Max with your render engines and plugins. Where possible Render Manager will also grab the version of each plugin.

The green tick on the top right corner means that the Render Manager Plugin for 3ds Max is installed. This plugin has to be installed on all the workstations and render nodes to allow the Render Manager to control 3ds Max.

Normally the plugin is installed automatically for all 3ds Max versions. If this doesn’t happen for some reason, you will see a red sign. To fix this you can click on the red button or you can run the Render Manager installer manually.

You can launch the required version of 3ds Max by clicking on the rocket button.

Compare devices

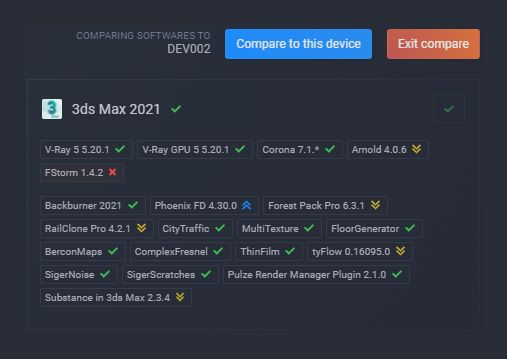
You can compare the list of installed software and plugins between the connected computers. This is a great way to check for version mismatches. Open one of the computers that you would like to compare it against and press Compare to this device.

rm_nodes_005.jpg

You will see some extra icons that will appear next to each plugin.

  • plugin is installed and the version is identical
  • lower version
  • higher version
  • missing plugin

Additional software

You will also find additional installed software like V-Ray Standalone, Chaos Vantage, Arnold Standalone and Fusion Render Node. These standalone or command-line applications are treated the same way as 3ds Max with the exception that they don’t have additional plugins.

rm_nodes_006.png

Running software

Toward the bottom, you will also see the currently opened 3ds Max file with version and render engine information.

rm_nodes_007.png

If your 3ds Max instance is not listed here, then please make sure that the Render Manager Plugin for 3ds Max is installed and 3dsmax.exe is added to firewall exceptions.


Operations

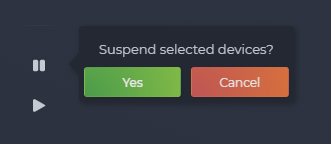
The operations will become active once you select one or more computers from the list. For the commands that don’t need more settings like Restart or Suspend, you will be prompted with a little popup like this:

rm_nodes_008.png

This is to ensure that you don’t accidentally click on a command that you don’t want to run.

These are the commands that you can perform on the selected computers.

Restart
Restart (reboot) the selected computers

Shutdown
Shutdown (turn off) the selected computers

Wakeup
Power on the selected computer with Wake on LAN

Please note that you need to enable Wake on LAN in your BIOS and in the network connections settings of Windows

Remove
Remove the selected computer from the list. This will also ban the computer from reconnecting to the pool. You can whitelist it again from the Settings if needed.

Report Error
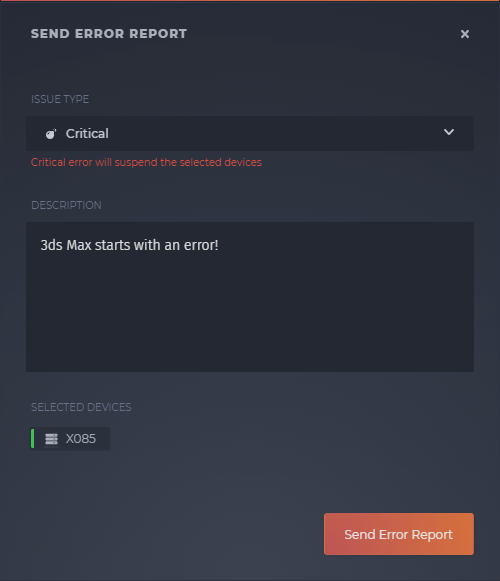
Report Error will allow you to submit internal issues for the selected computers. In the dialog, you can choose the type of error. If you choose Critical the computer will be also suspended until the administrator fixes the problem.

rm_nodes_009.png

Run Benchmark
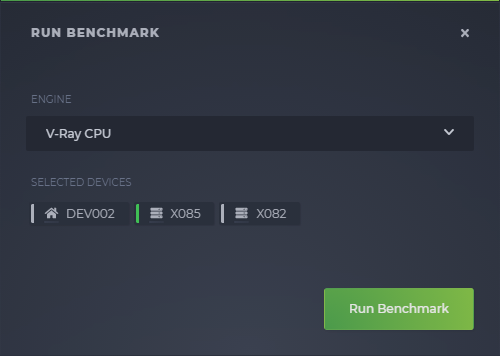
This command will run V-Ray or Corona benchmark on the selected computers. These benchmark scores will be saved for each node and you can use them to compare and pick the most powerful ones for a certain job.

rm_nodes_010.png

Start Spawner Mode
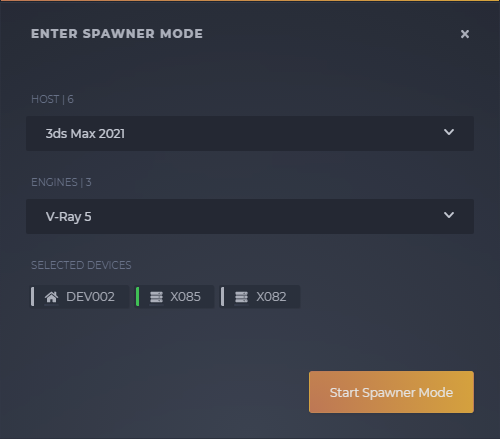
The command will start the selected V-Ray spawner or Corona DR server on the selected computers. This can be useful if you want to do Distributed Rendering the manual way without a job. There are a number of other applications like Fusion Render Node or V-Ray Swarm that you can also start. In these cases, this is more like a reserve feature for a specific task that is performed outside of Render Manager.

While a computer is in Spawner mode it won’t be able to work on the submitted jobs.

rm_nodes_011.png

Stop Spawner Mode
Stop Spawner Mode will exit the application (V-Ray Spawner, Fusion Render Note, etc…) and will restore the previous status of the computer

Suspend
A suspended computer won’t be able to work on jobs. This feature is useful when you would like to use the render node for something else outside the Render Manager or if you are doing some maintenance.

Unsuspend
Unsuspend will put back the computer into its original state.

Start Node Mode
The Start Node Mode command will turn the selected workstations into render nodes.

Stop Node Mode
Stop Node Mode will switch back the selected workstations to a none-working state.

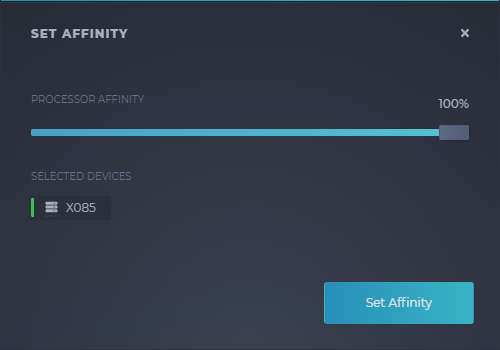
Set Affinity
You can set the processor affinity of each workstation and render node. This can come in handy if you don’t want to use all the cores of a computer for rendering.

rm_nodes_012.png

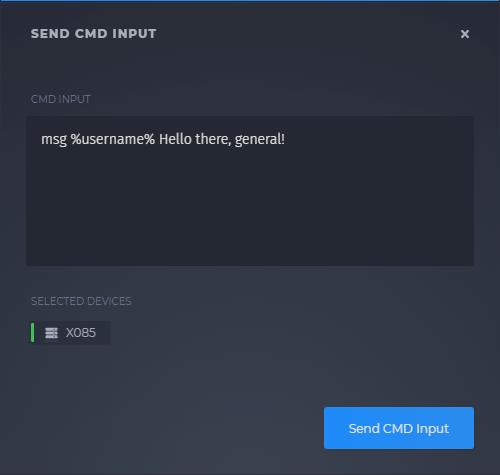
Send command
You can send commands to the selected computers

rm_nodes_013.png

Restart Pulze
Instead of the entire computer, this will restart Render Manager only.
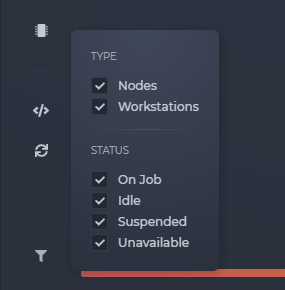
Filters
Filter the list of computers by type or status.

rm_nodes_014.png


Analytics

Software

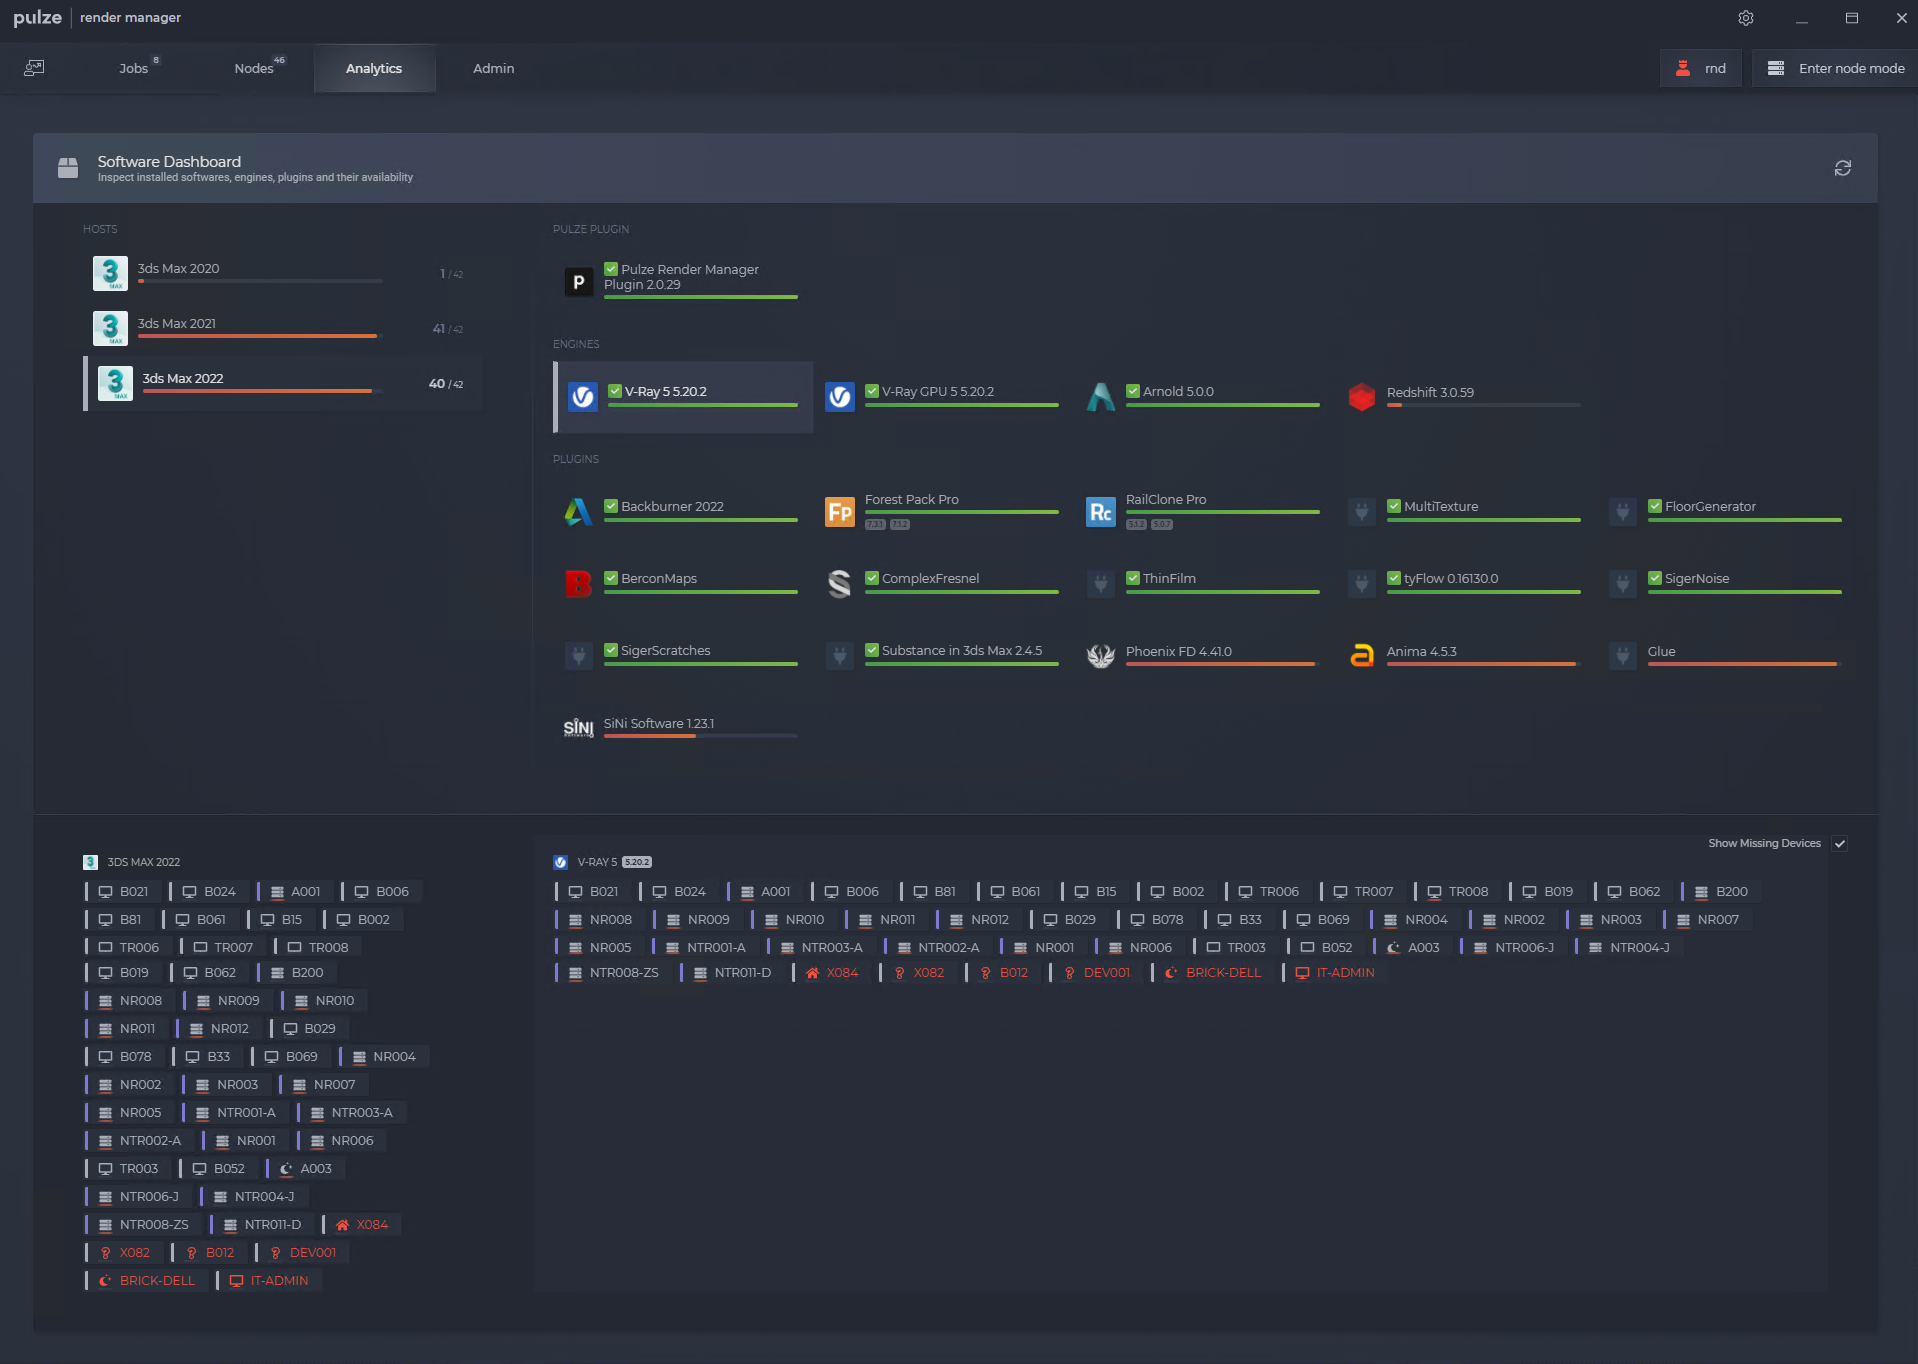
The analytics feature will allow you to overview the installed software on all the connected computers. It is a great way to check which computer is missing a certain version of a plugin. For example, after deploying the latest 3ds Max, Corona and Forest Pack version it is a great way to check if you missed out something before you start sending out jobs.

rm_analytics_001.png

By selecting a host application like 3ds Max 2022 from the left side, you can view all the plugins and versions that are installed.

If you see a green tick, that means the plugin is installed on all the currently connected computers. There is also a bar that indicates the percentage of how many computers has the plugin.

By enabling Show Missing Devices checkbox you can view which computers are missing the chosen plugin.

There is also an option to refresh the list of installed software by pressing the refresh button on the top right corner.


Job Submitter

Source

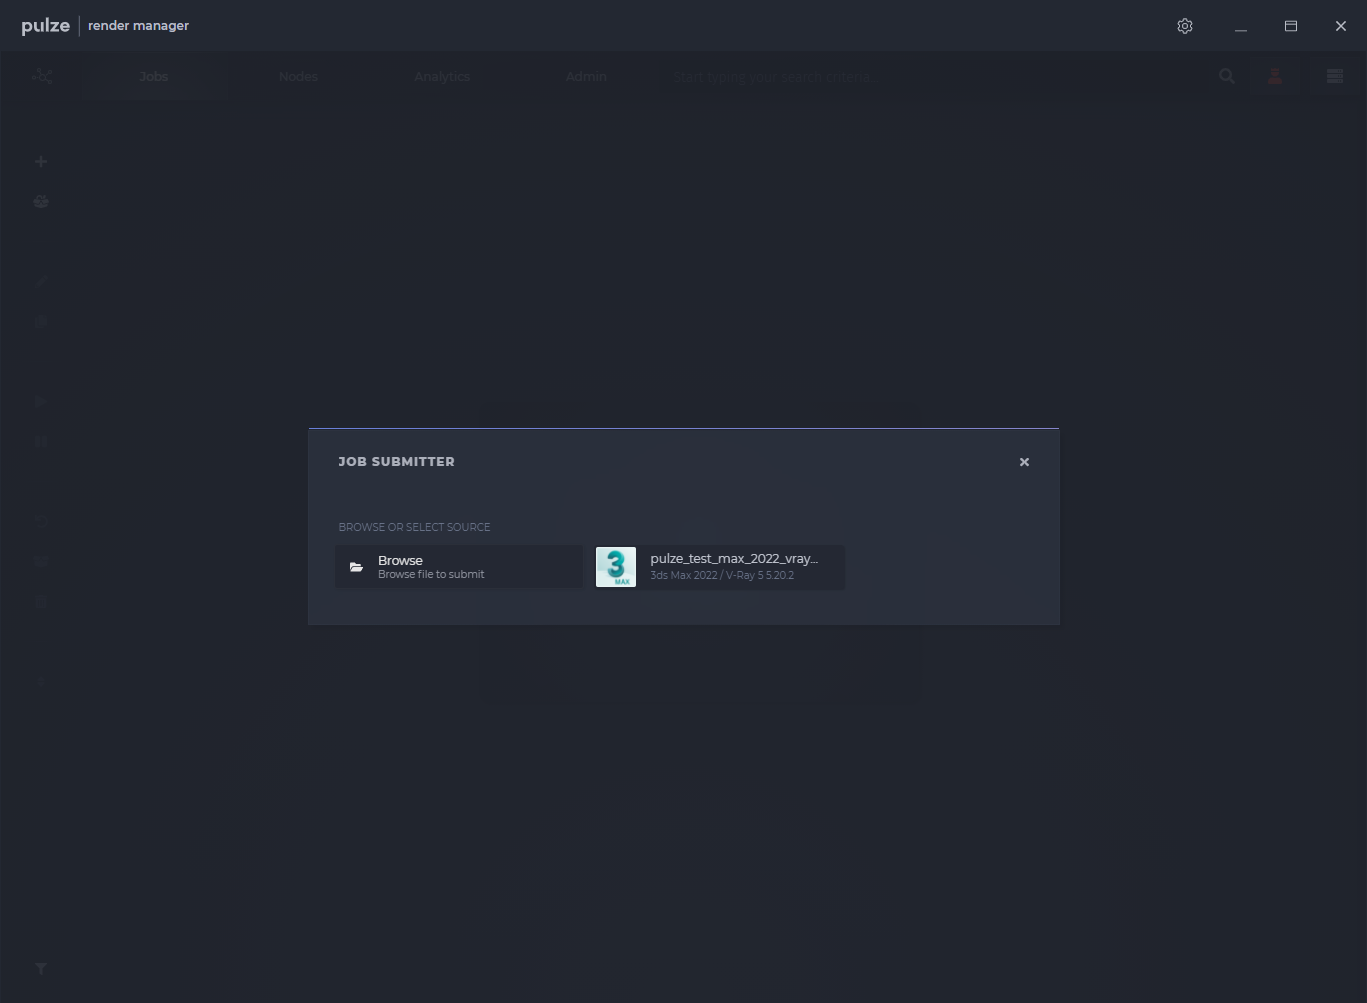
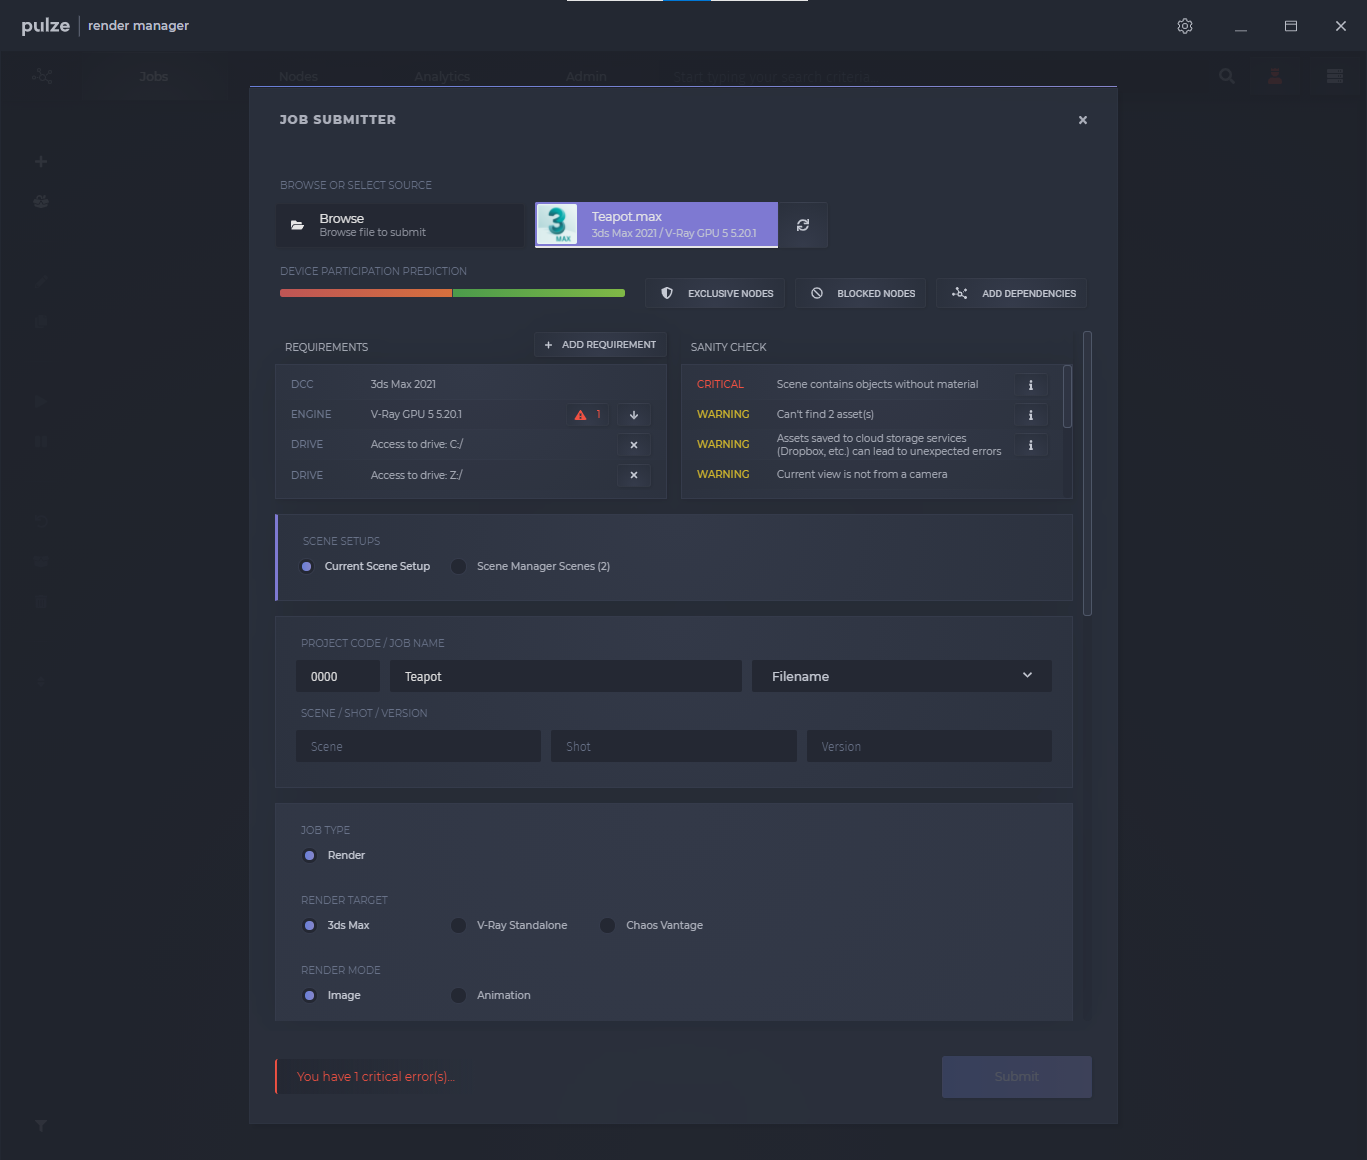
First, you will need to define a file that you would like to submit. Render Manager offers two ways of doing that. You can browse one or more files or you can pick the currently opened 3ds Max file.

rm_job_submitter_001.png

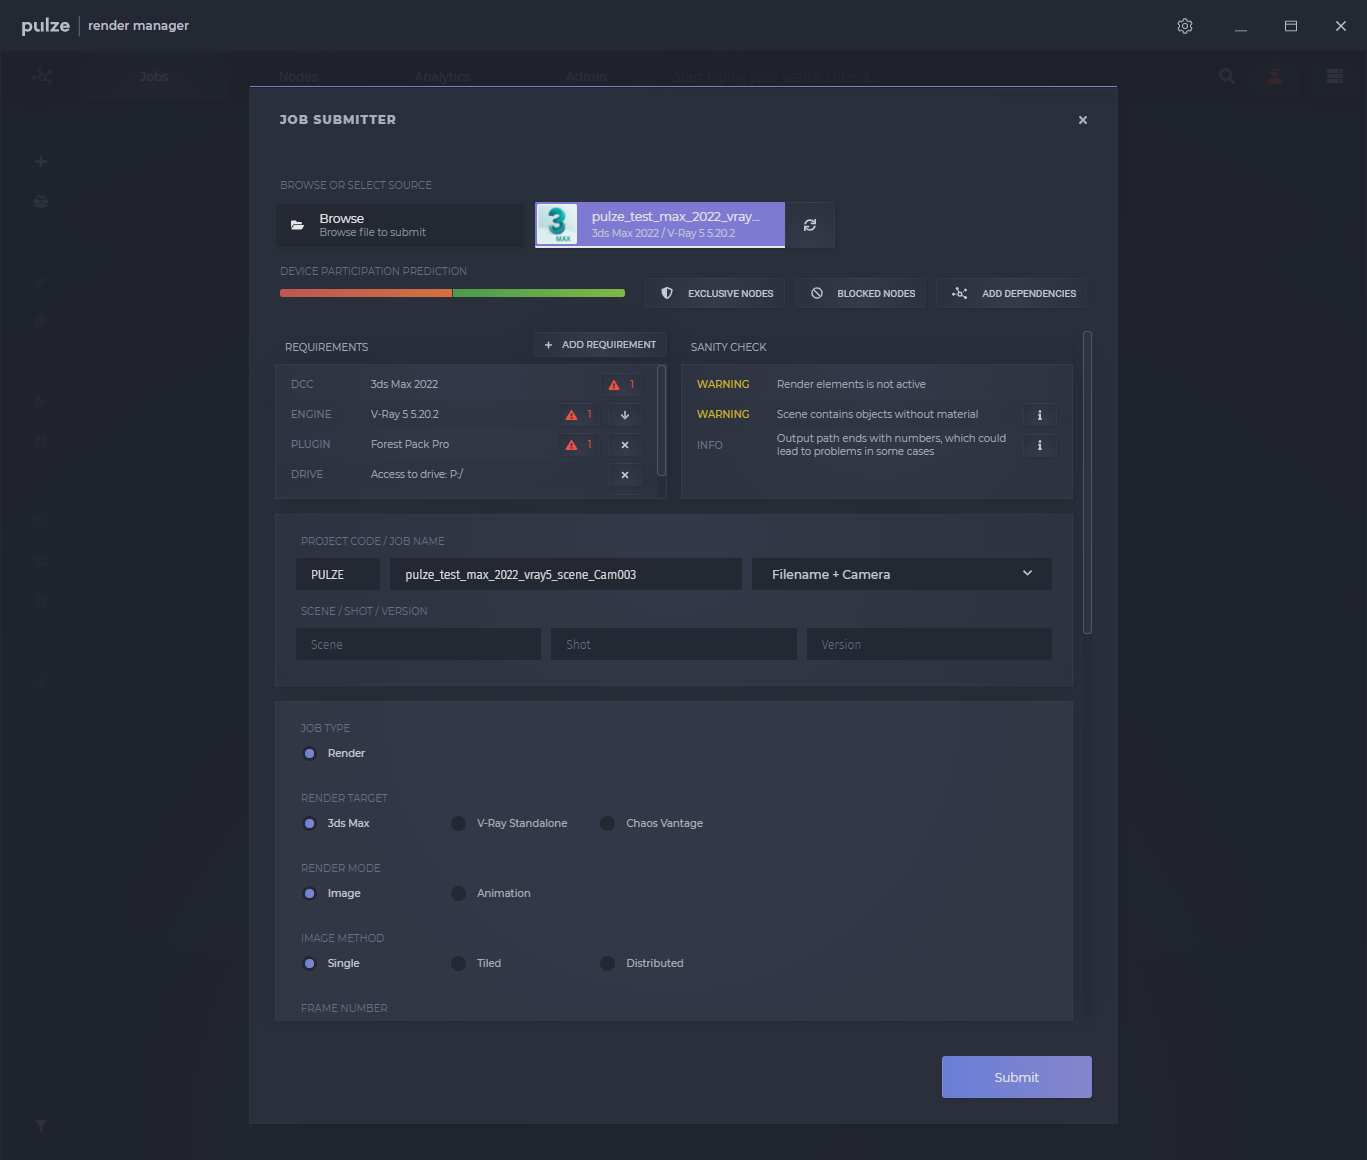
Render Manager will gather all the required information from the max file and will perform a series of asset and sanity checks. Depending on the size of the project this could take a few seconds. Once the preparation is finished, the results will show up and Render Manager will try to prefill the most important settings.

rm_job_submitter_002.png


Requirements

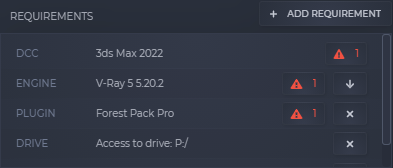
The requirements section will show you the version of the host application and the list of plugins and network drives that your file is using.

rm_job_submitter_003.png

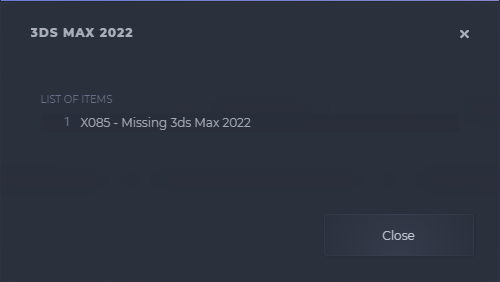
Render Manager will check each connected computer and will show a warning if a plugin is missing or if the version is not correct.

rm_job_submitter_004.png

You can choose to downgrade a plugin, which means that Render Manager won’t check the version of it. For example, after downgrading V-Ray 5.20.2 it will become V-Ray 5.., meaning all computers can join if they have V-Ray 5 installed. You can also remove a plugin from the list and this way it won’t get checked.

Downgrading or removing a requirement could cause errors since those computers might join that won’t be able to load and render the job correctly.

rm_job_submitter_005.png

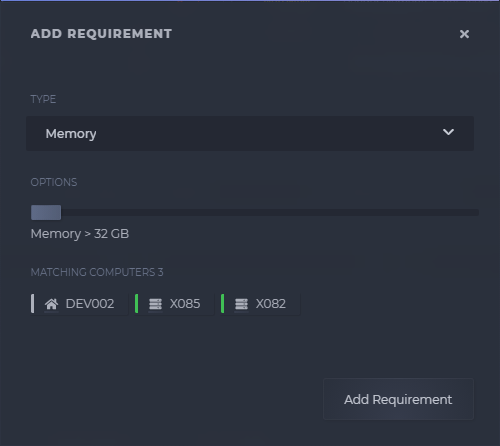
You also have the possibility to add your own requirements and create your own rules to control who will be able to join the job. For example, you can define a minimum memory or benchmark score rule that could filter out the slower computers.


Sanity Check

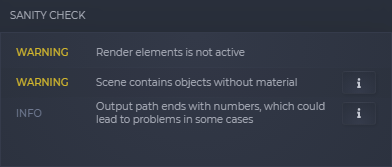
This section will list the result of your Sanity Check. Some of the warnings will have extra information that will help you to narrow down the problem. Read more about customizing the Sanity Check to your own needs here: // link to admin

rm_job_submitter_006.png


Project

In this section, you can customize the name of your job. You can choose between different presents like Filename, Filename + Camera. A project code will be automatically extracted from the name of the file. By default, this is the first few characters of the filename or the section before the underscore.

rm_job_submitter_007.png

For animation projects, you can also define scene, shot and version codes that will help to keep your jobs more organized for the team.


Render mode - Image

The image render mode will allow you to submit still images that will be rendered by one or more computers. This mode has the following options:

rm_job_submitter_008.png

Single

It is the most simple method, it will submit one still image job that will be rendered by one computer.

Tiled

In the process of tiled rendering, the image will be divided into multiple parts (tiles) and each part will be rendered separately allowing more than one computer to be working on the same image. When each tile is finished, Render Manager will stitch them together creating the final image.

rm_job_submitter_009.png

Tiled rendering is useful for huge images or in cases when distributed rendering is not available.

Tiled rendering might require pre-calculation (Light Cache for V-Ray or HD Cache in case of Corona Renderer) to ensure there are no differences between the tiles.
The usage of some post-processing features like bloom and glare or lens flares could cause artifacts on the final stitched image.

Distributed

Distributed rendering is the process when multiple computers are calculating the same image. You have the option to define a master node which will start the job in the first place. You can leave on the default value (Automatic) and let Render Manager choose the master.

rm_job_submitter_010.png

Once this computer reaches the rendering phase, Render Manager will assign additional nodes to the job. These nodes will open up the file as well and will start contributing to the render. If a node has no more work to do on an image, Render Manager will automatically move it to another job.

Frame Number

You can define the frame number which should be rendered for your still image. If you selected a currently opened 3ds Max file, this value will be filled in for you depending on your current timeline settings.

rm_job_submitter_011.png


Render mode - Animation

The animation render mode will submit a range or list of frames and each frame will be rendered by the assigned computers.

rm_job_submitter_012.png

Frame Sorting

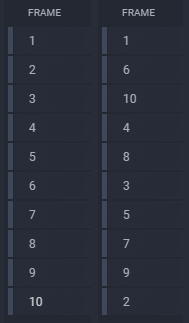
You can choose between the Linear and Sparse options. Linear will render the frames in ascending order, while the Sparse option will render the first, last and middle frame and then condense the rest. Sparse can be handy for long animations where you would like to get quick results from the entire camera path without waiting for the entire job to finish.

rm_job_submitter_013.png

Frame Settings

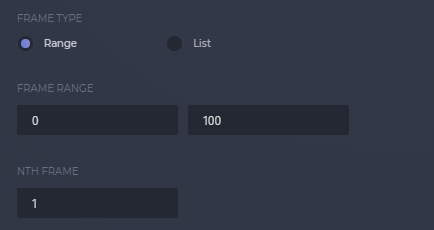
The animation mode will allow you to define a range or a list of frames. When browsing or selecting a 3ds Max file Render Manager will try to read out these settings and pre-populate the fields for you. In the case of the range type, you can set the Nth frame value.

rm_job_submitter_014.png

Pack Tasks

The packed task option will allow you to define the amount of frames that a node should continuously work on. This method will be an asset when rendering animation on the GPU or handling large frame counts.


Camera

Render Manager will read out all the cameras from your scene. By default, the currently active camera will be selected or Current view if the camera can’t be defined.

rm_job_submitter_015.png

Changing it to Current view will tell Render Manager to render your scene as it is and won’t change the view.

This option may be limited or disabled when you are browsing the 3ds Max file.


Resolution

In this section, you can change the width and height of your render. You also have the ability to lock or unlock the aspect ratio and quickly double or divide the resolution.

rm_job_submitter_016.png


Output

You can review and configure your output paths before submitting a job. In case of V-Ray, you have multiple options with the Channels and Raw input. Any other render engine will only have the Common option which is identical to what you have in the Render Settings > Common tab.

rm_job_submitter_017.png

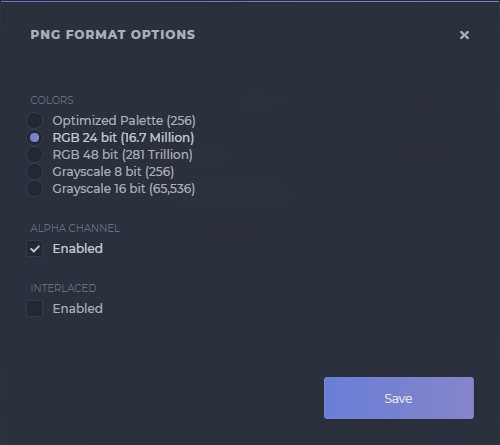
For most of the output formats you have extra options.

rm_job_submitter_018.png


Render settings

Render Manager allows you to view and change the most essential render settings for V-Ray, Corona and FStorm.

rm_job_submitter_019.png


Priority

You can choose between Low, Normal, Medium and High priorities. The higher priority jobs will receive more resources whereas the High priority will take all available render nodes.

rm_job_submitter_020.png

A Low priority job will only receive render nodes when there is no Normal or higher priority job in the list. For example, this can be used to render less important animations and previews during the day.


Start time

By default, a submitted job will start immediately (Now). You can choose to submit the job with suspended status with the Later option.

rm_job_submitter_021.png


Node options

Max nodes

When enabling max nodes, you will limit the number of nodes that can work on the job. You can also set this property on the fly after you submitted the job.

rm_job_submitter_022.png

Lock nodes

When lock nodes setting is enabled you can be sure that a render node that is currently working on your job will be only delegated to another job when it finishes the task.

rm_job_submitter_023.png

An exception to this is when the node is loading the file. In terms of the render manager this is the preparation and not the working (rendering) phase. Only those render nodes can stay on the task that reached the rendering phase.

Include / Exclude

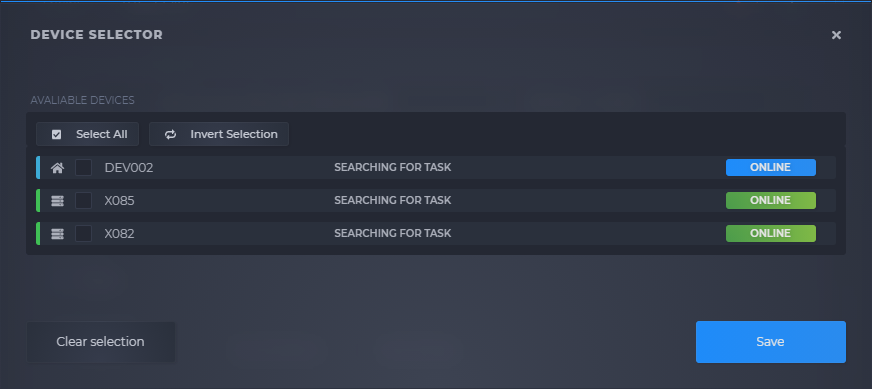
With the Exclusive nodes list, you can specify which computer should work on the job, and with the Blocked node define which computer should be blocked.

rm_job_submitter_024.png

rm_job_submitter_025.png


Dependency

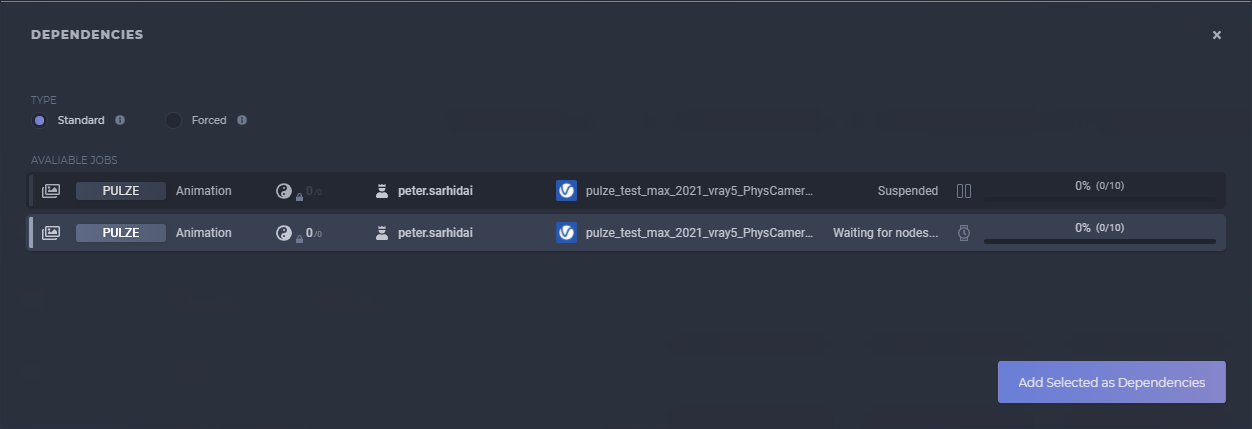
The dependency selector will allow you to define which jobs should be finished before the render nodes will start your job.

rm_job_submitter_026.png

rm_job_submitter_027.png


Settings

You can open up the settings of Render Manager by clicking on the cogwheel icon that is located on the top right corner of the interface.

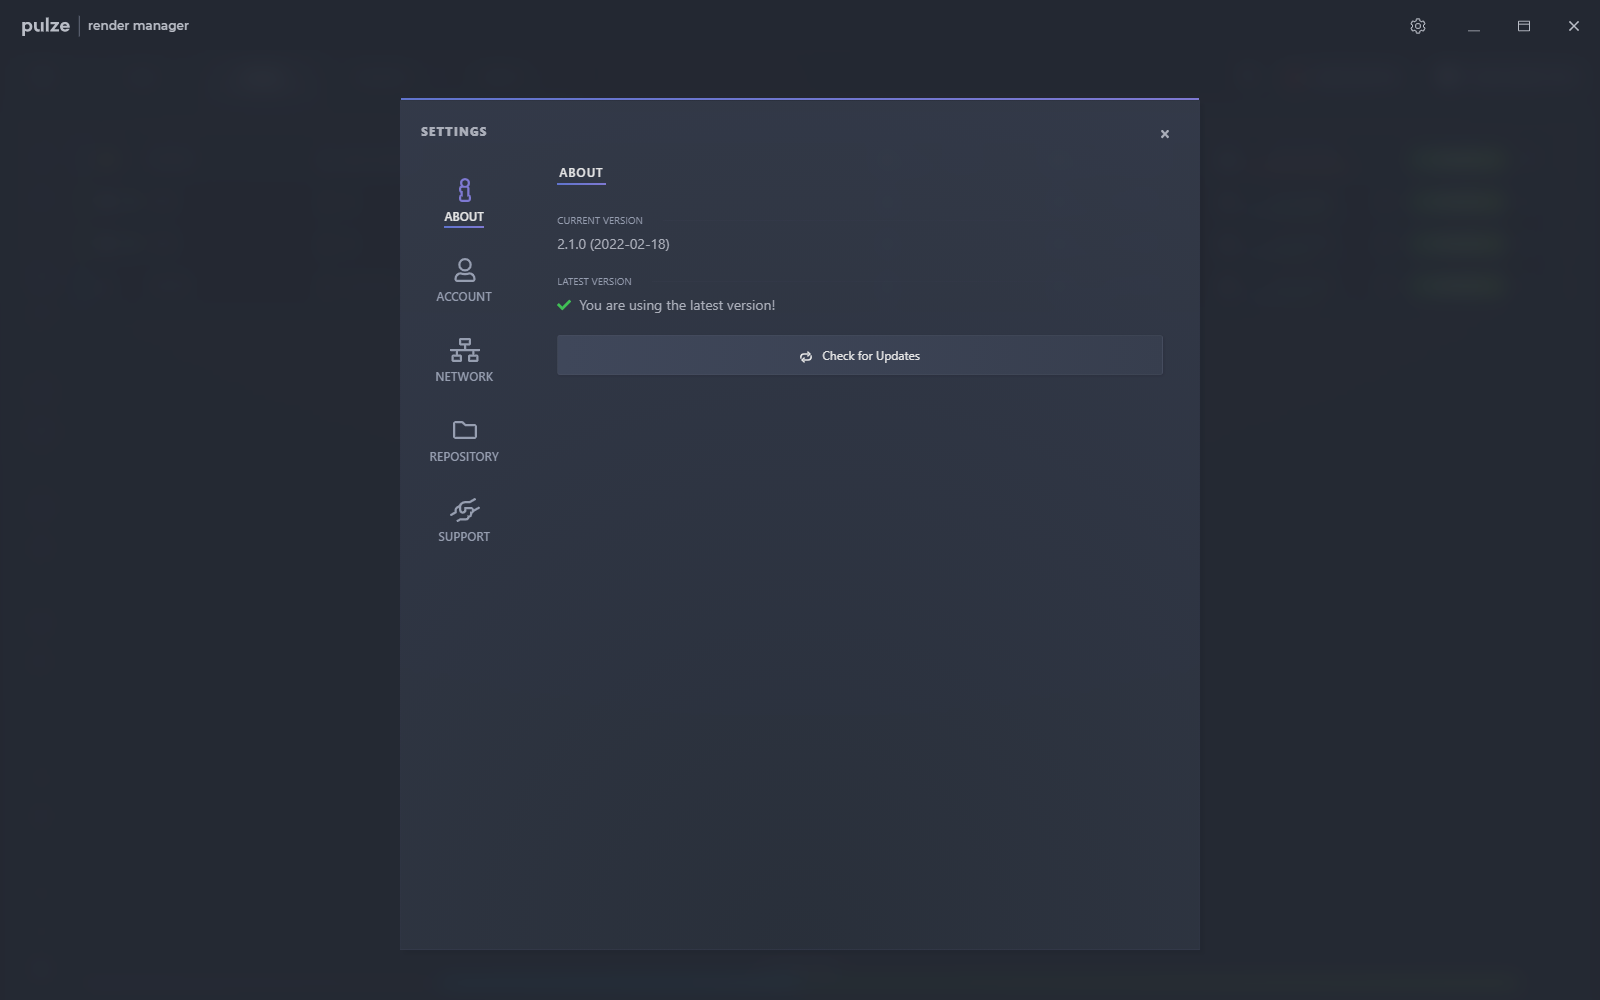
About

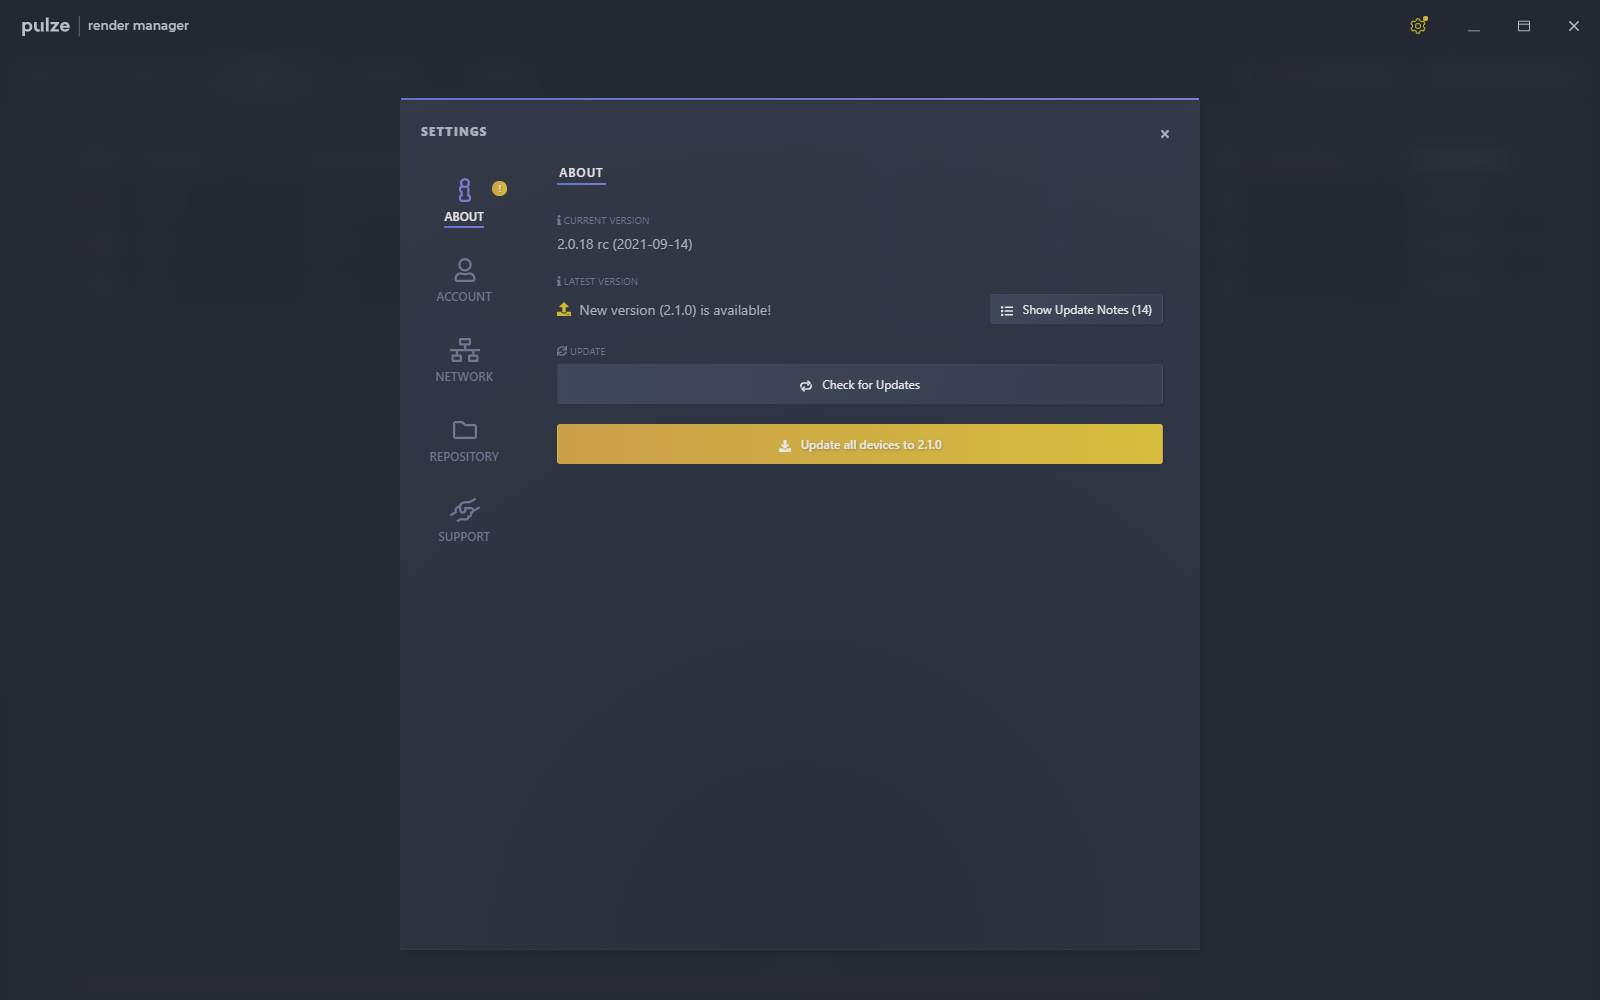
Here you will find the current version and release date of Render Manager. If there is an update available it will also show up here.

rm_settings_001.png

The Update all devices button will download the latest Render Manager version to the repository and will automatically update all the computers that are connected to the pool. To ensure a smooth update experience, please make sure that you do the following before you continue:

  • Stop all the currently active jobs and do not submit new jobs until the update is finished.
  • The update procedure won’t start if 3ds Max is running because our plugin can’t be installed. Make sure you closed 3ds Max on all involved computers.

rm_settings_002.png

Once the update is finished you should see that all previously connected computers are back online and ready to work. In some cases, an additional restart of Render Manager might be necessary.


Account

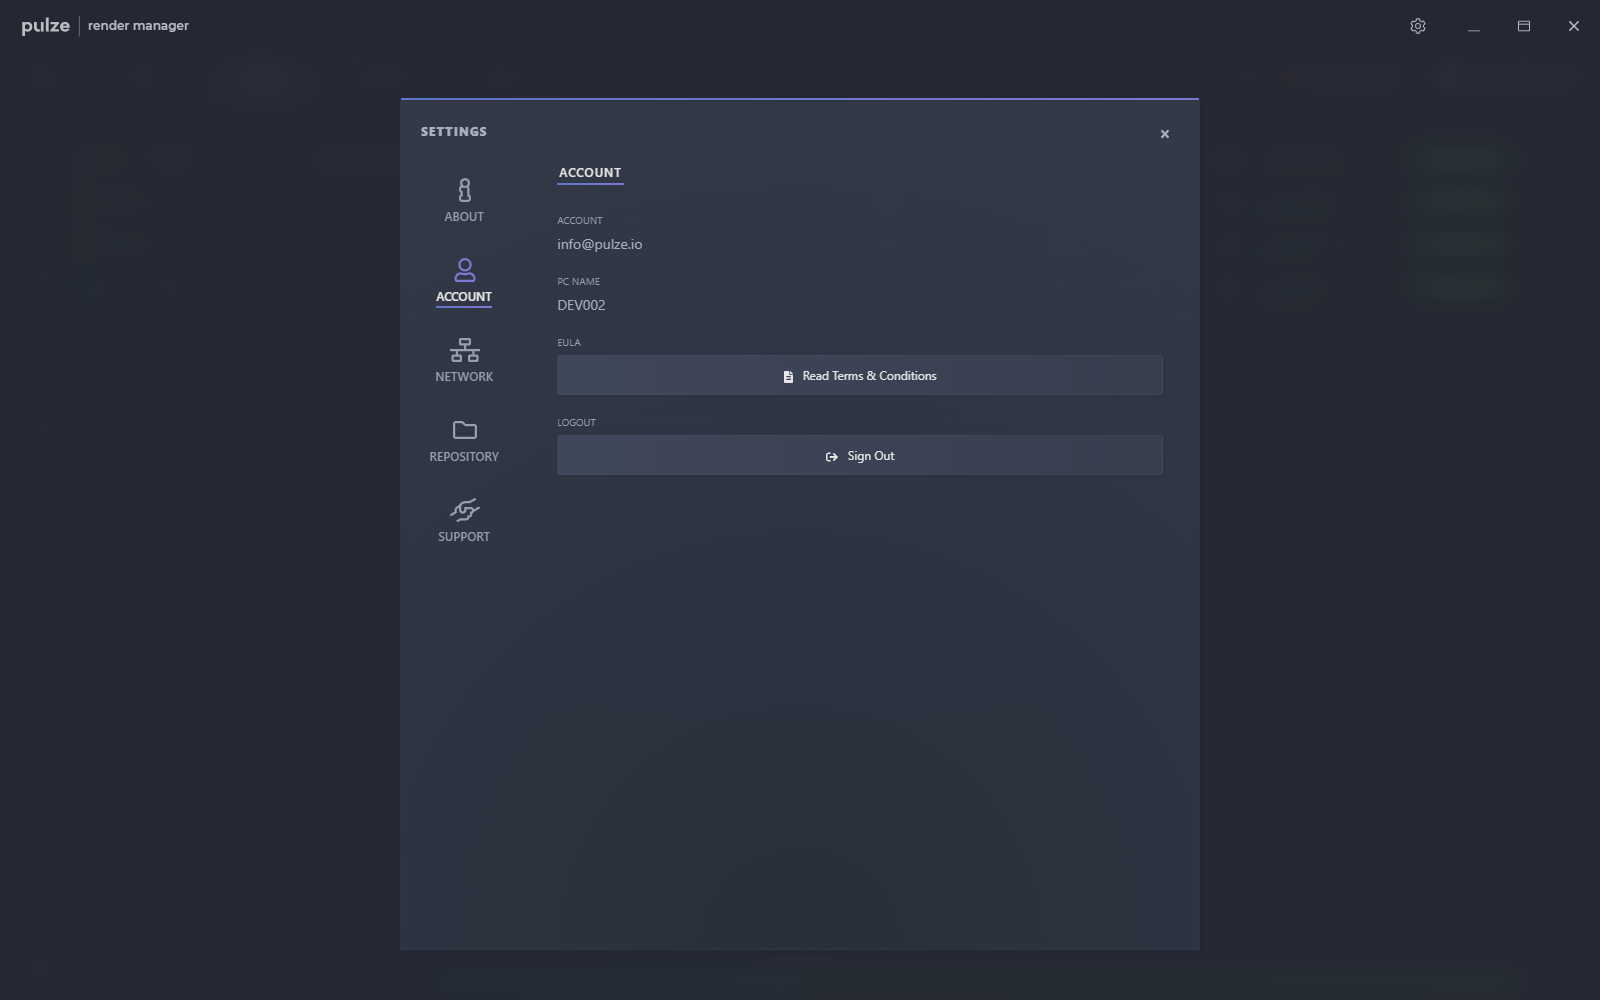
In the account section, you will find the current Pulze account that you are logged in with. If you would like to change that and use a different account or permanently change from workstation to node mode, then press Sign Out. In this case, Render Manager will reset itself and will jump to the login section where you will need to do the configuration and connection process.

rm_settings_003.png


Network

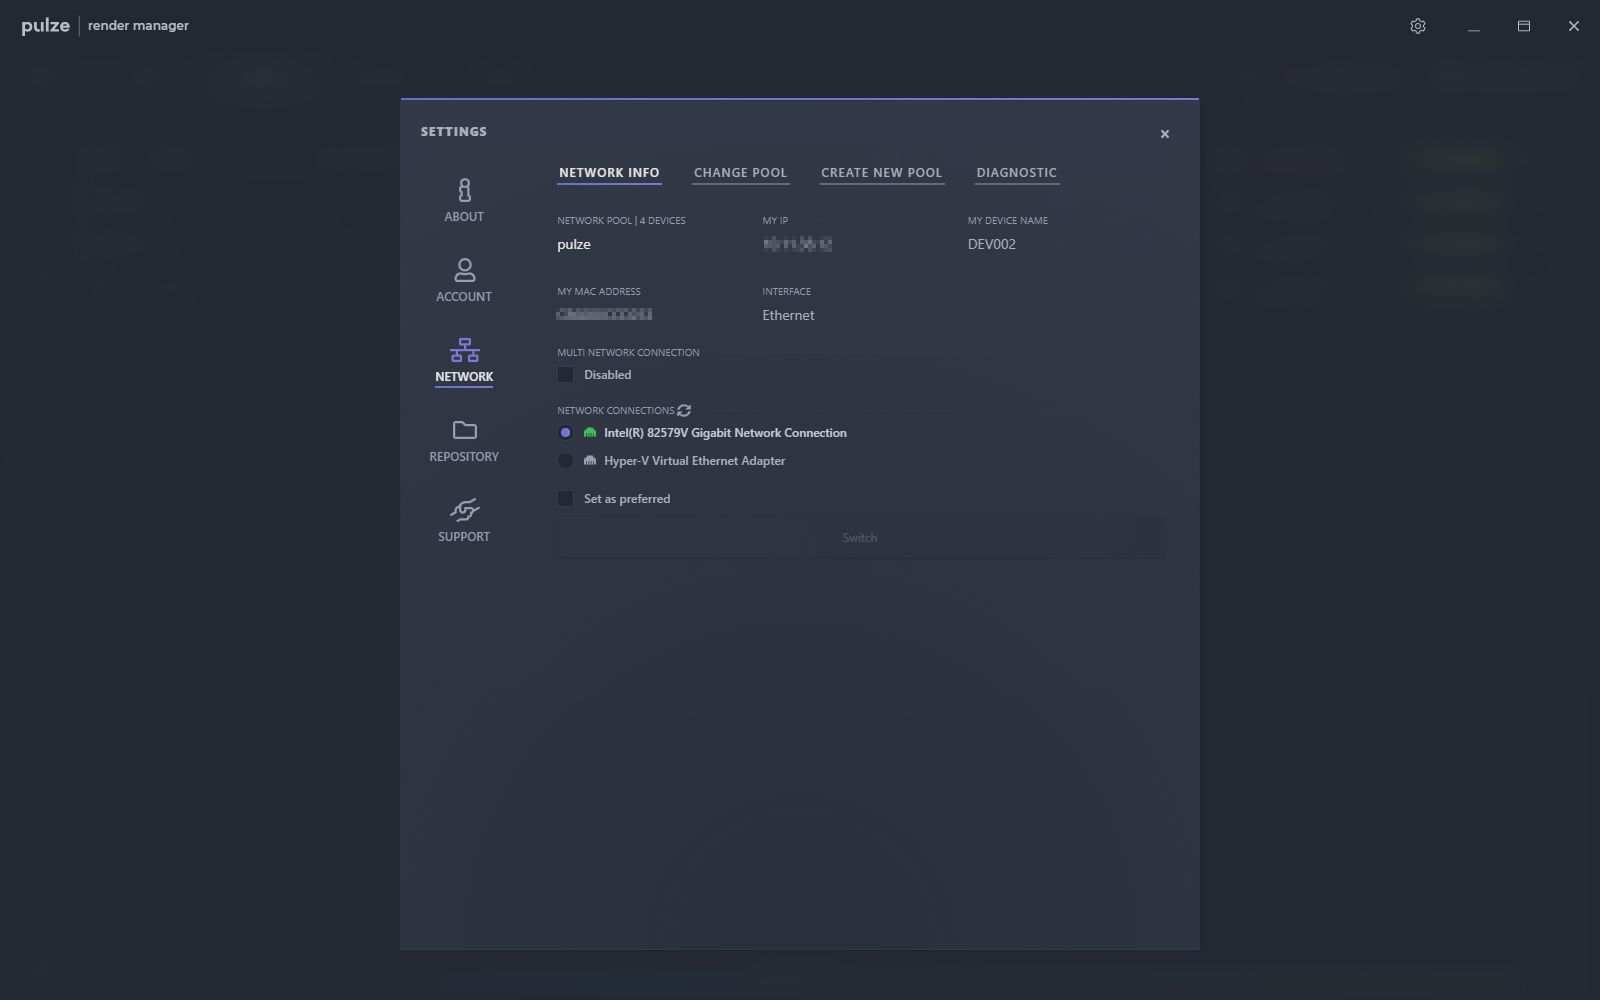
The network section holds the most important information like your ip, mac address, network interface and the current network pool you are connected to.

By default, Render Manager won’t allow incoming and outgoing connections from different networks for performance and security reasons. You can enable this with the Multi Network Connection option.

If you have more than one network interface you also have the option to switch between them. This option can come in handy when you are using a VPN and you need to regularly switch between the different networks. The set as preferred option will force Render Manager to try and connect to that network on startup.

rm_settings_004.jpg

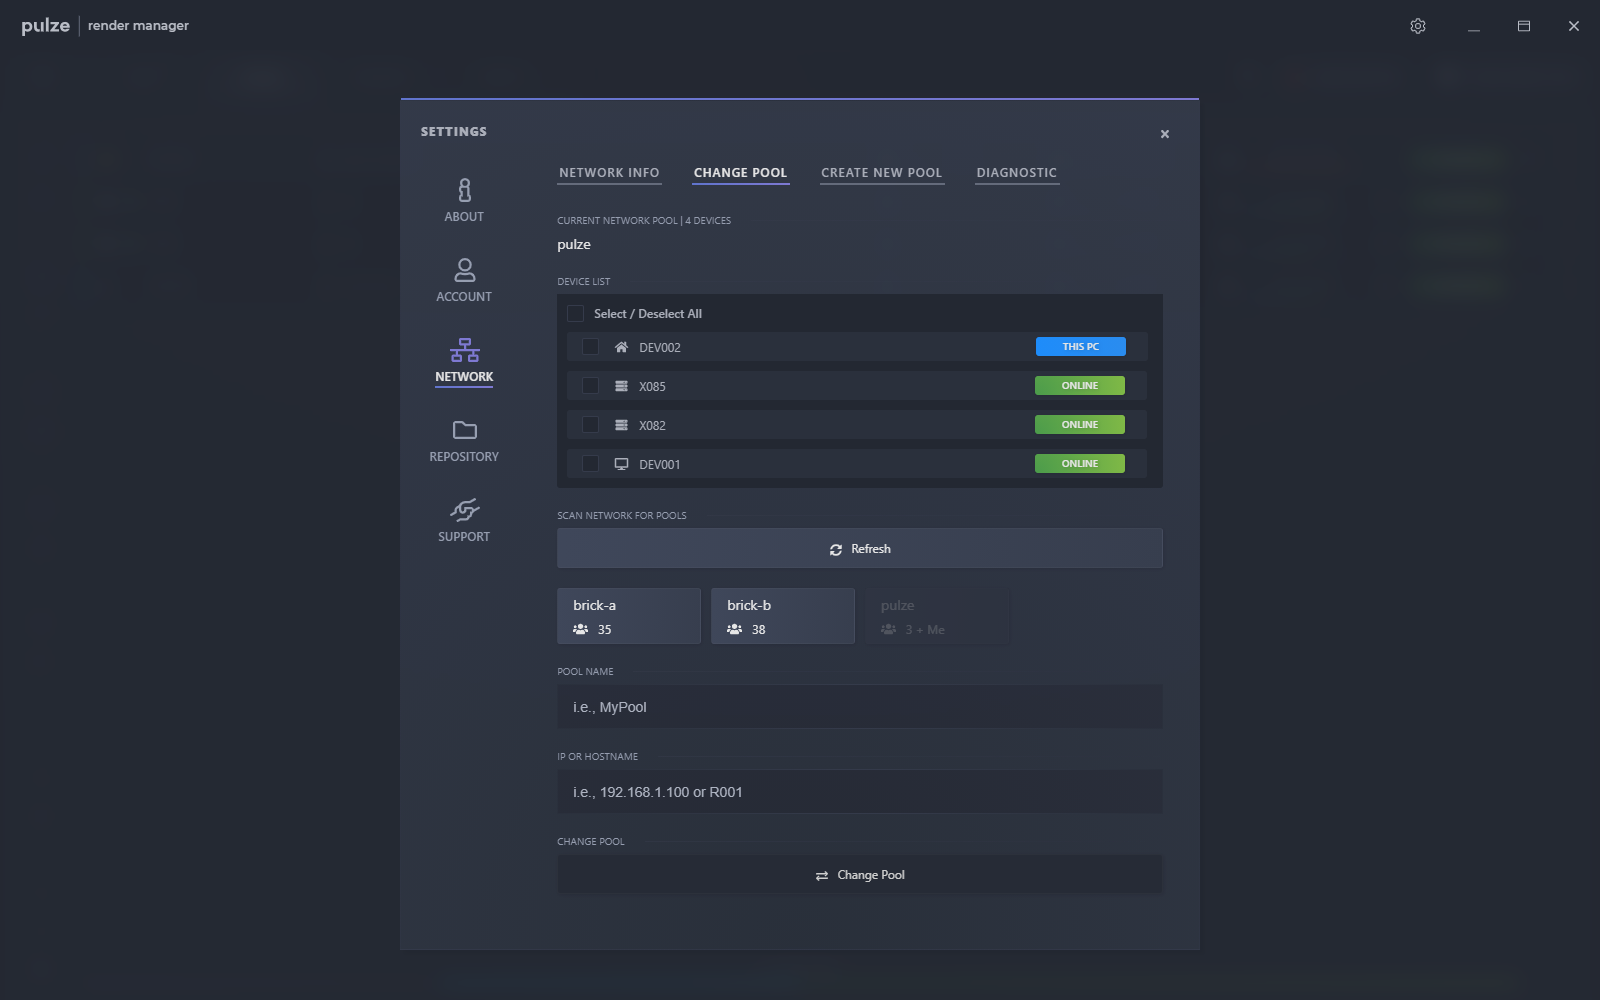
The change pool feature will let you transfer yourself or other computers between pools. You can change the pool manually by entering the pool name and of the workstation’s ip or hostname. Or you can scan your network for pools and join the selected one.

rm_settings_005.png

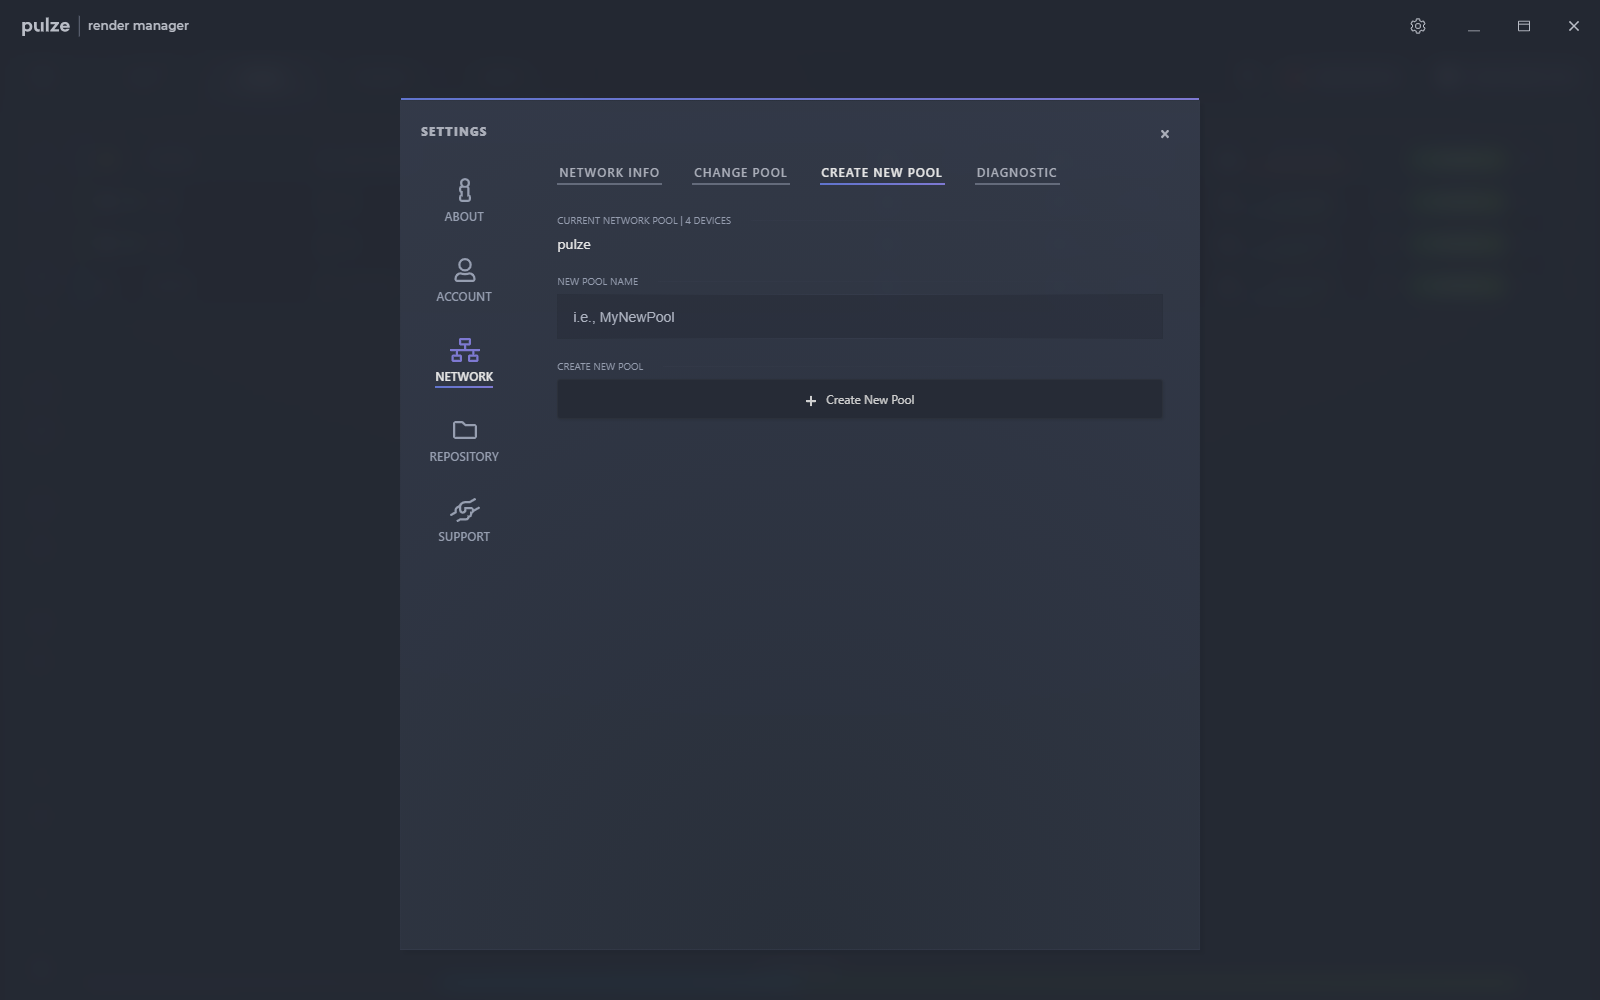
You can create a new pool under the Create New Pool section. Please note that your computer will automatically join the newly created pool leaving all the other nodes and jobs behind.

rm_settings_006.png

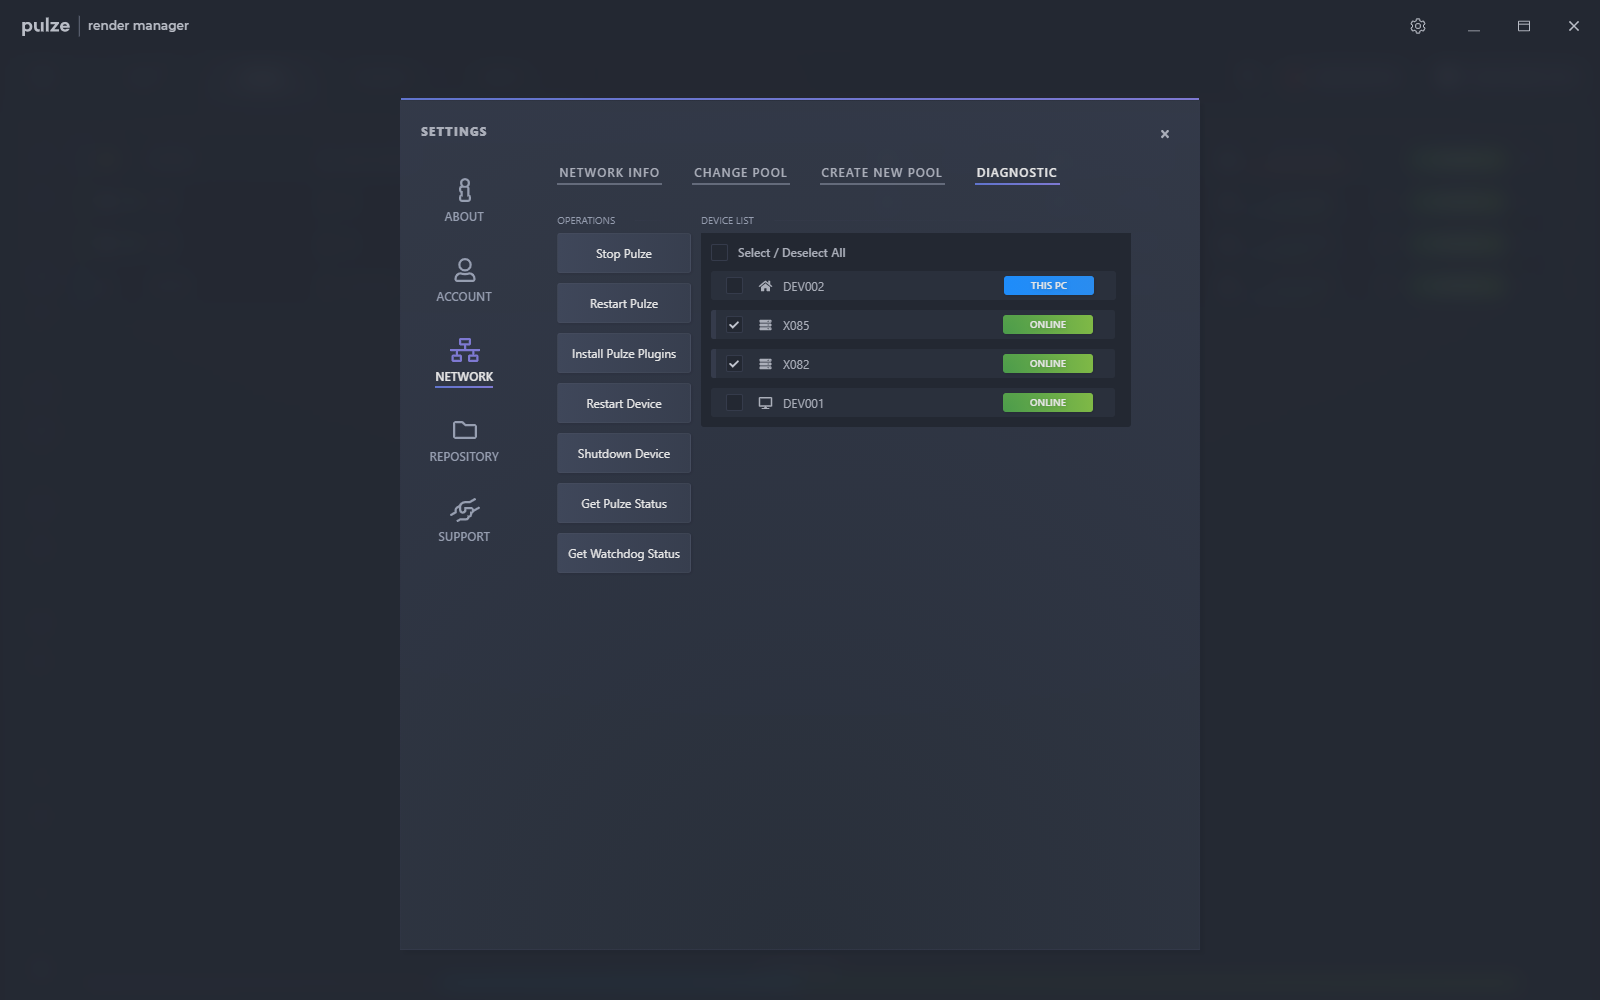
The diagnostic tab will allow you to perform some special operations like stopping, restarting or grabbing the current status of Render Manager or its service. These operations will work even if Render Manager is not running or unresponsive on the target computer.

rm_settings_007.png

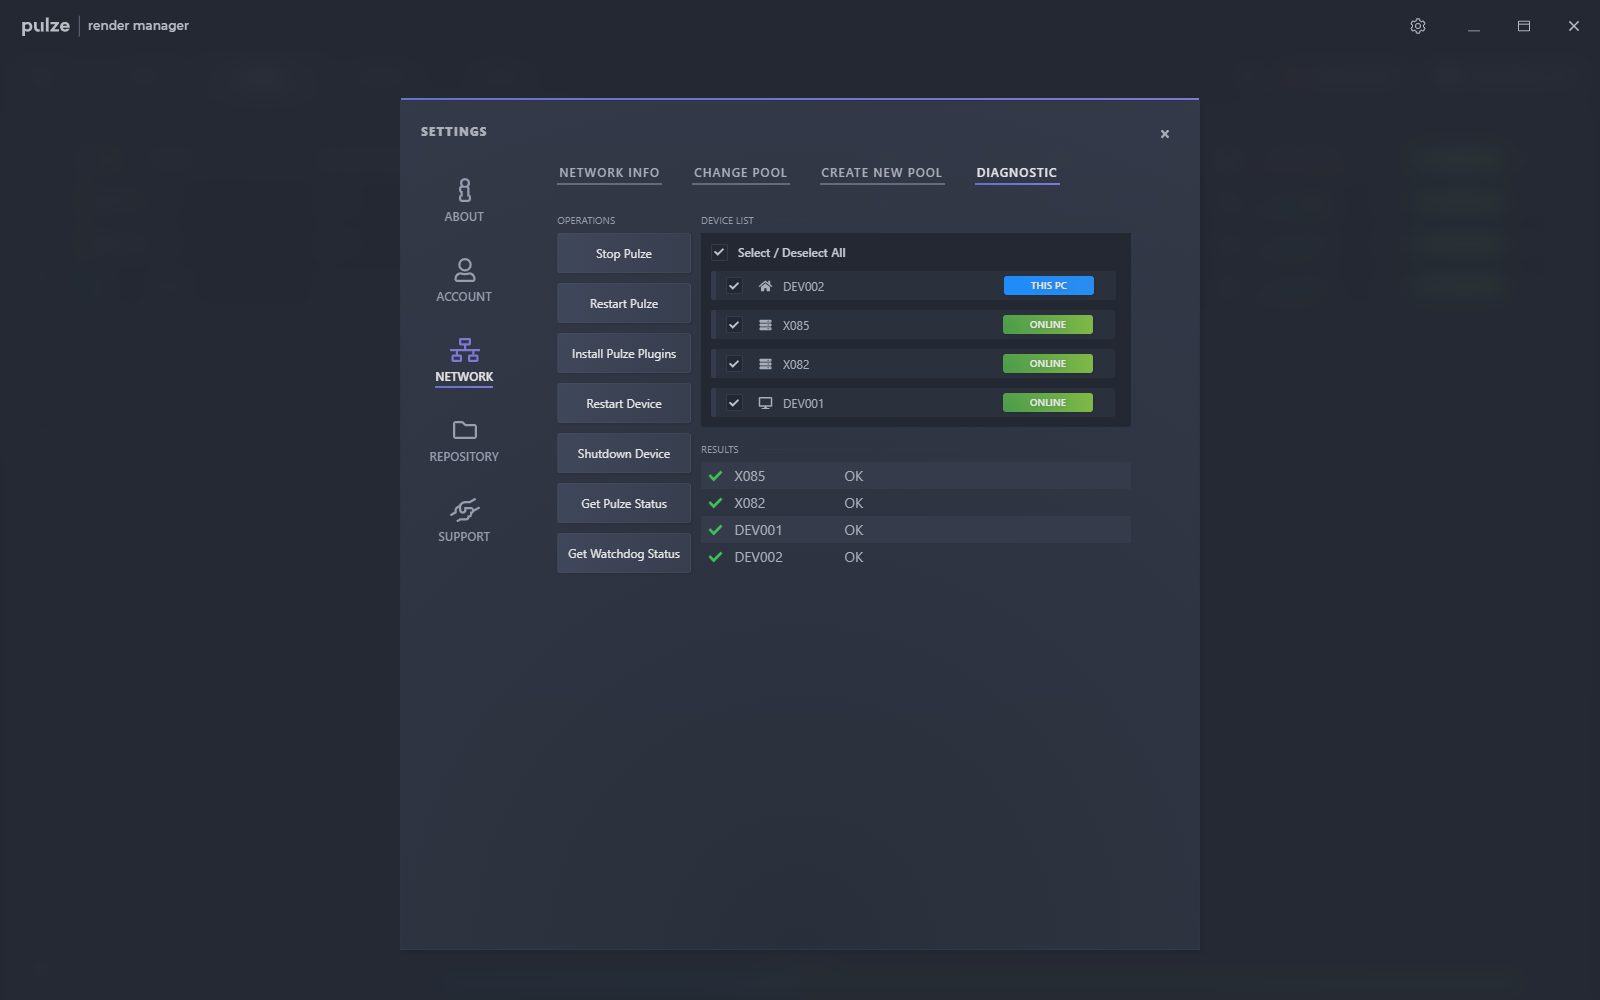
Once Render Manager sends out the command you will see if succeeded or failed with an error.

rm_settings_008.png


Repository

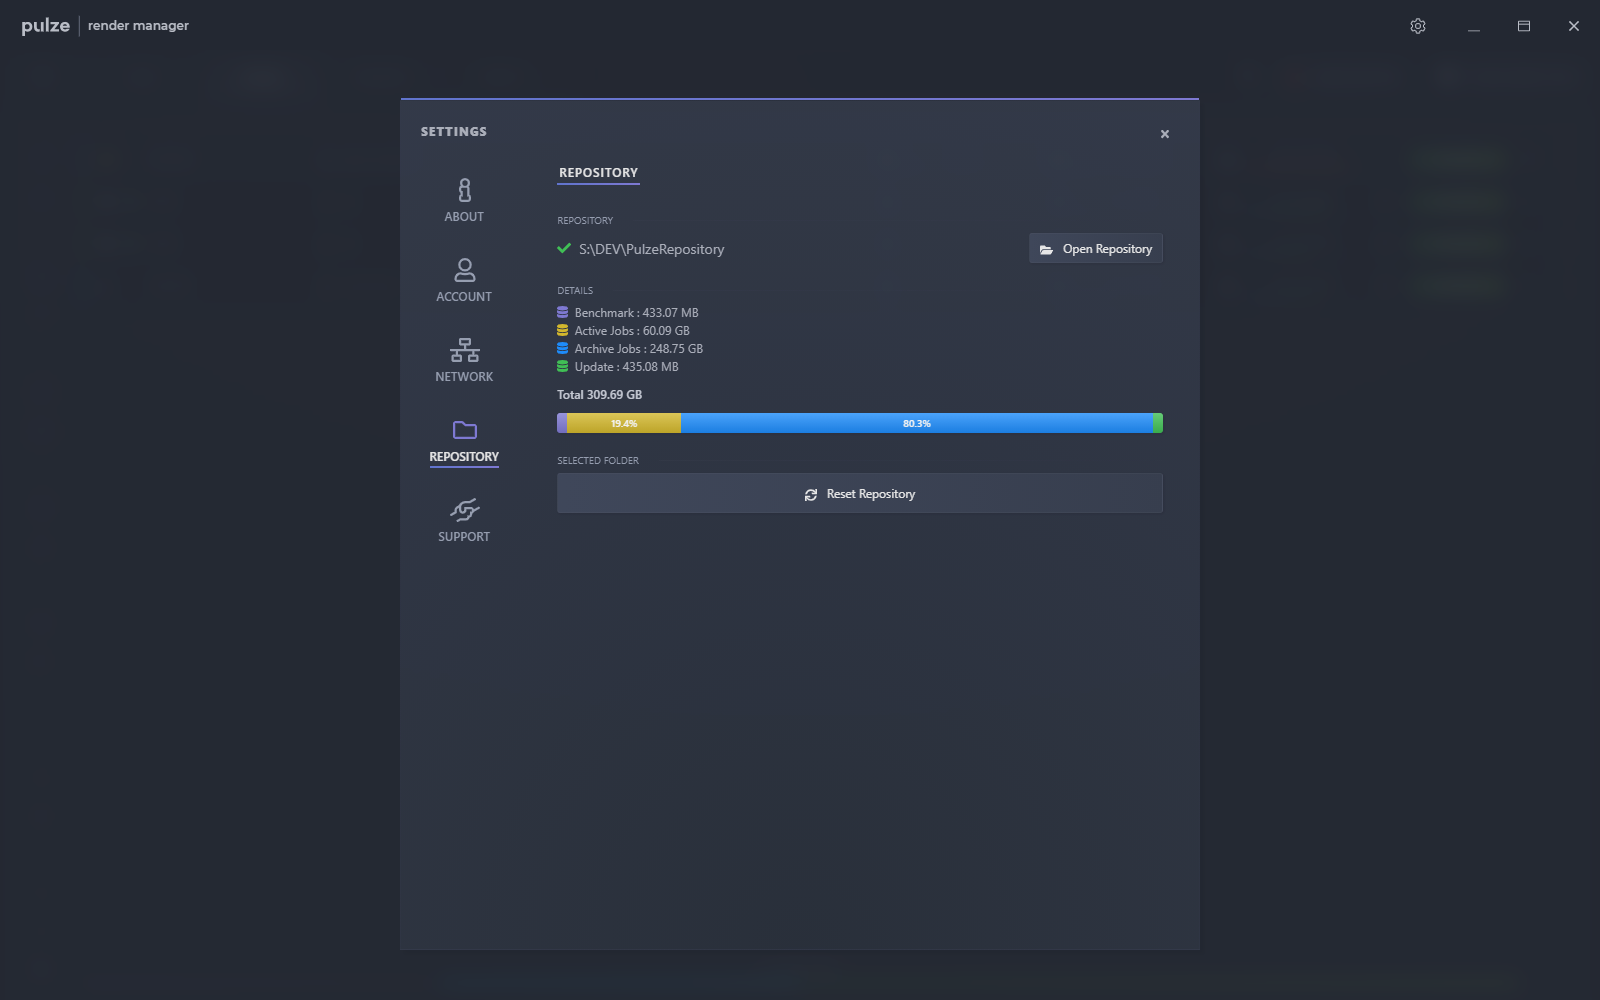
The repository is a set of specific folders that the Render Manager mainly uses to store the active and archived jobs. Beside that, it will store updates, log collections, bug reports, statistics and various configuration files.

rm_settings_009.png

Click Set Repository to enable it. You will be asked to select a folder where the Render Manager can create the repository.

The repository folder has to be located on a shared network drive which can be accessed by every computer in the pool.

rm_settings_010.png

If you would like to change the folder and configure a new one, you will have to first press Reset Repository then select a new folder.

Please note that for security reasons Reset Repository will NOT remove the content of the folder. If you want to free up the space, you will have to manually delete the content of the folder.

If you want to move the repository to a new place instead of creating a new one, just copy the PulzeRepository folder to the new place then browse in the new path.


Support

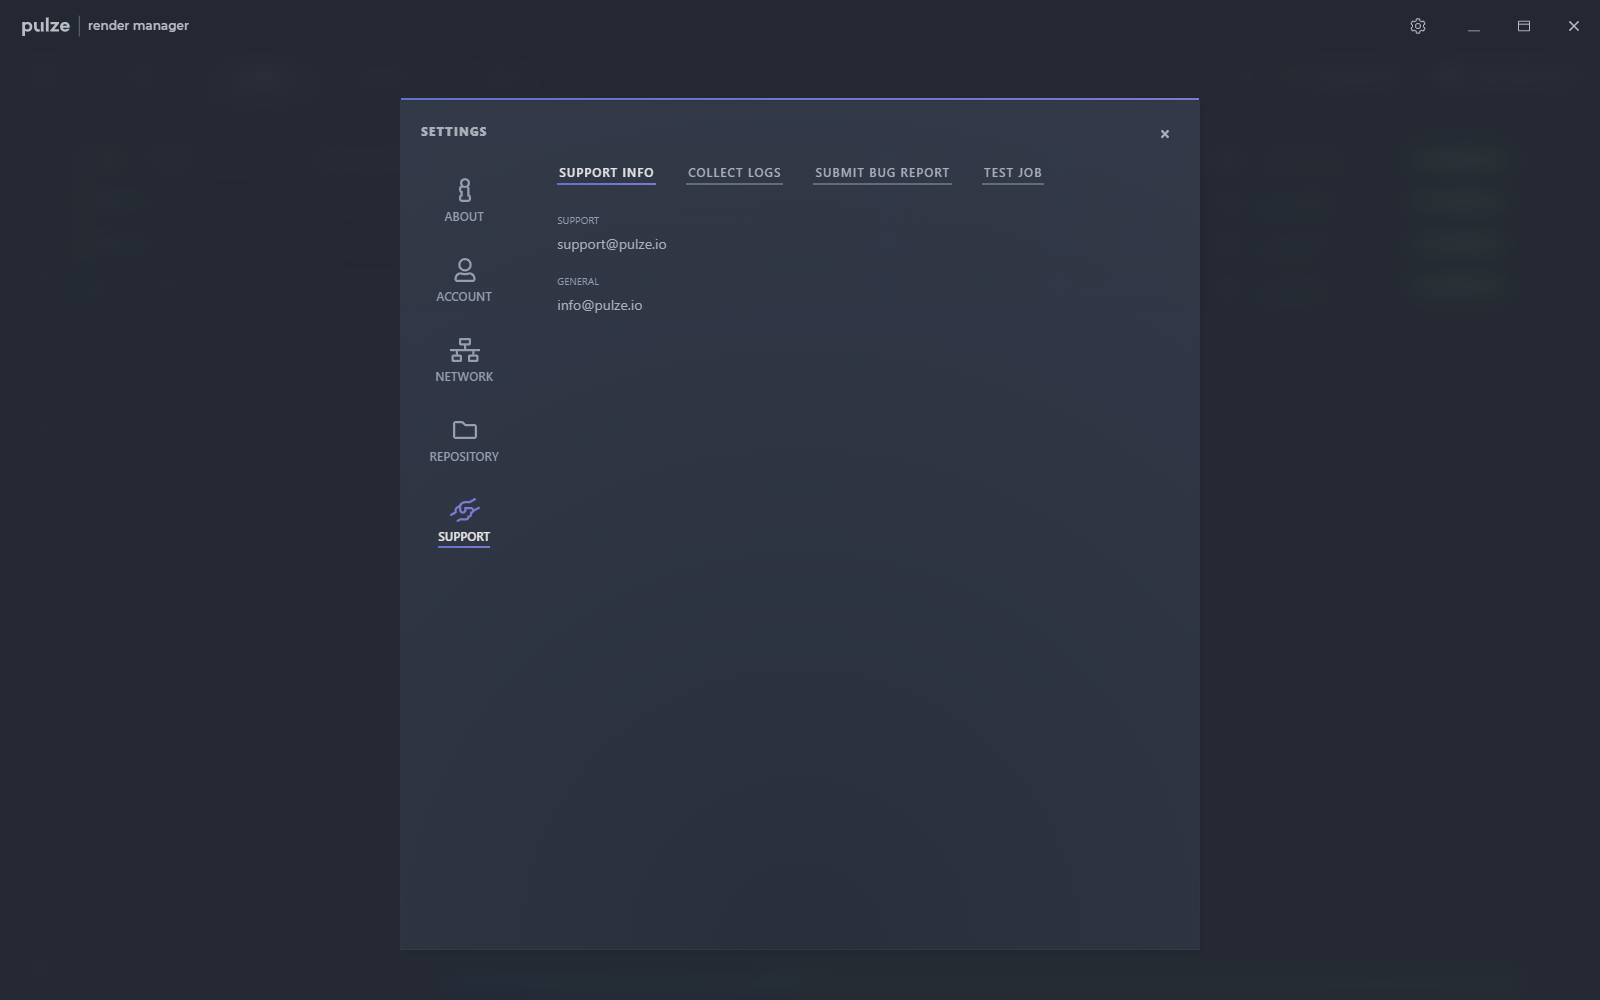
The support section contains various features where you can directly submit your issue, collect logs or submit jobs for testing purposes.

rm_settings_011.png

Collect logs

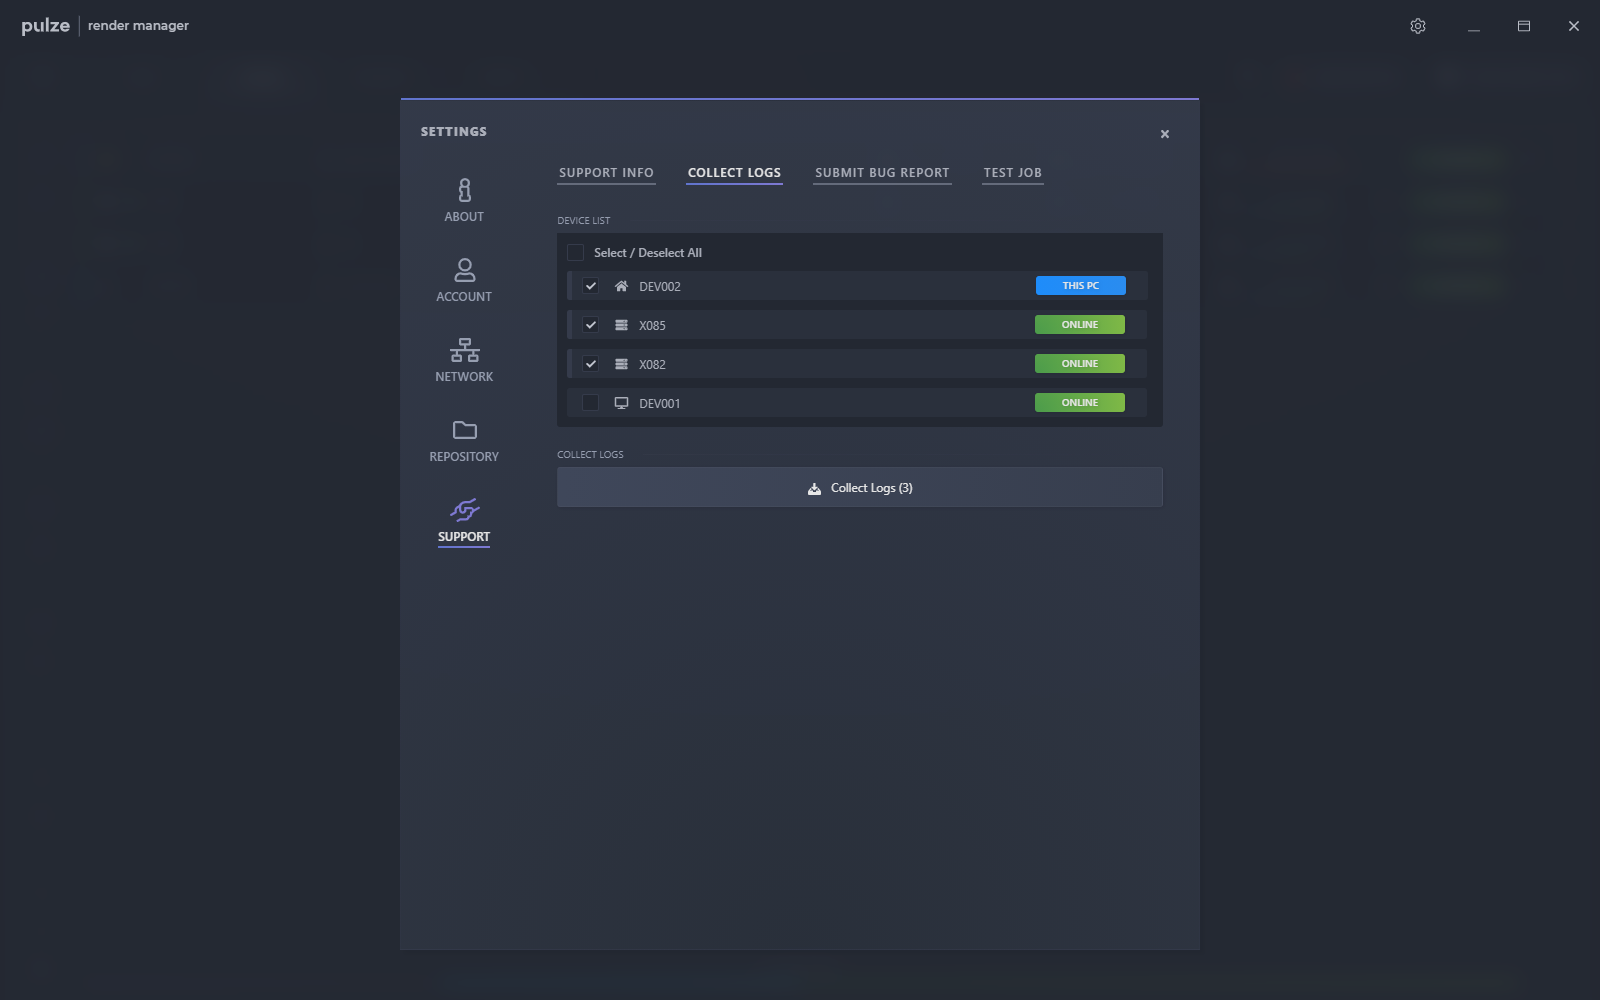
The collect logs feature will gather the log files from Render Manager, 3ds Max, V-Ray and Corona and will create an archive of it. Before you would submit a ticket through our support channels, it is good practise to select the involved computers and attach them to the ticket. This will make our work faster and easier.

rm_settings_012.png

Submit bug report

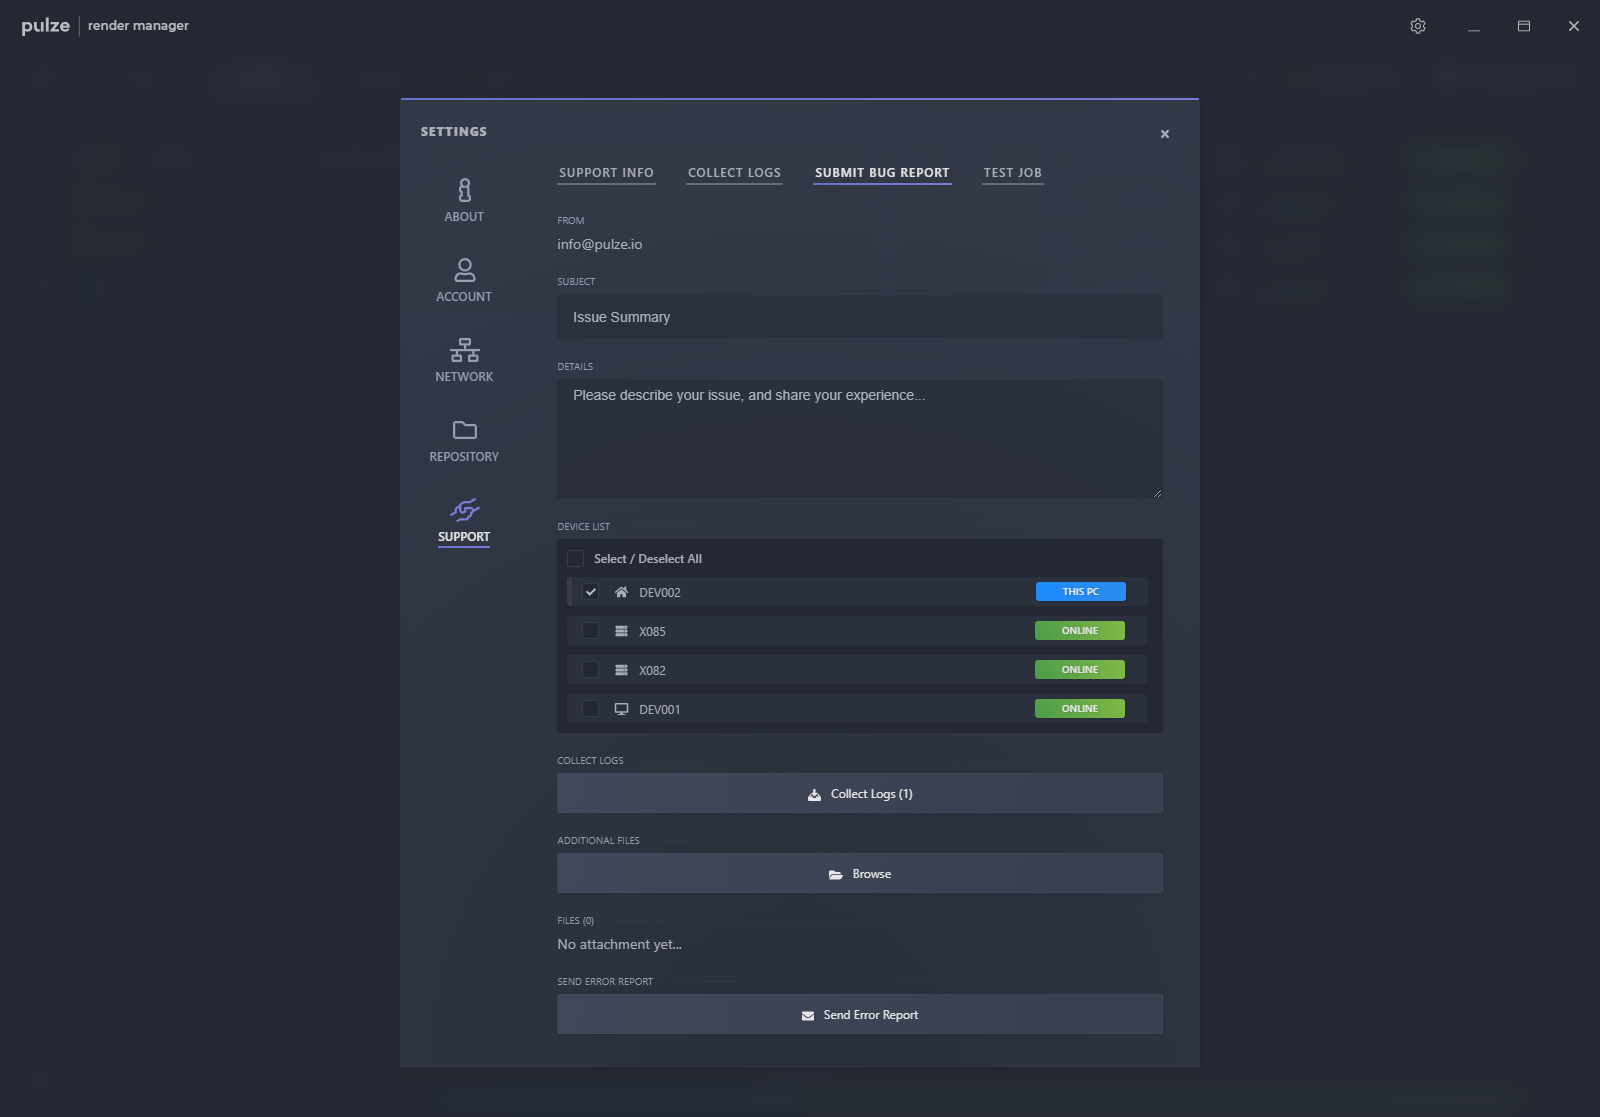
With the submit bug report you can describe your issue, collect the logs, attach additional files and submit it as a ticket. Please note that we will reply to the email address that you are using to access the Render Manager. If you can’t reach this email, please send your report via email to support@pulze.io!

rm_settings_013.png

Test job

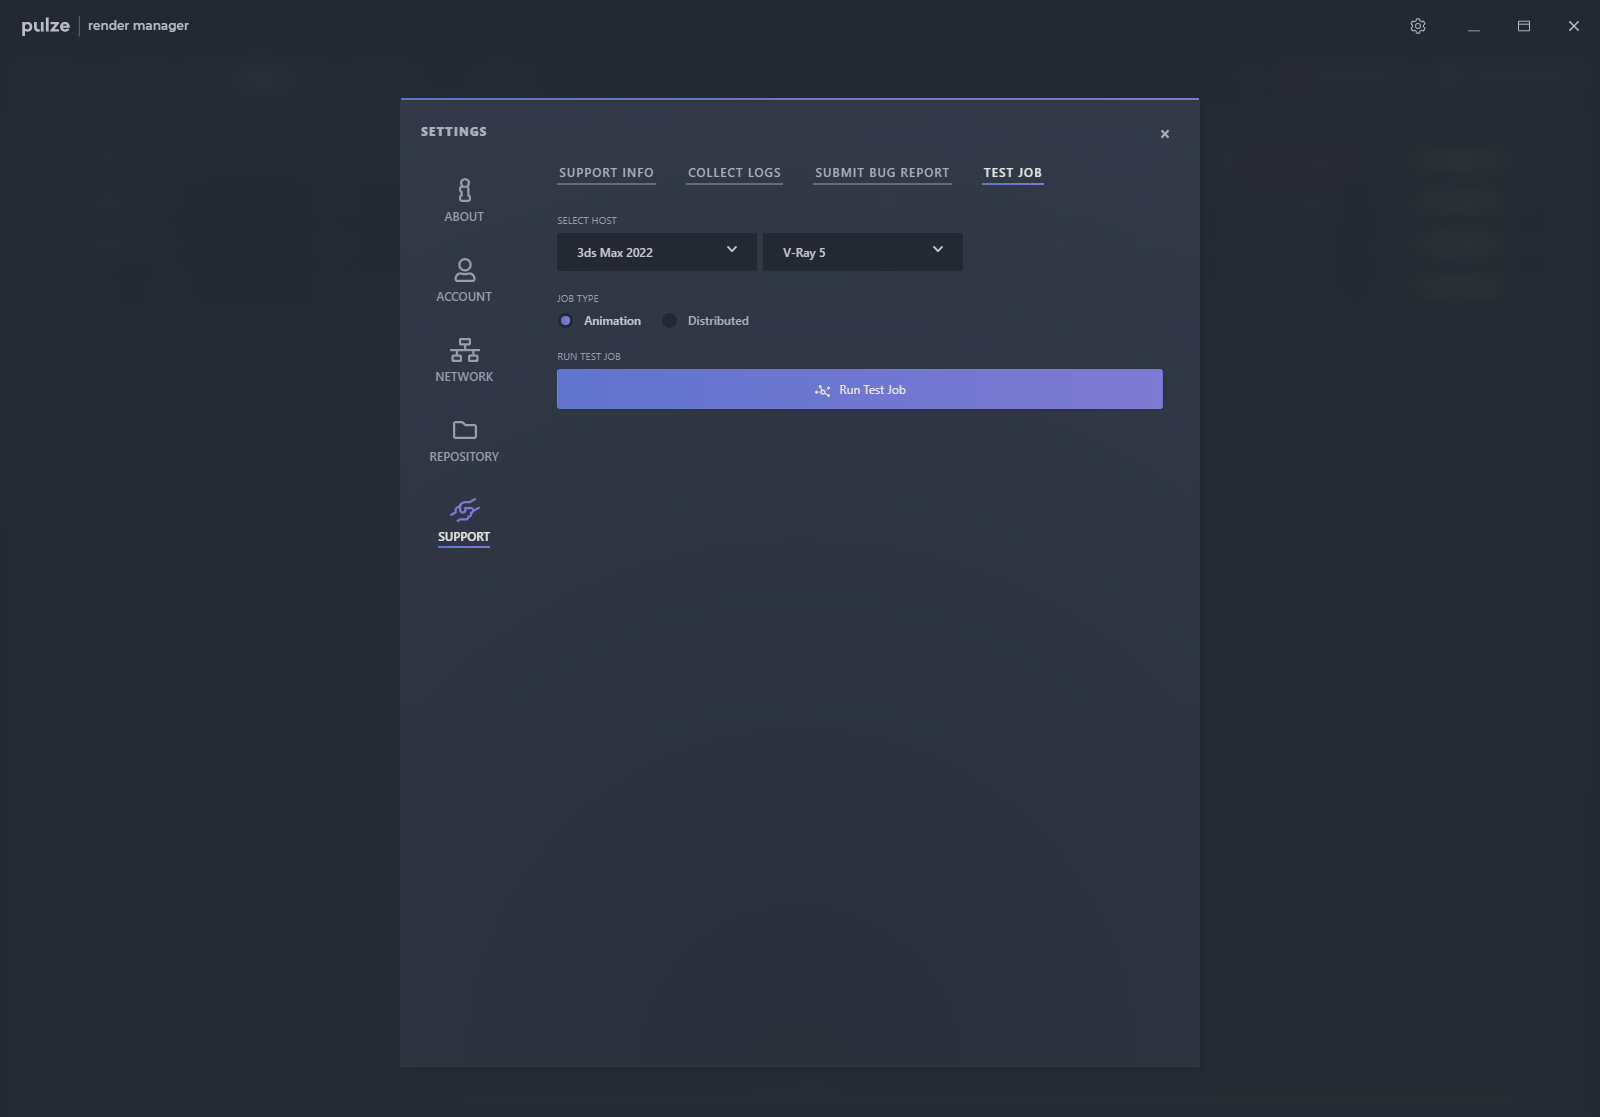
Test jobs are a fast and easy way to test the pure functionality of Render Manager and 3ds Max without the complexity of a real production file. These test jobs are very light and they don’t contain any assets. You can choose the version of 3ds Max and the type of the render engine (V-Ray, Corona, FStorm).

rm_settings_014.png

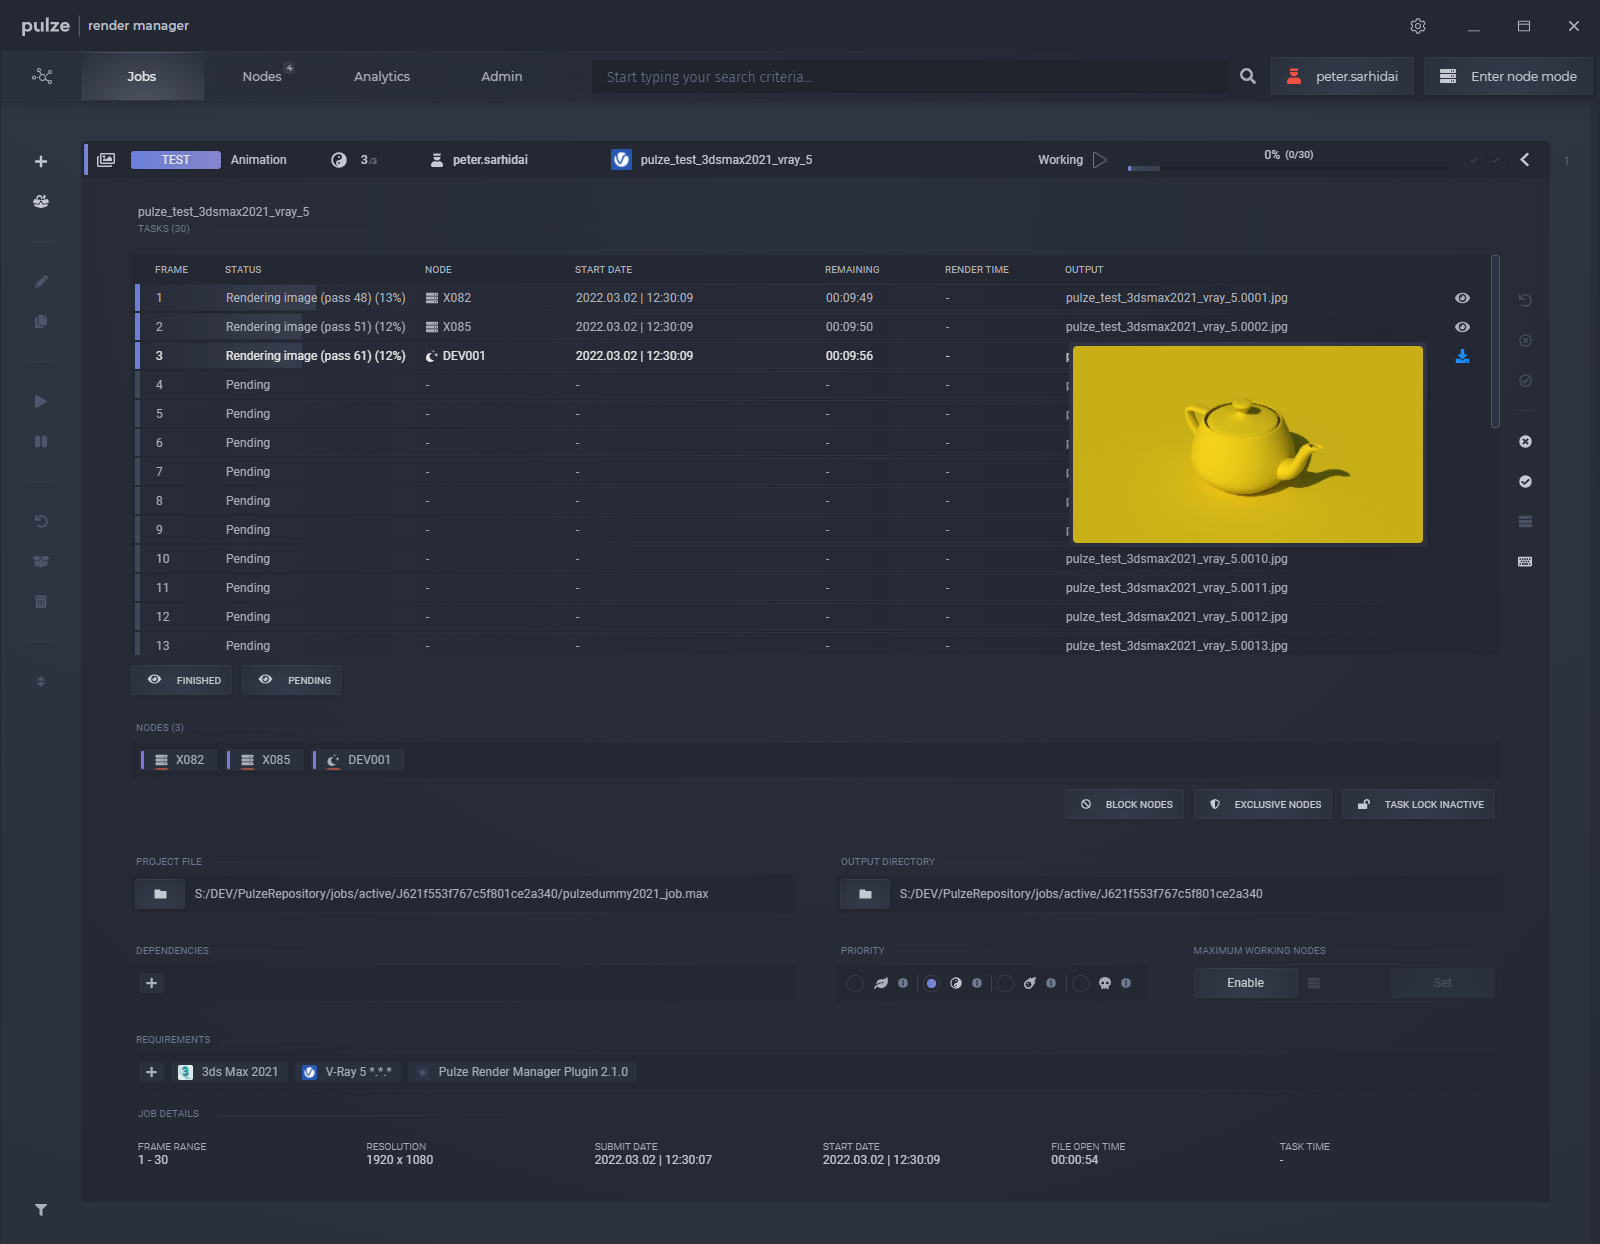
By clicking Run Test Job, Render Manager will automatically create an animation or a distributed job (V-Ray only). The animation job will have 30 tasks, where the frame time is set to 10 minutes and the output path is automatically set for you.

rm_settings_015.png


Admin

Users

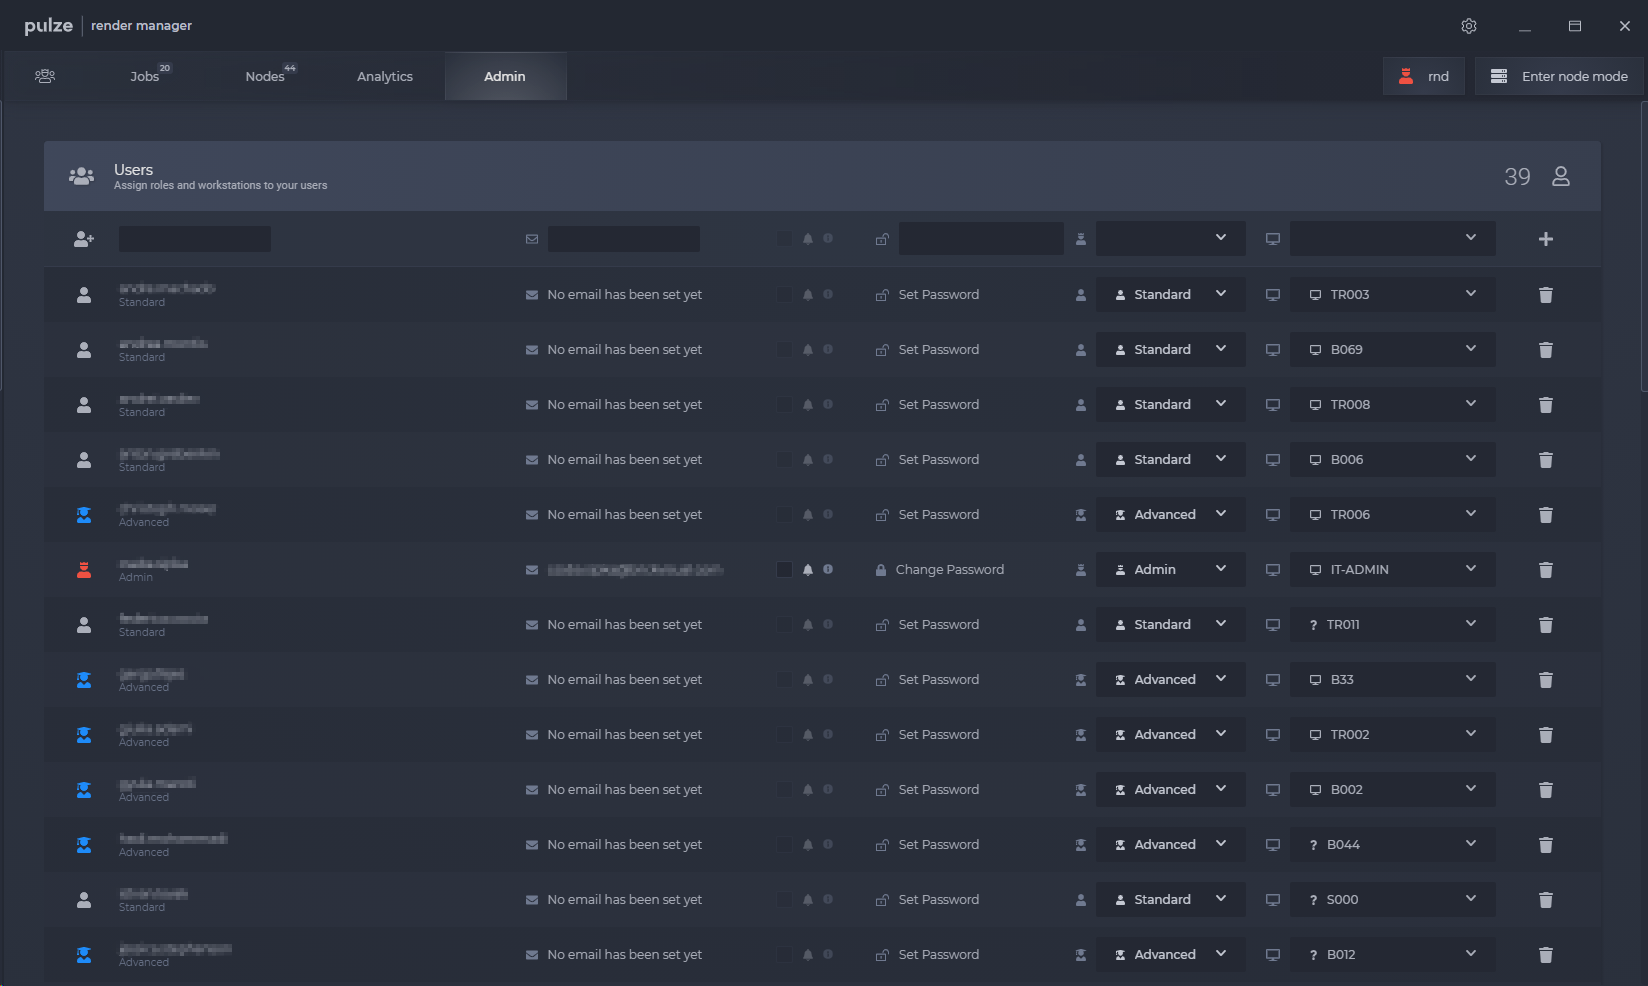
When you install and configure Render Manager as a workstation, a user with admin privileges will be automatically created.

rm_analytics_001.png

Creating a new user is pretty straightforward, you can define the following properties:

rm_analytics_002.png

User name - By default your Render Manager username will be the name of your current windows account. You can change this anytime. You can change the username anytime.
Email - You can define an email address for each user. This will be used to send notifications about the status of the jobs and critical errors. These notifications features are currently not available.
Password - The password can be used for IT admins to give temporary access to Standard or Advanced users to the features that are locked for them.
Type - Choose between Standard, Advanced and Admin. A Standard user can’t send any commands to the computers and it is also not able to delete or modify a job.
Workstation - Assign a workstation to the user.

You can delete a user by pressing the delete button.

Every Render Manager pool requires at least one admin user, therefore it is not possible to delete or restrict all the users.


Errors

All the reported internal errors are listed in this section. Read more about reporting errors here:

rm_analytics_003.png

If you have RDP configures you can quickly log into the computer by pressing the eye button. Once the issue is fixed you can remove the error by clicking on the tick. If the reported error was critical then the computer will also be unsuspended and it can go back to work.


Sanity

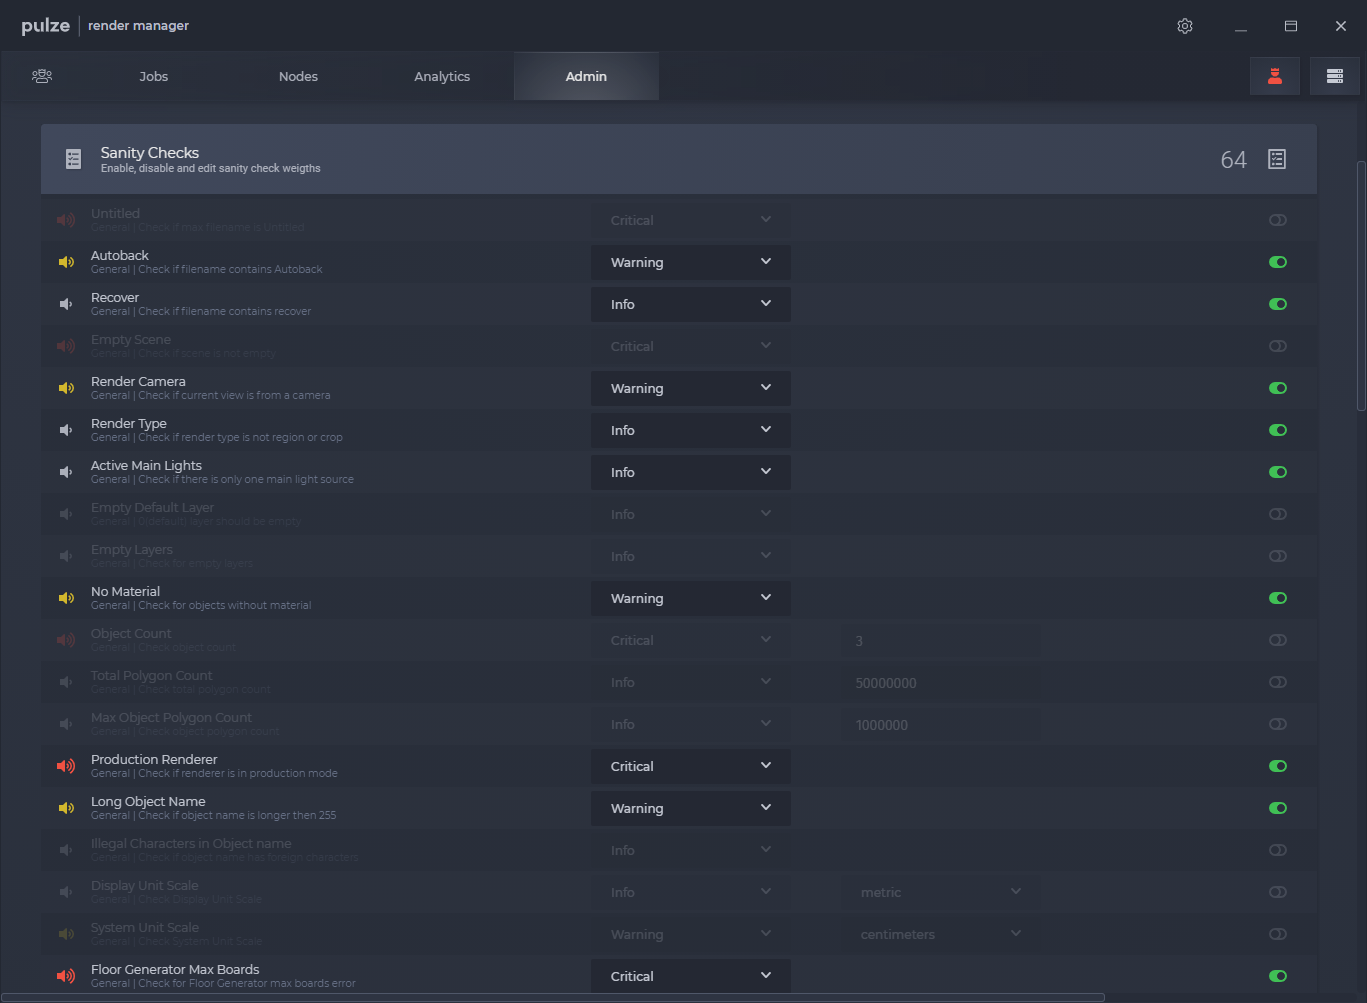
These are the list of checks that Render Manager will perform before submitting a 3ds Max job. You can enable/disable and select how important a check should be. Please note that changes made to any of the checks will affect all users that are connected to the same pool.

rm_analytics_004.png

A sanity check has 3 levels and you can customize them to your team’s needs.

Info - The check will be listed in the job submitter but won’t be prioritised and it won’t have any effect.
Warning - The warnings will be on the top of the error list. You can still submit your scene, but probably you should fix the reported problems.
Critical - If you have a critical error you won’t be able to submit the job.

As an example let’s enable the check called No Material and modify the error level to Critical. If you tried to submit your scene that contains an object without material, the Submit button will be disabled! This is an effective way to stop users from submitting faulty scenes to Render Manager.

rm_analytics_005.png


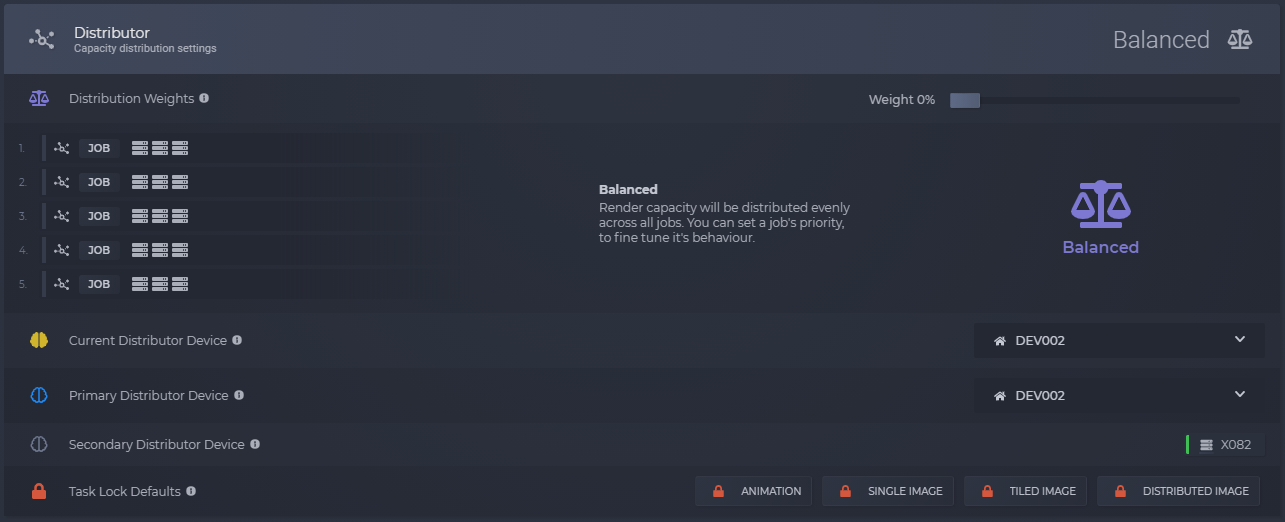
Distributor

One of the most important and impactful settings is located in the distributor section.

rm_analytics_006.png

Distributor Weights

The Distributions Weights control will allow you to define how your would like to distribute your render nodes to the jobs.

rm_analytics_007.png

Balanced (Weight 0%) will evenly distribute the computers across all jobs. This mode is useful if multiple users are submitting distributed rendering or previews jobs and you want to give the same rendering capacity to all the jobs.

rm_analytics_008.png

The Mixed mode (Weight 25%, 50% and 75%) will prioritize the jobs that are on the top of the list and will allocate fewer resources toward the bottom. These mixed modes will be in favor of the jobs that are older but the newer jobs will be also started.

rm_analytics_009.png

Top-to-bottom (Weight 100%) will concentrate all the available resources on the top job. This mode is identical to the way other render manager software like Backburner works.

Distributor Device

You can select a computer that will be the distributor device. Essentially this means that this computer will act as a server and it will be responsible for matchmaking and assigning the right computers to the available jobs. By default, Render Manager will select a workstation as the distributor device automatically.

rm_analytics_010.png

The Current Distributor Device is the computer that is currently acting as the distributor in your pool. The Primary Distributor Device should be your preferred computer that will be the distributor whenever is it online.

Our recommendation is that the Primary Distributor Device should not be used for rendering or other resource-intensive tasks. Such usage can interrupt the distribution and the connection to other computers and it can lead to unexpected issues.
If it is not possible to dedicate a computer to this task, then you should lower the number of cores that are used for rendering. You can set this when entering node mode or use the set affinity command under the nodes tab.

The Secondary Distributor Device will be picked automatically. In case the Primary Device goes offline because of a restart or any other reason, this computer will take over the distribution duties until the primary device is back.

Task Lock

You can define the Task Lock defaults per job type in this section. If a job has task lock turned on, then a render node that is working on the job will always finish its current task before it moves on to work on another job. This way you can ensure that your frames will render safely and a higher priority job won’t drag away your render nodes.

rm_analytics_011.png

By default, the Task Lock is enabled for all job types. You can overwrite this in the Job Submitter or in the Job Details.