Render Manager is an artist-friendly solution that solves the age-old problem of managing network renderings. It offers a set of easy-to-use and smart features to supercharge your work intuitively.
We collected some of the most useful features, including: node monitoring, software analytics, job submission, distributed rendering and our Scene Manager integration.
1. Set it up in minutes
Installing and introducing new software across the entire office is always challenging and requires a bit of downtime. The installation and initial configuration of Render Manager are fast and easy even for less technical people.
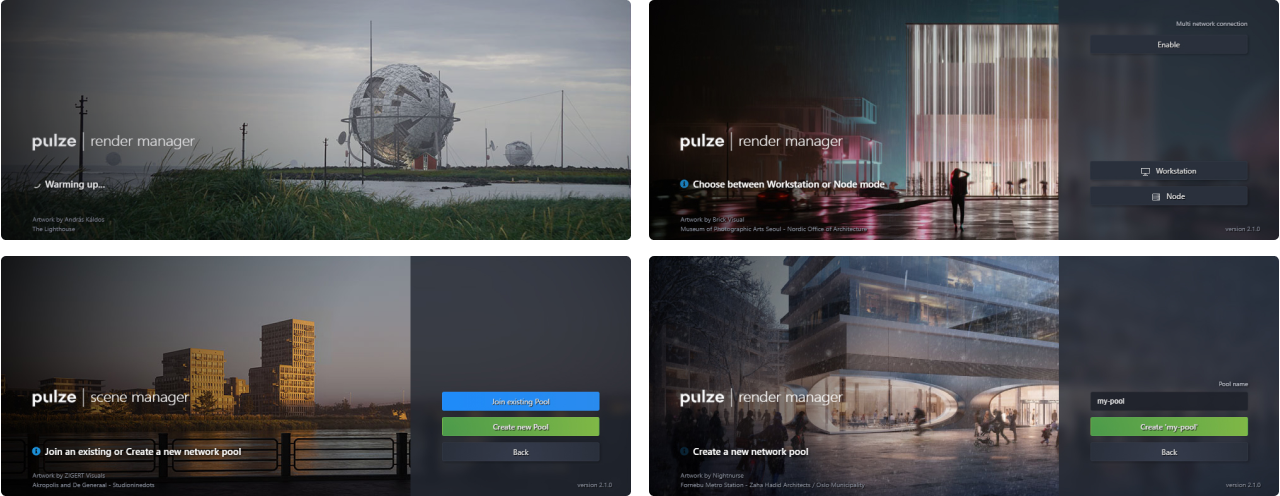
Once Render Manager starts, you can choose between node or workstation mode. You can create a new pool or connect to an existing one. An automatic scan feature is also included that will search for computers where Render Manager is already running and you can easily join them.
2. Node monitoring
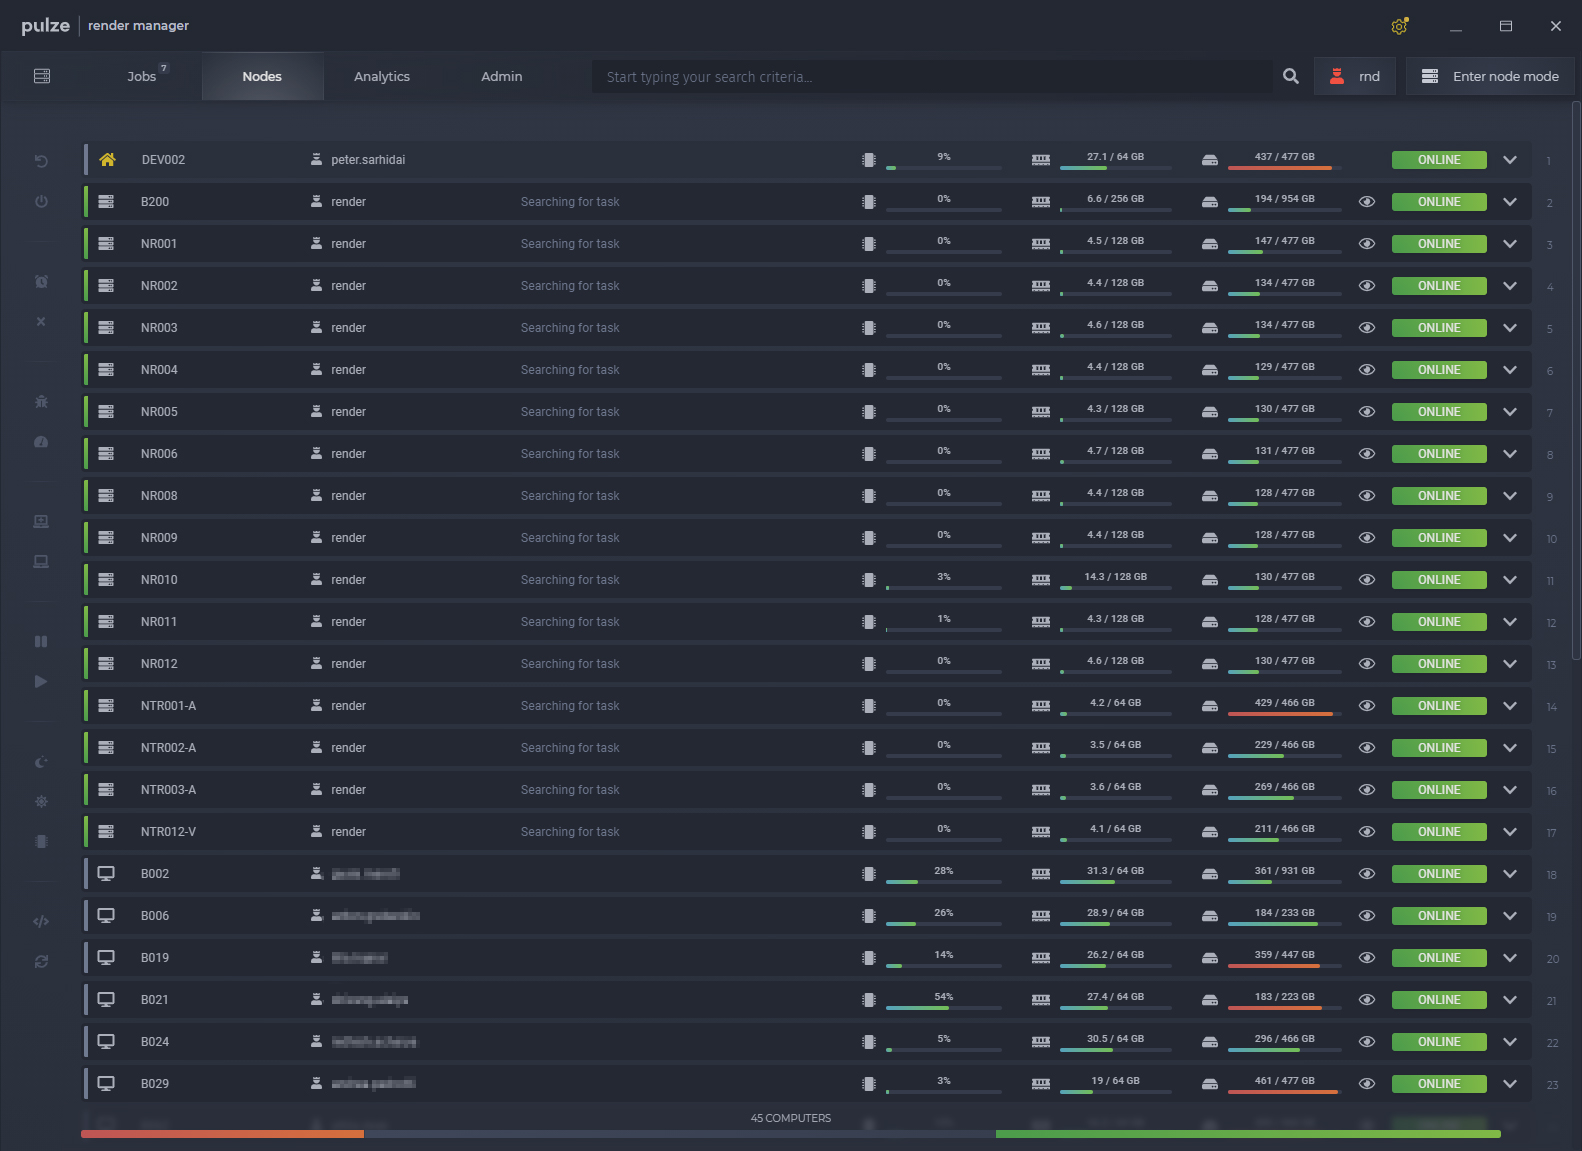
Render Manager is not only about rendering and managing jobs. It includes extensive node monitoring, with CPU, RAM utilization as well as essential network and hardware component information.
There is also an option to restart, shut down, wake up, suspend and run benchmark tests on the selected computers.
3. Software analytics
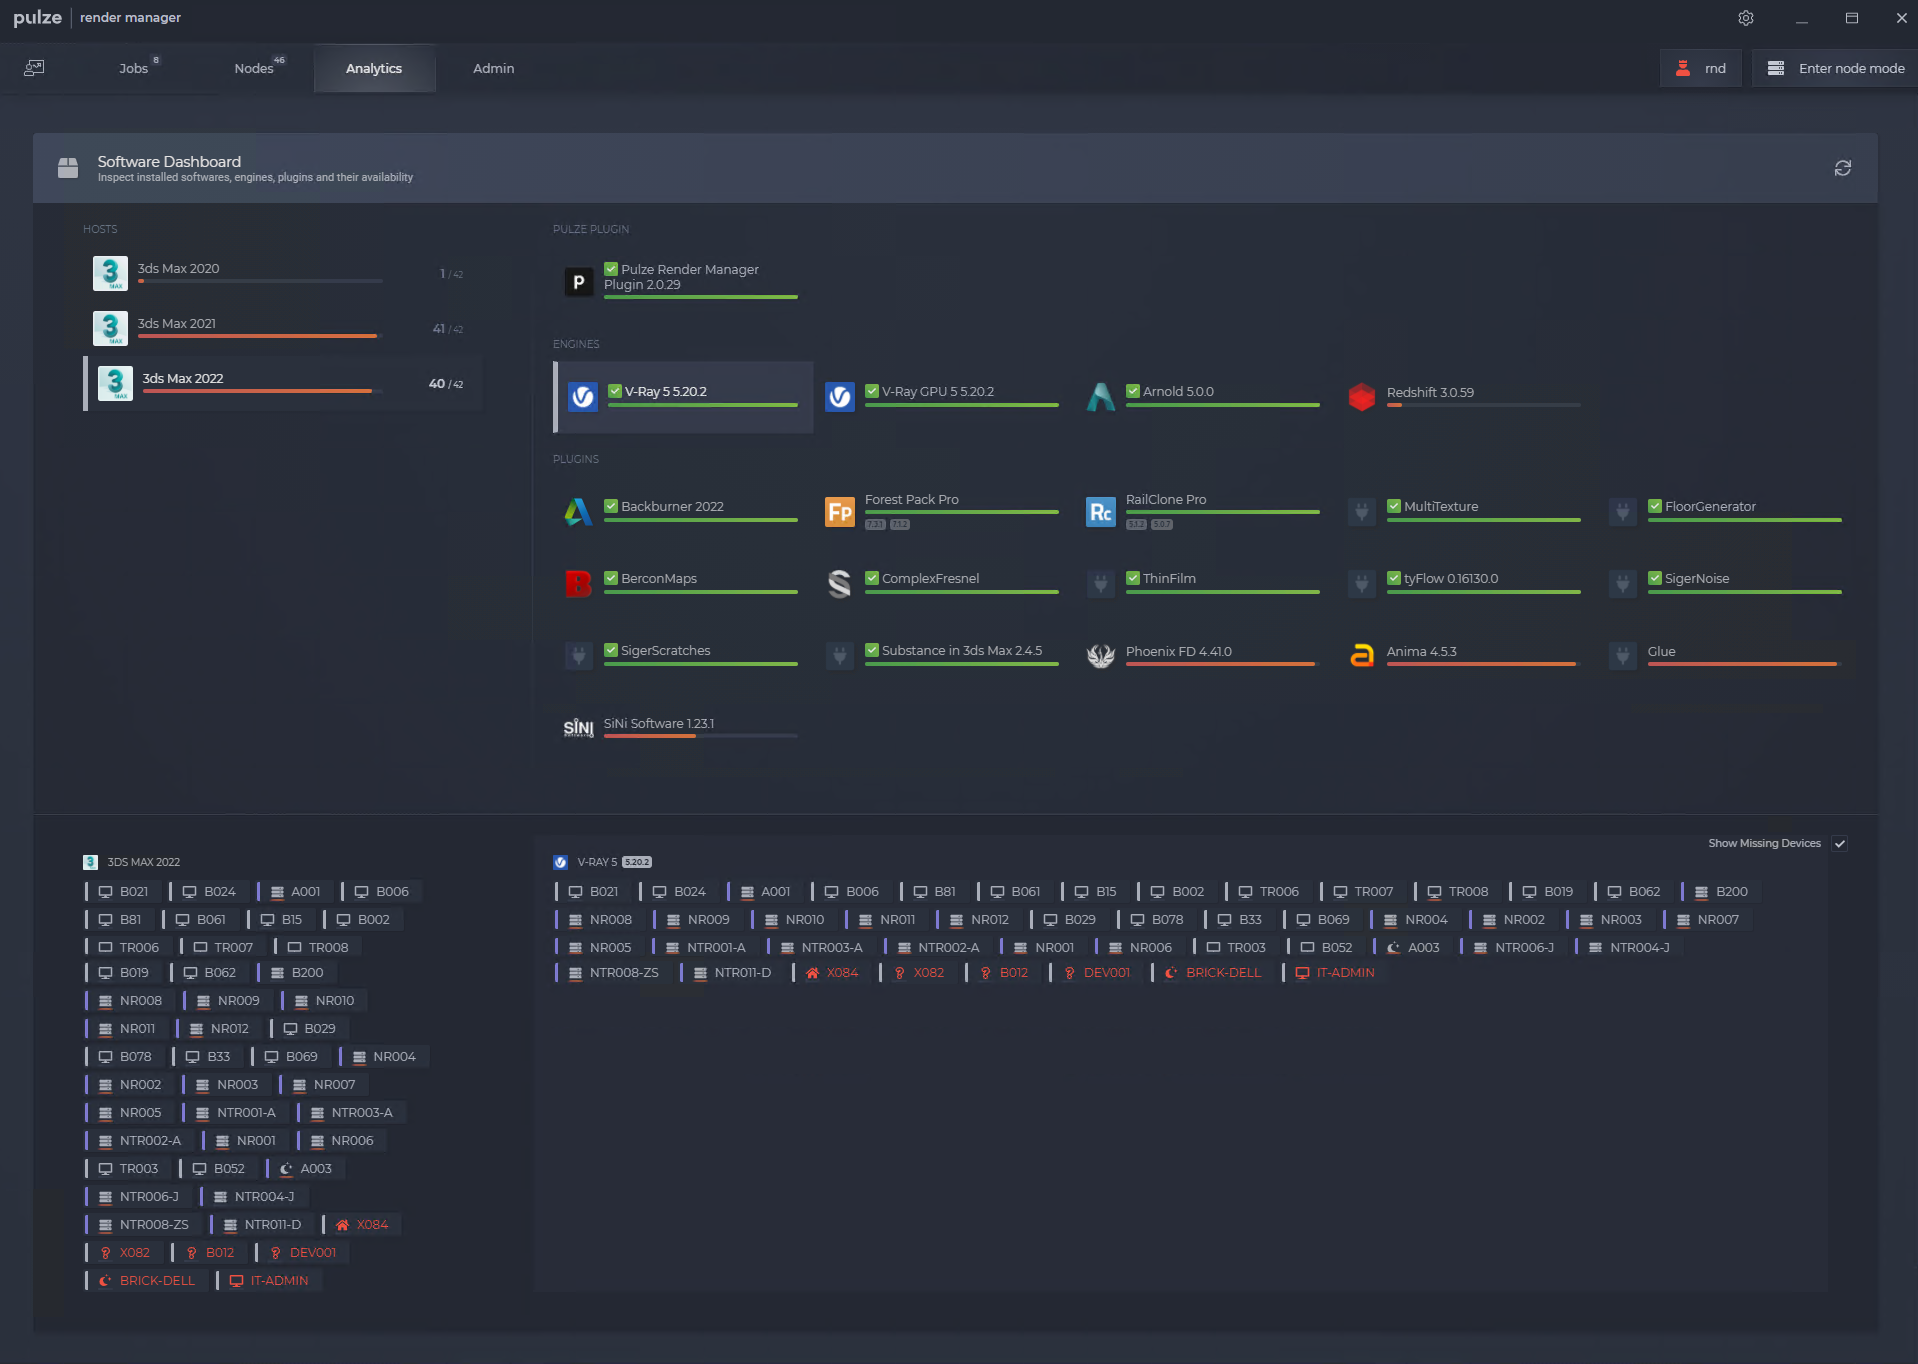
After startup, Render Manager will search for 3ds Max and all the relevant plugins. Besides the five supported render engines (V-Ray, Corona, FStorm, Redshift, Arnold) we also search for 30 of the most commonly used plugins including Forest, Railclone, Anima and tyFlow.
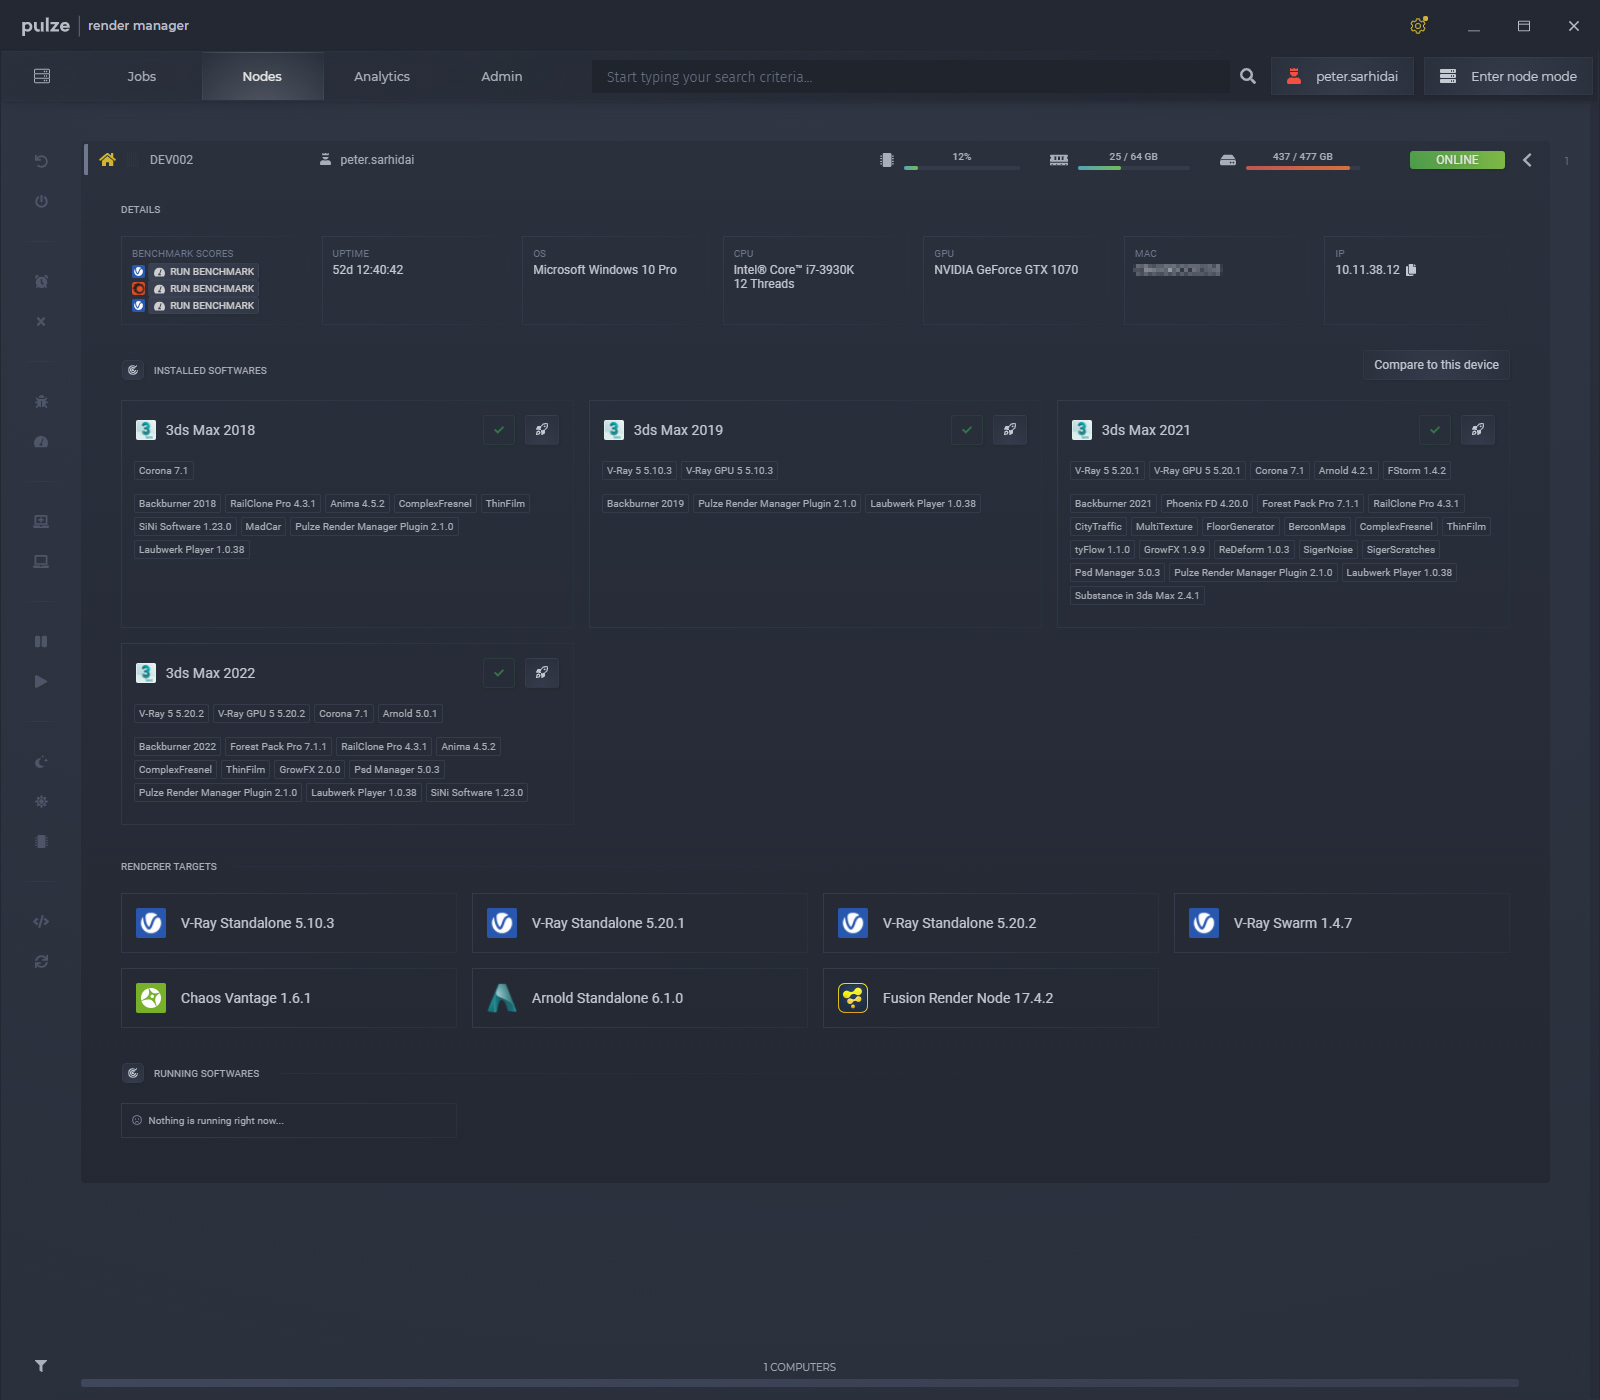
From the Analytics tab, you will see all your installed plugins across the network and you can review if there is a missing mismatch.
4. Job submitter
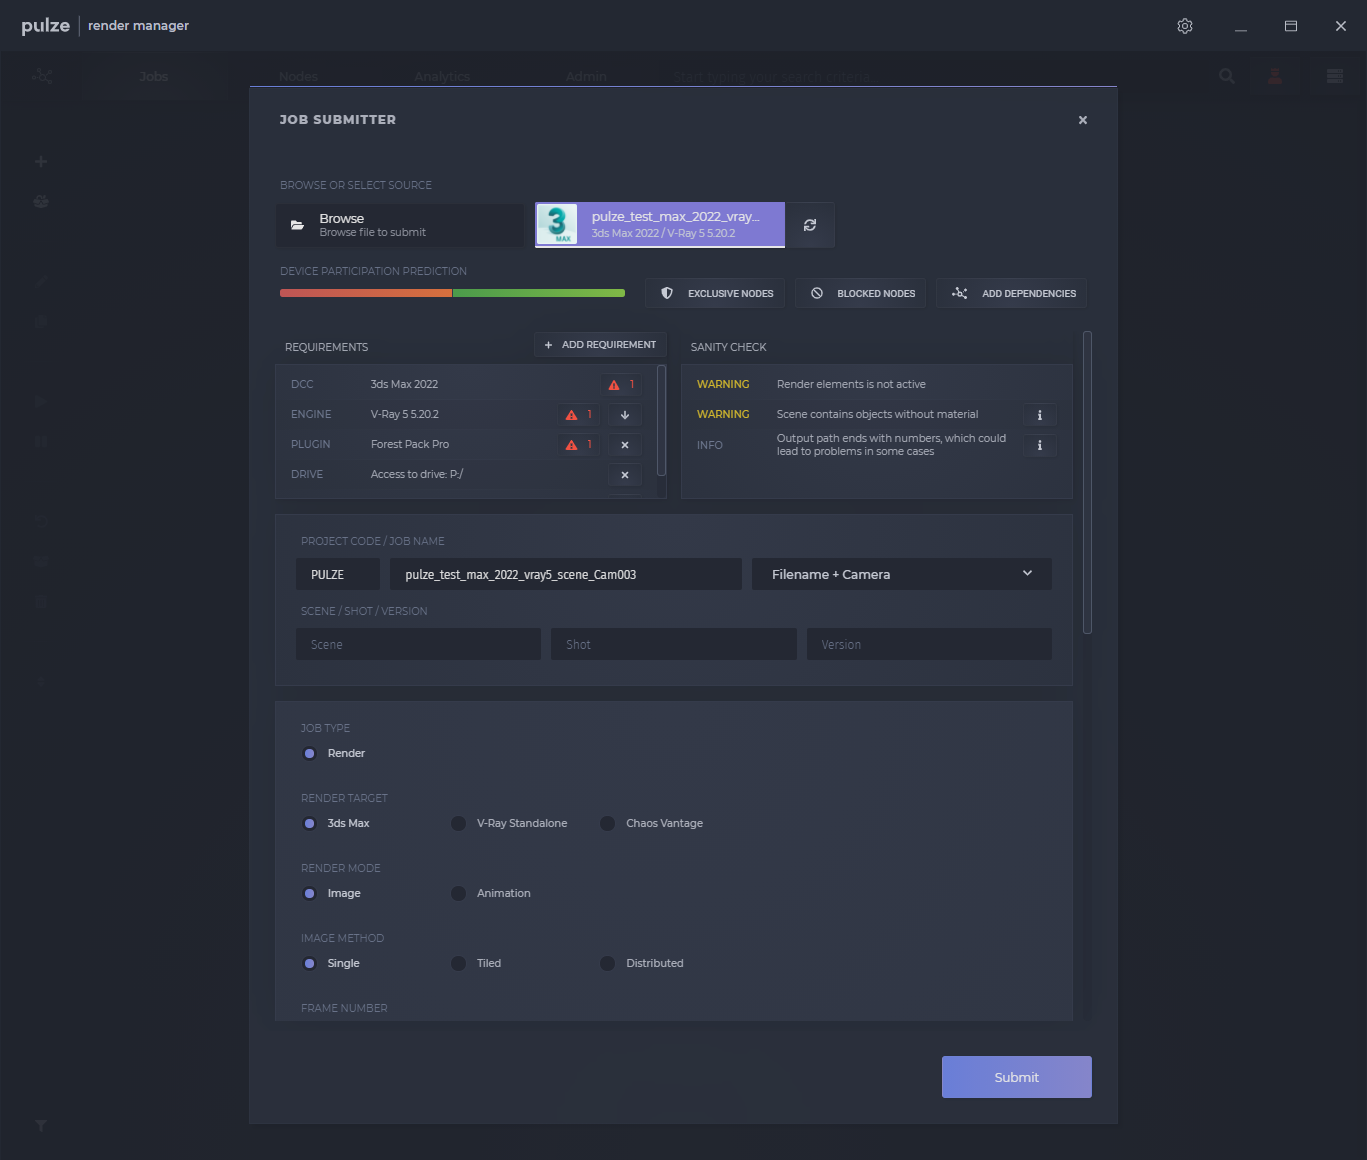
One of the key features of Render Manager is its unique job submitter. You start by browsing one or more max files or you have the option to select a running instance of 3ds Max. Render Manager will gather all the plugin and asset information from your file.
You can choose to render a still image or an animation. After that, you can define the most common properties such as the camera, resolution, frame range, output, render settings and more. There are also various options to define which computers should be involved or excluded from the job.
5. Sanity check
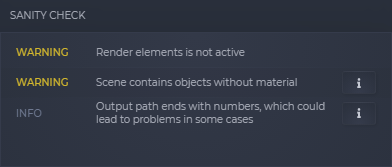
When selecting a file to submit, Render Manager will automatically run a series of checks. These checks are to prevent the most common human mistakes. You will be warned of possible problems like no output specified, duplicated render elements, enabled region, not compatible materials and missing plugins or textures.
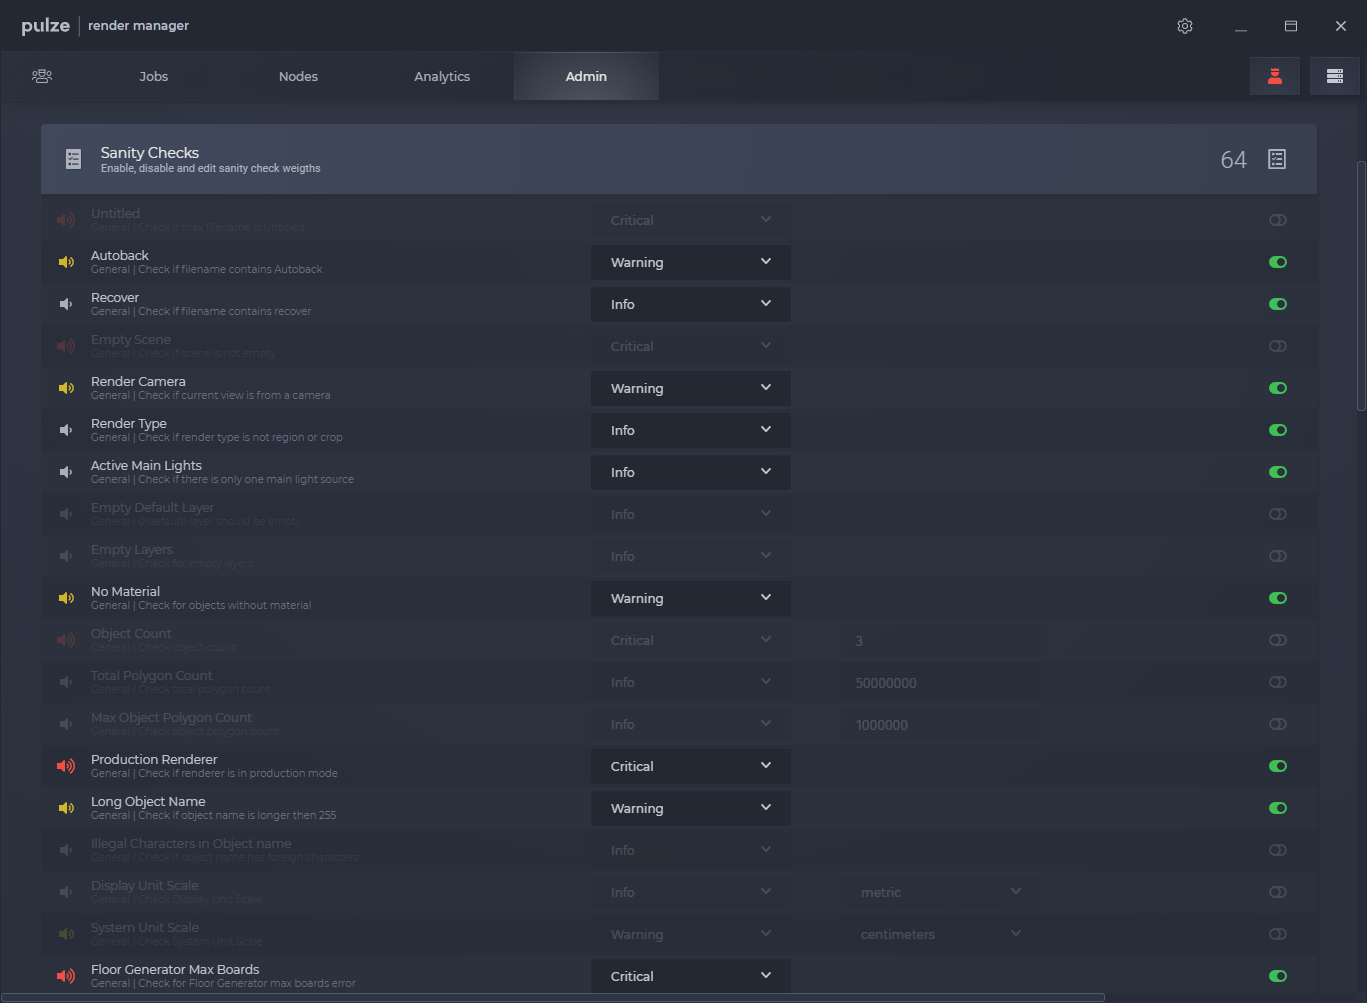
It is also possible to customize the sanity checks for your own needs. You can choose between different levels of errors, up to a point where you can’t submit the job until the problem is fixed.
6. Requirements
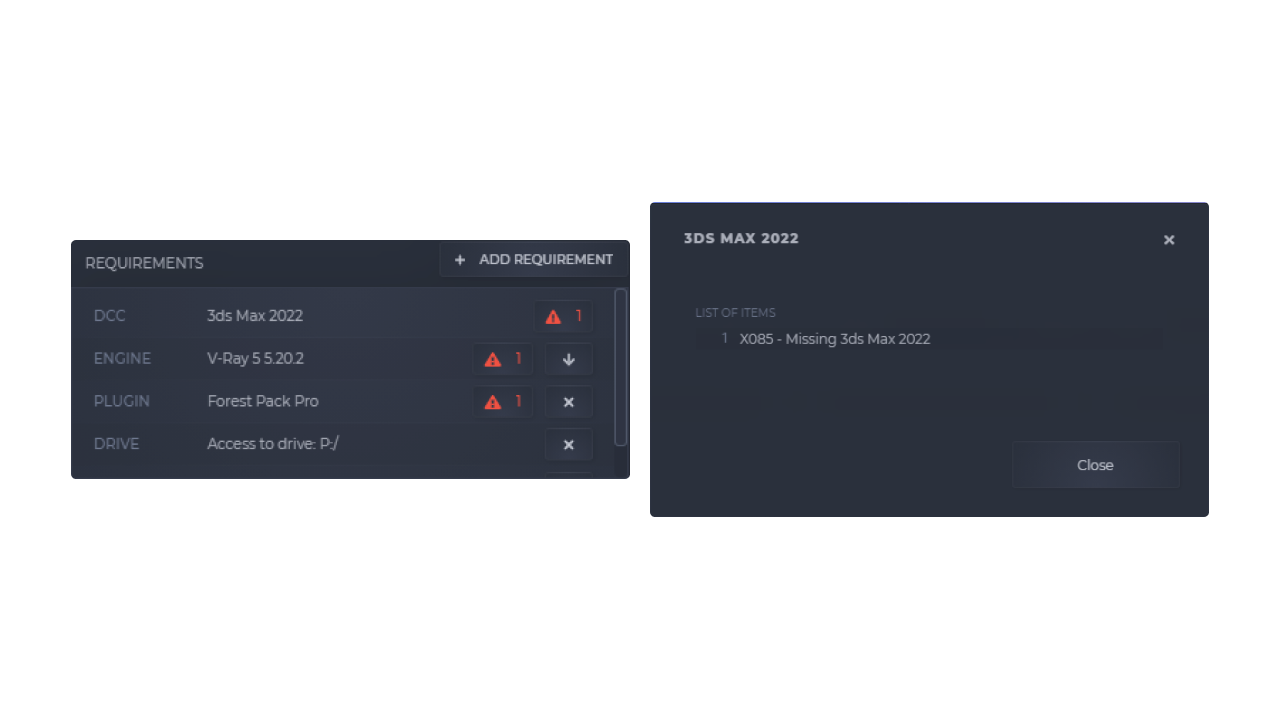
Render Manager will automatically create a list of requirements from the file that you wish to render. This will include the version of 3ds Max, all the used 3rd party plugins, asset drives and more.
Once a job is submitted, these requirements will be used to automatically filter out the computers that are missing a certain plugin or unable to reach the necessary network drives.
7. Filter by performance
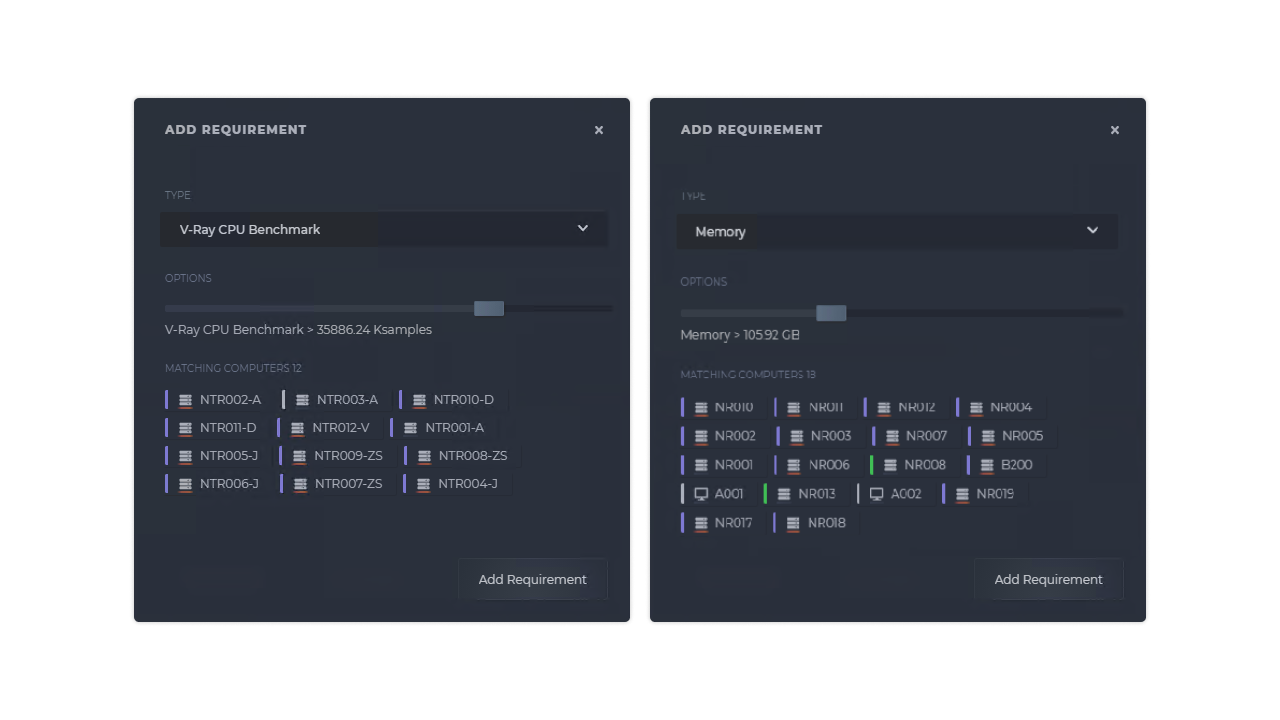
There are times when you would only like to use the most powerful computers for a certain job. You could allocate them manually, one by one, or you can choose to add a performance requirement.
Render Manager allows you to run Corona or V-Ray benchmarks and use these results to filter your computers. You can also set a minimum amount of RAM that a computer should have in order to join the job.
8. Distributed rendering
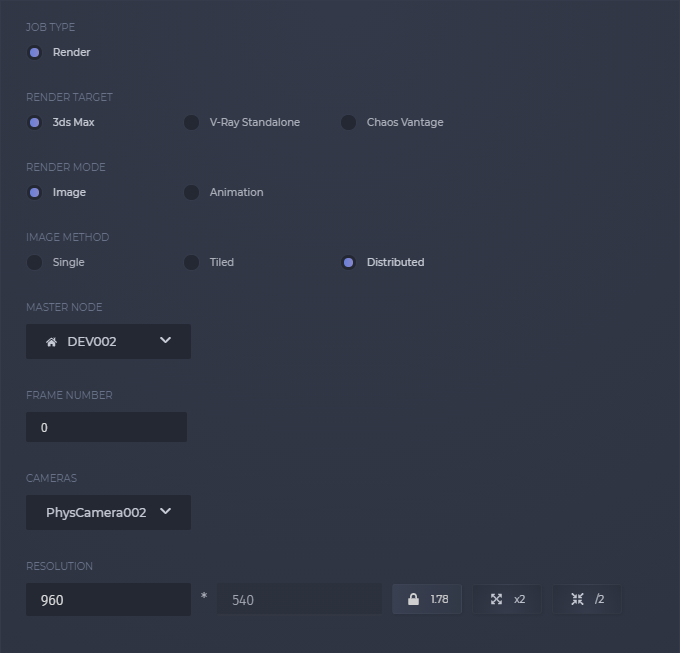
Managing distributed renders over the network is often a challenging and manual process. Render Manager has first-class support for distributed rendering and it provides multiple ways of doing it.
You can choose the traditional way, where one of your computers will act as a master which will open the file, starts rendering it and the rest of the nodes will join. The other special option is when the render starts on your workstation from the already opened file and the rest of the nodes will join your computer.
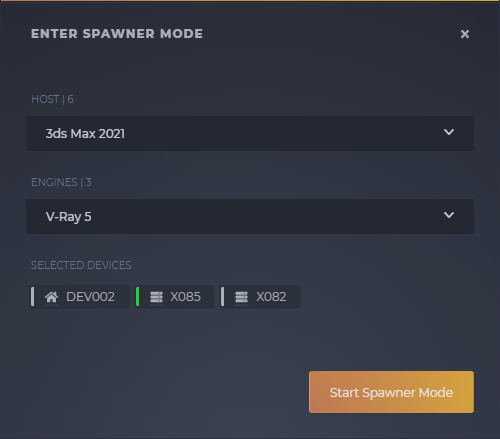
There is also a manually start and stop the spawners using the spawner mode option. This will start V-Ray spawner or Corona DR Server on the selected computers, which can be useful if you want to do Distributed Rendering outside the Render Manager without creating a job.
9. Animations
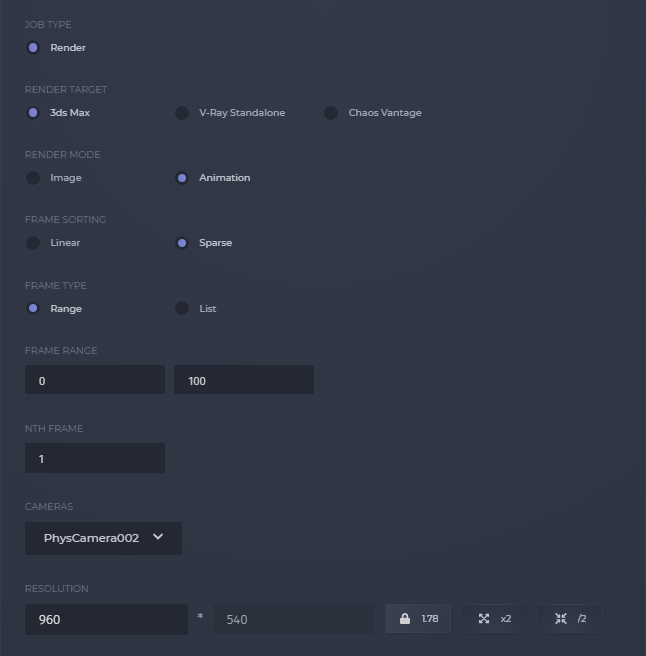
Render Manager also offers multiple extra features when it comes to rendering animations. Besides the usual linear frame order, you can choose the sparse option that will render the first, last and middle frames and then condense the rest.
The packed task option will allow you to define the number of frames that a node should continuously work on. This method will be an asset when rendering animation on the GPU or handling large frame counts.
10. Progress and Preview
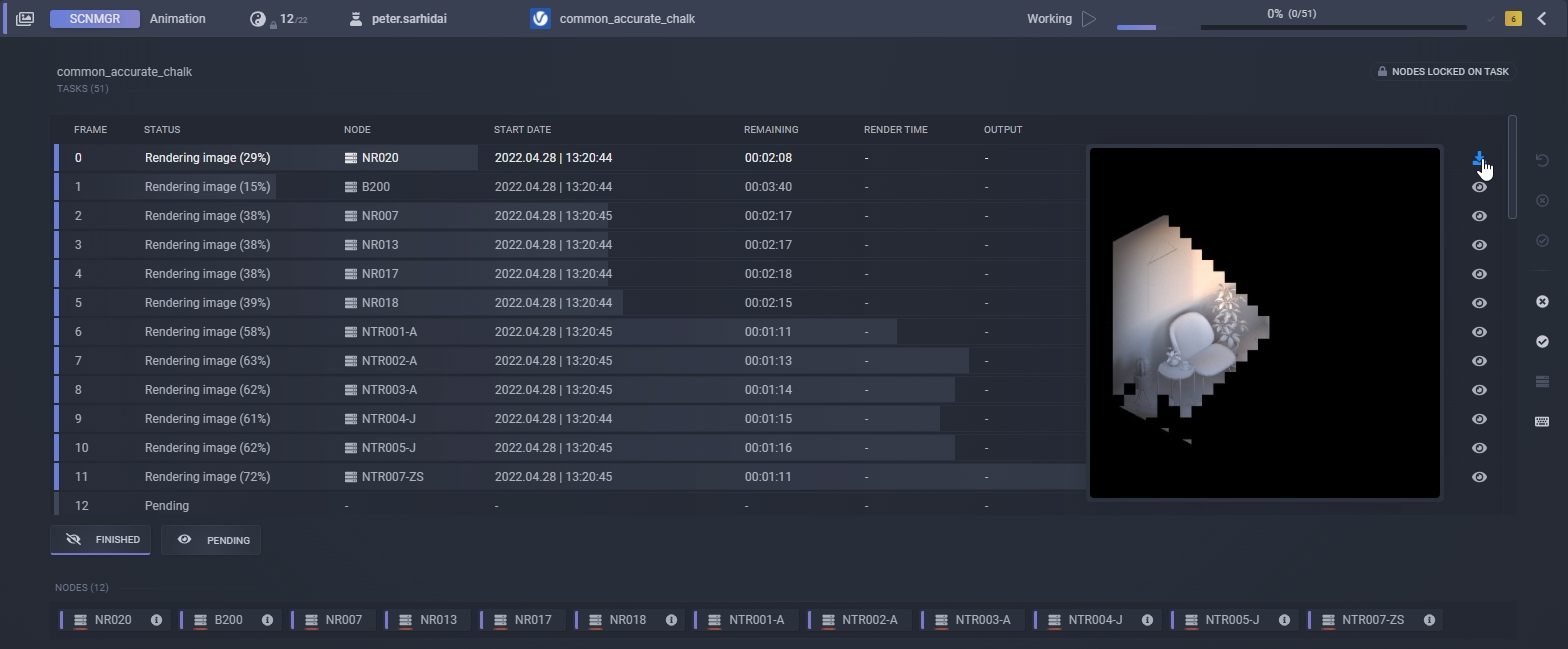
With every rendering job, you get detailed status, progress, time, and thumbnail information for all running tasks. This instant feedback takes the network rendering experience to a new level and makes it very easy to predict and get a quick overview of your jobs.
The VFB thumbnails will also help you to spot any errors before waiting for the entire frame to be finished.
+1 Scene Manager integration
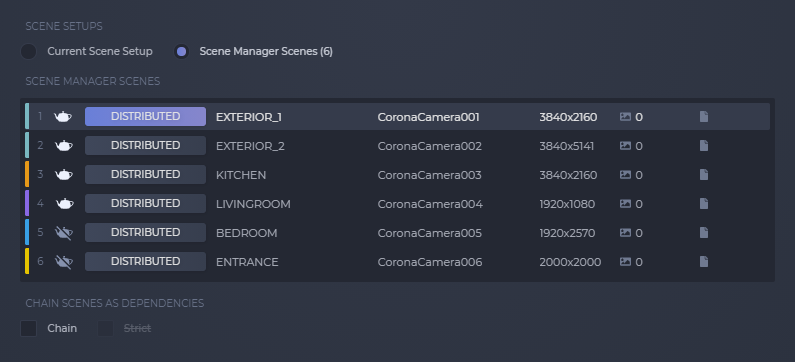
Outputting your entire image or movie project on the farm should not be a repetitive task. The tight integration with Scene Manager will allow you to submit all your cameras with different lighting, layer config, render and output settings with one click.
You also have the ability to modify the most important settings of your Scene Manager setups without opening the file.
Sign up for a free 30 days trial
The trial is only limited in time and you will have access to all the features. Our floating licenses will give you enough flexibility to try it out at work and from home.
Try Render Manager Now
If you have any questions please check our faq or contact us at support@pulze.io!
