
We collected some of the less visible but very interesting features of Scene Manager. These little gems will make your work faster and more efficient. As the plus one we selected an experimental feature that we never showed before. Make sure to try out all of them!
1. Select similar
One of the great advantages of Scene Manager is that you can batch edit setups. Changing the resolution, render settings, output path or any other properties on multiple selected setups together is not an issue. In some cases, it could be a tedious task to pick the right setups that you would like to modify. Luckily we have a select similar feature that could help you out. You can use it by pressing and holding Ctrl and then clicking on the setup list header.
By Ctrl + Clicking on the Sun header we selected all the setups where we use CoronaSun001
2. Preview setup
When selecting a Scene Manager setup, the settings will always get loaded to the scene. Most of the time this is what you want for sure, but there are cases when this could take serious time. For example when using XRef-s or large HDRi maps. The preview setup option (Alt + Click) will help you out when you want to change some properties but you don’t want to apply them.
By Alt + Clicking on the first setup we can preview and modify and of the properties without applying it to the scene
3. Switch camera only in locked viewport
Scene Manager by default will always change the camera on the currently active viewport. It could be that you don’t want to mess up your viewports by accident. One of the best options is the ability to only apply the camera change to the locked viewport which you specified in the render settings. To turn on this mode just open up the Scene Manager settings and choose the locked View to Render option.
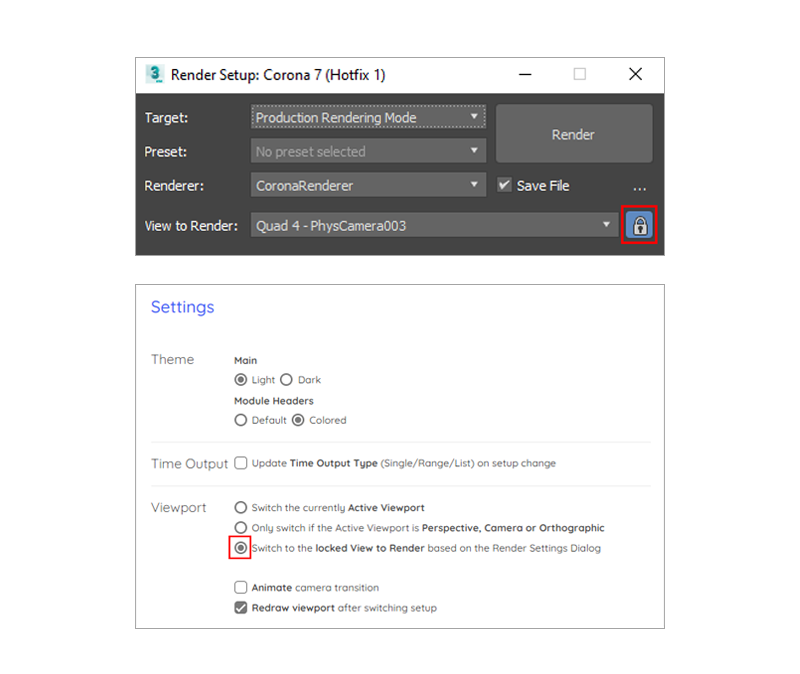
Scene Manager will always switch to the locked viewport and it will apply the camera switch on there
4. Copy/paste settings
Scene Manager is all about simplicity and ease to access the most common 3ds Max settings, but there can be complicated setups that is time-consuming to create. If you would like to reuse the output or the HDRi settings the fastest way is to use the copy/paste feature.

Usage of copy/paste between your setups
5. Minimize modules
User interface real-estate is limited. Minimizing a module can come in handy if you want to save some space but you still want to have the option to quickly open the module and get back into action. By double-clicking on the modules header, you can minimize and maximize them.
You can save some space by double clicking the header of the module
+1 Camera transition effect
Ever been jealous of the camera transition of Sketchup or Rhino? Well, with a flip of a switch in Scene Manager you can achieve a similar effect. It could be a nice touch to turn it on during client presentations or just for your own fun.
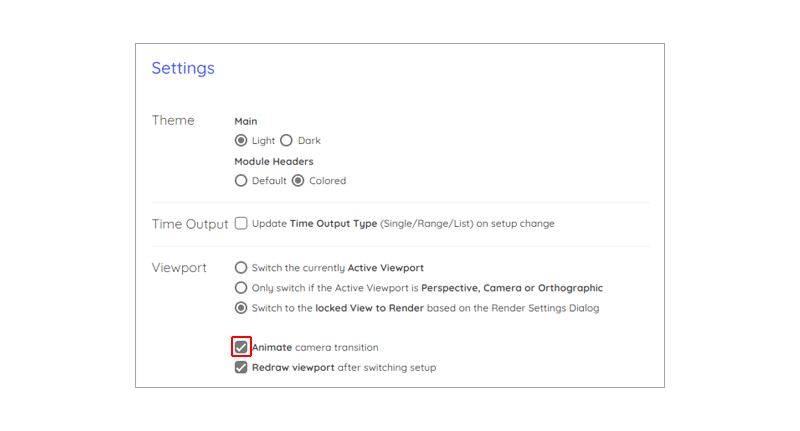
By turning on the Animate camera option you get this great transition effect