Our spotlight series continues with one of our long time users, Red Going Blue. We asked them about their company, the workflow before and after they adopted Scene Manager and their most beloved features.
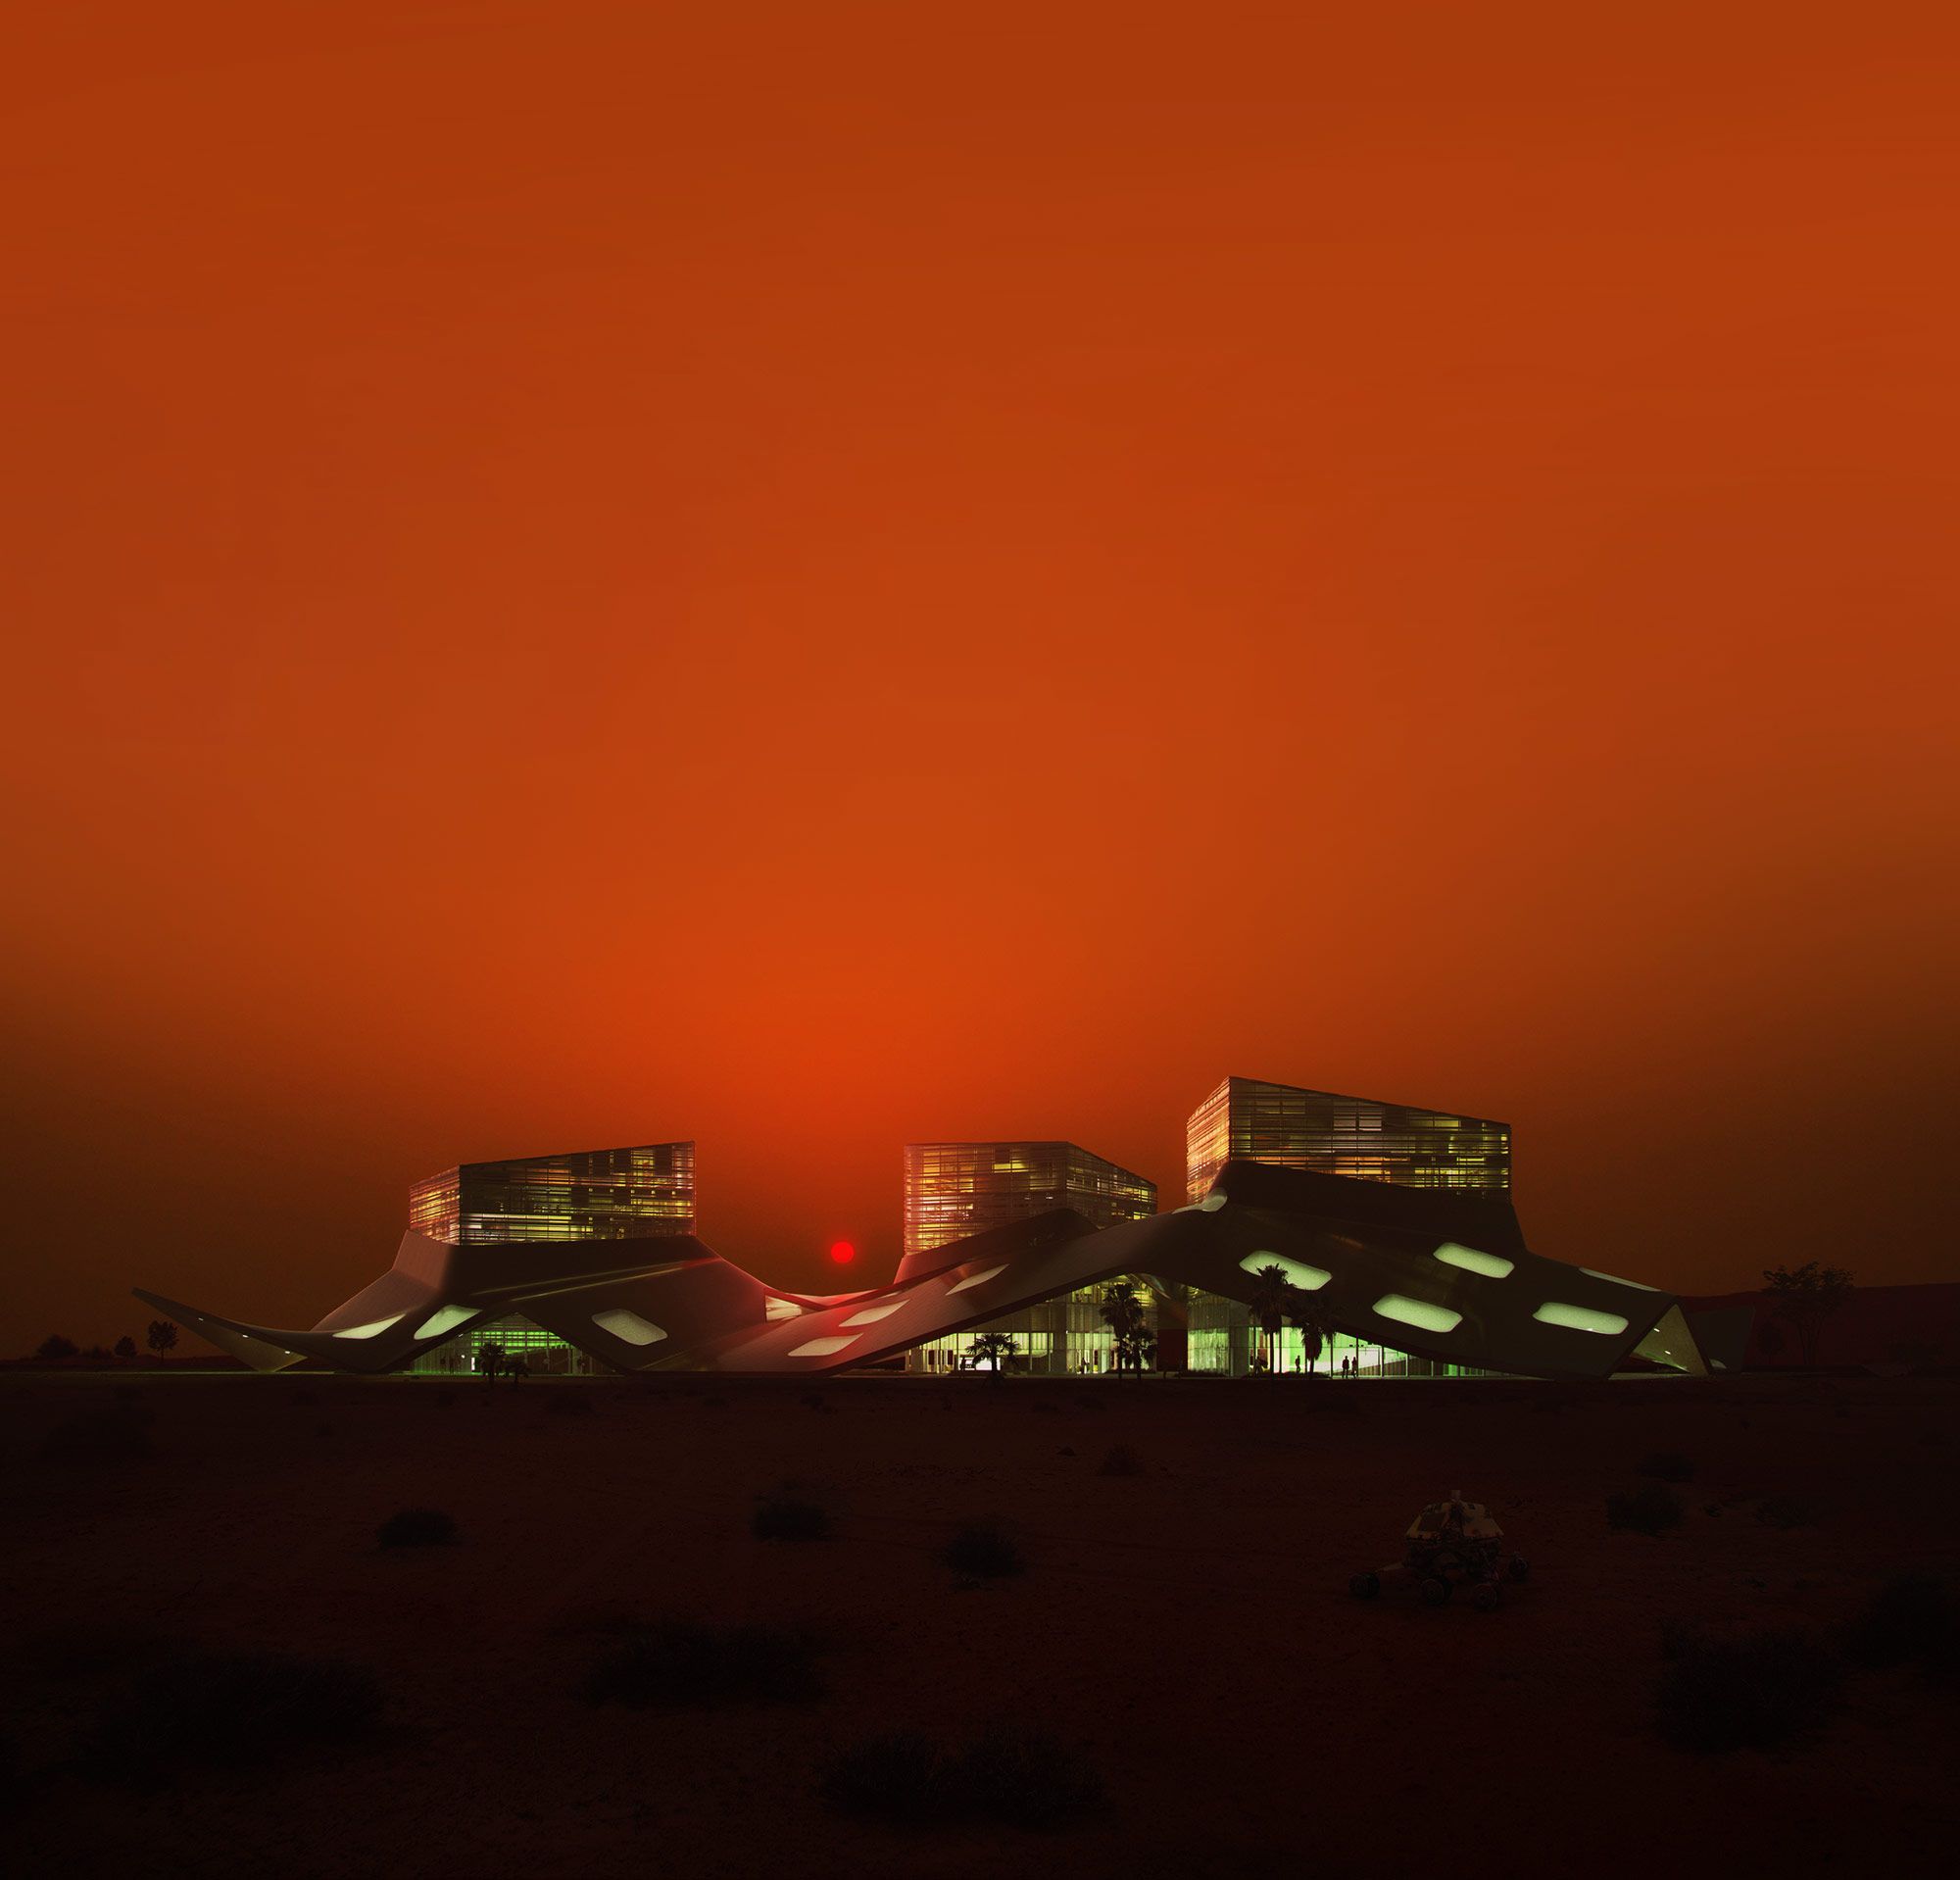
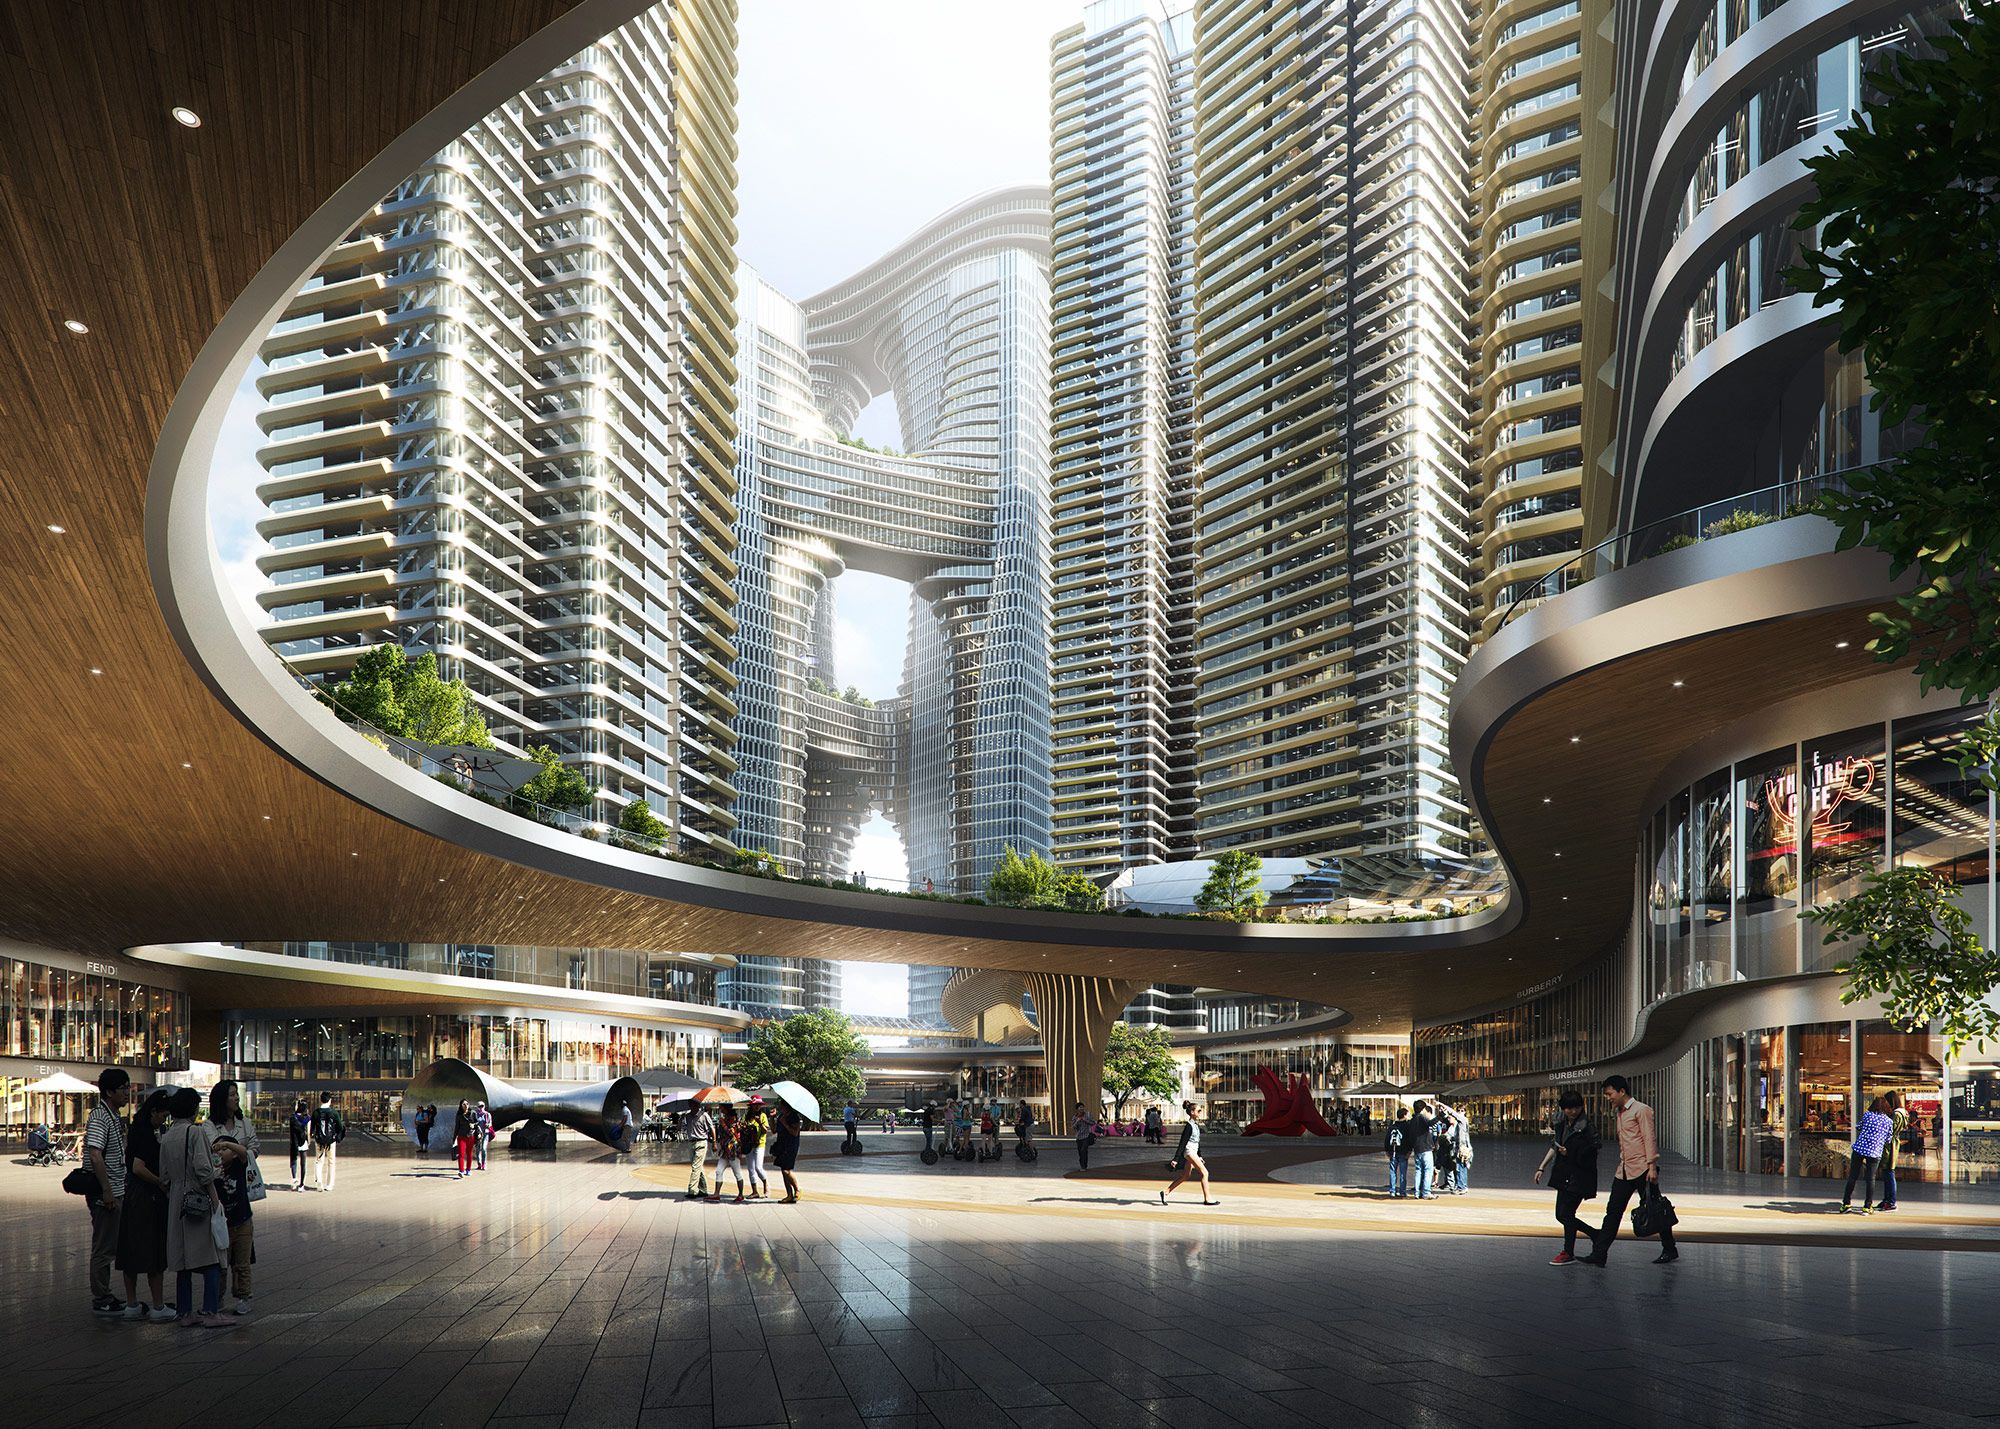 WAVES - Shenzhen masterplan, Tariq Khayyat DP
Could you please introduce your company?
Redgoingblue is an archviz studio focused on crafting still images for international architectural firms.
Our studio is based on the idea of delivering high-quality images taking advantage of the 3d workflows but also merging the final results with a strong focus on the versatility of the 2d post-production, which gives us the ability to tell stories that are strongly connected to the buildings.
From the beginning, we thought about creating a visualization studio that would be closer to the client to understand their needs and be able to dedicate time to achieve good quality, without trying to take on too many projects at the same time and being able to concentrate on generating good images.
We try to avoid using the same formula to every project so we aim to test different approaches for the creation of an image.
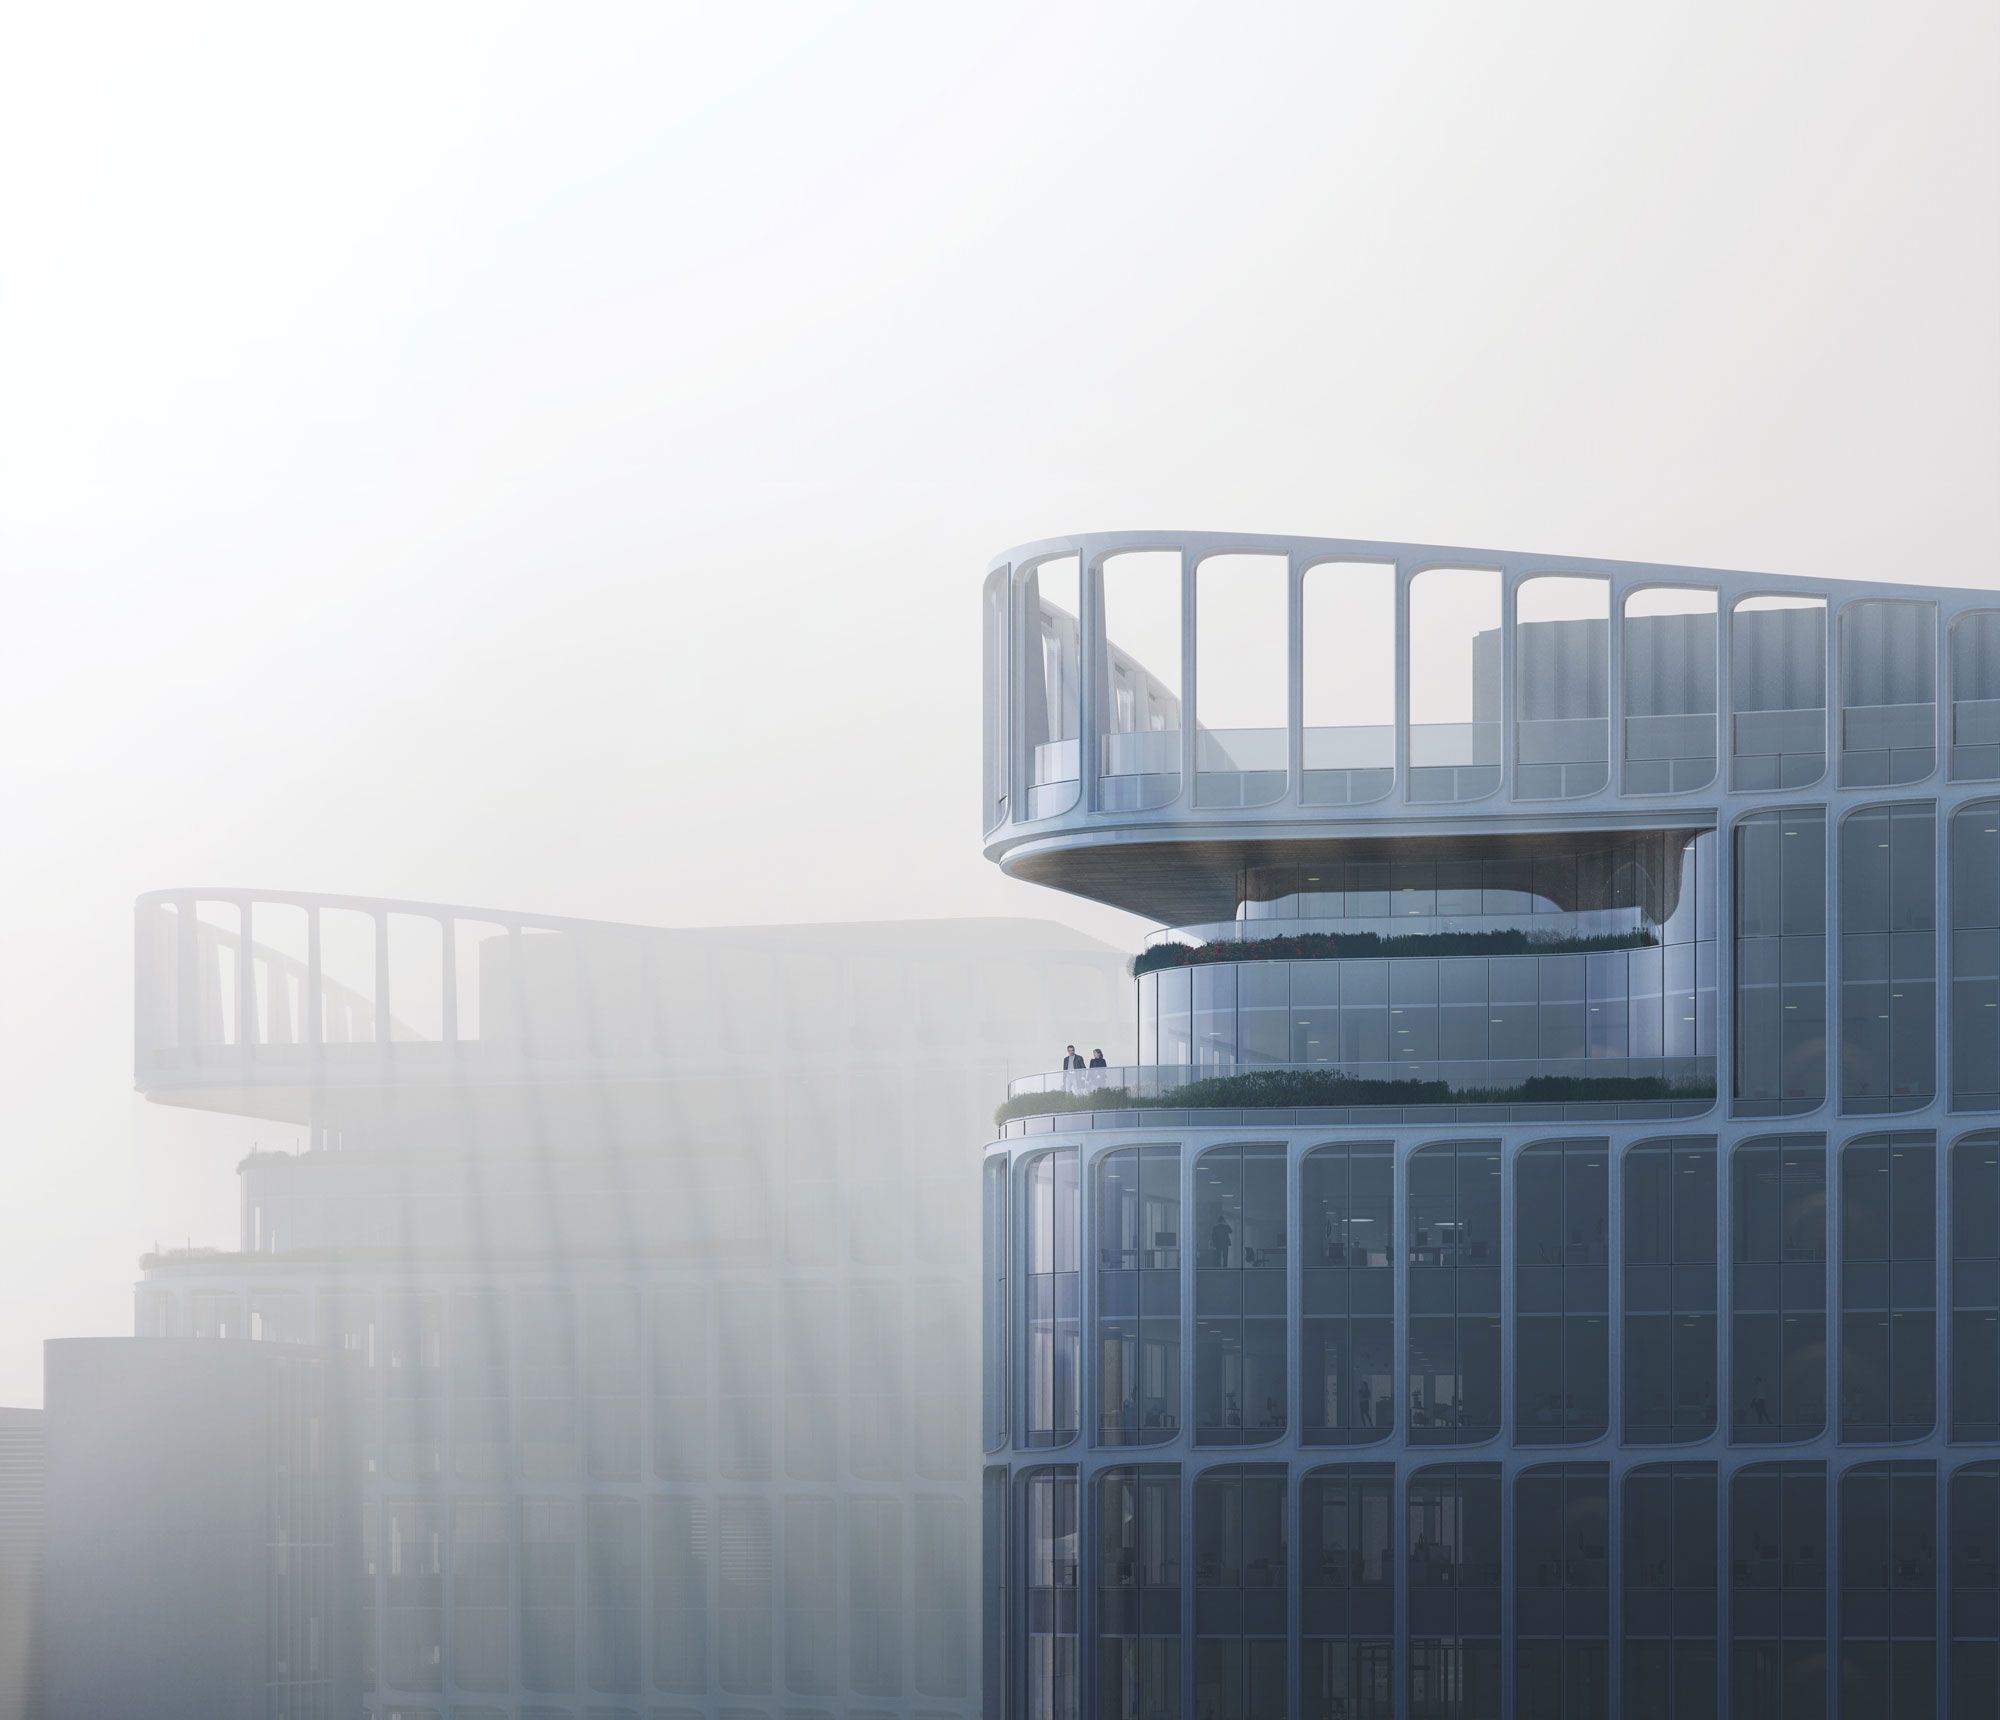 THE MIST - Confidential Project, Kohn Pedersen Fox.
Please, walk us through the workflow of a typical project.
Honestly, it is not something from another world. First, we ask the client for all the information related to the project and a briefing to have a better understanding of what the client is after.
The first day or two we import the model into 3ds max, assign materials, and all the props (vegetation, cars, interior furniture, etc). This way we can split the work through the rest of the team and that way we all have the same starting point.
This is kind of tedious work, but once it is done it’s when the fun begins.
From here, we start testing different cameras and moods from almost every interesting point of view of the project, trying to give our clients a lot of different variations and new perspectives.
We think that probably the clay render times are almost over. That’s why we prefer to present a more complex and polished product from the beginning.
This way the feedback flows better and the clients have a more accurate understanding of how the images will look at the end.
After the cameras or sketches (which are usually a little bit more complex in terms of post-production), we do a second draft based on the selected cameras, and this time we add the rest of the details that will be presented on the final images.
That’s basically it!
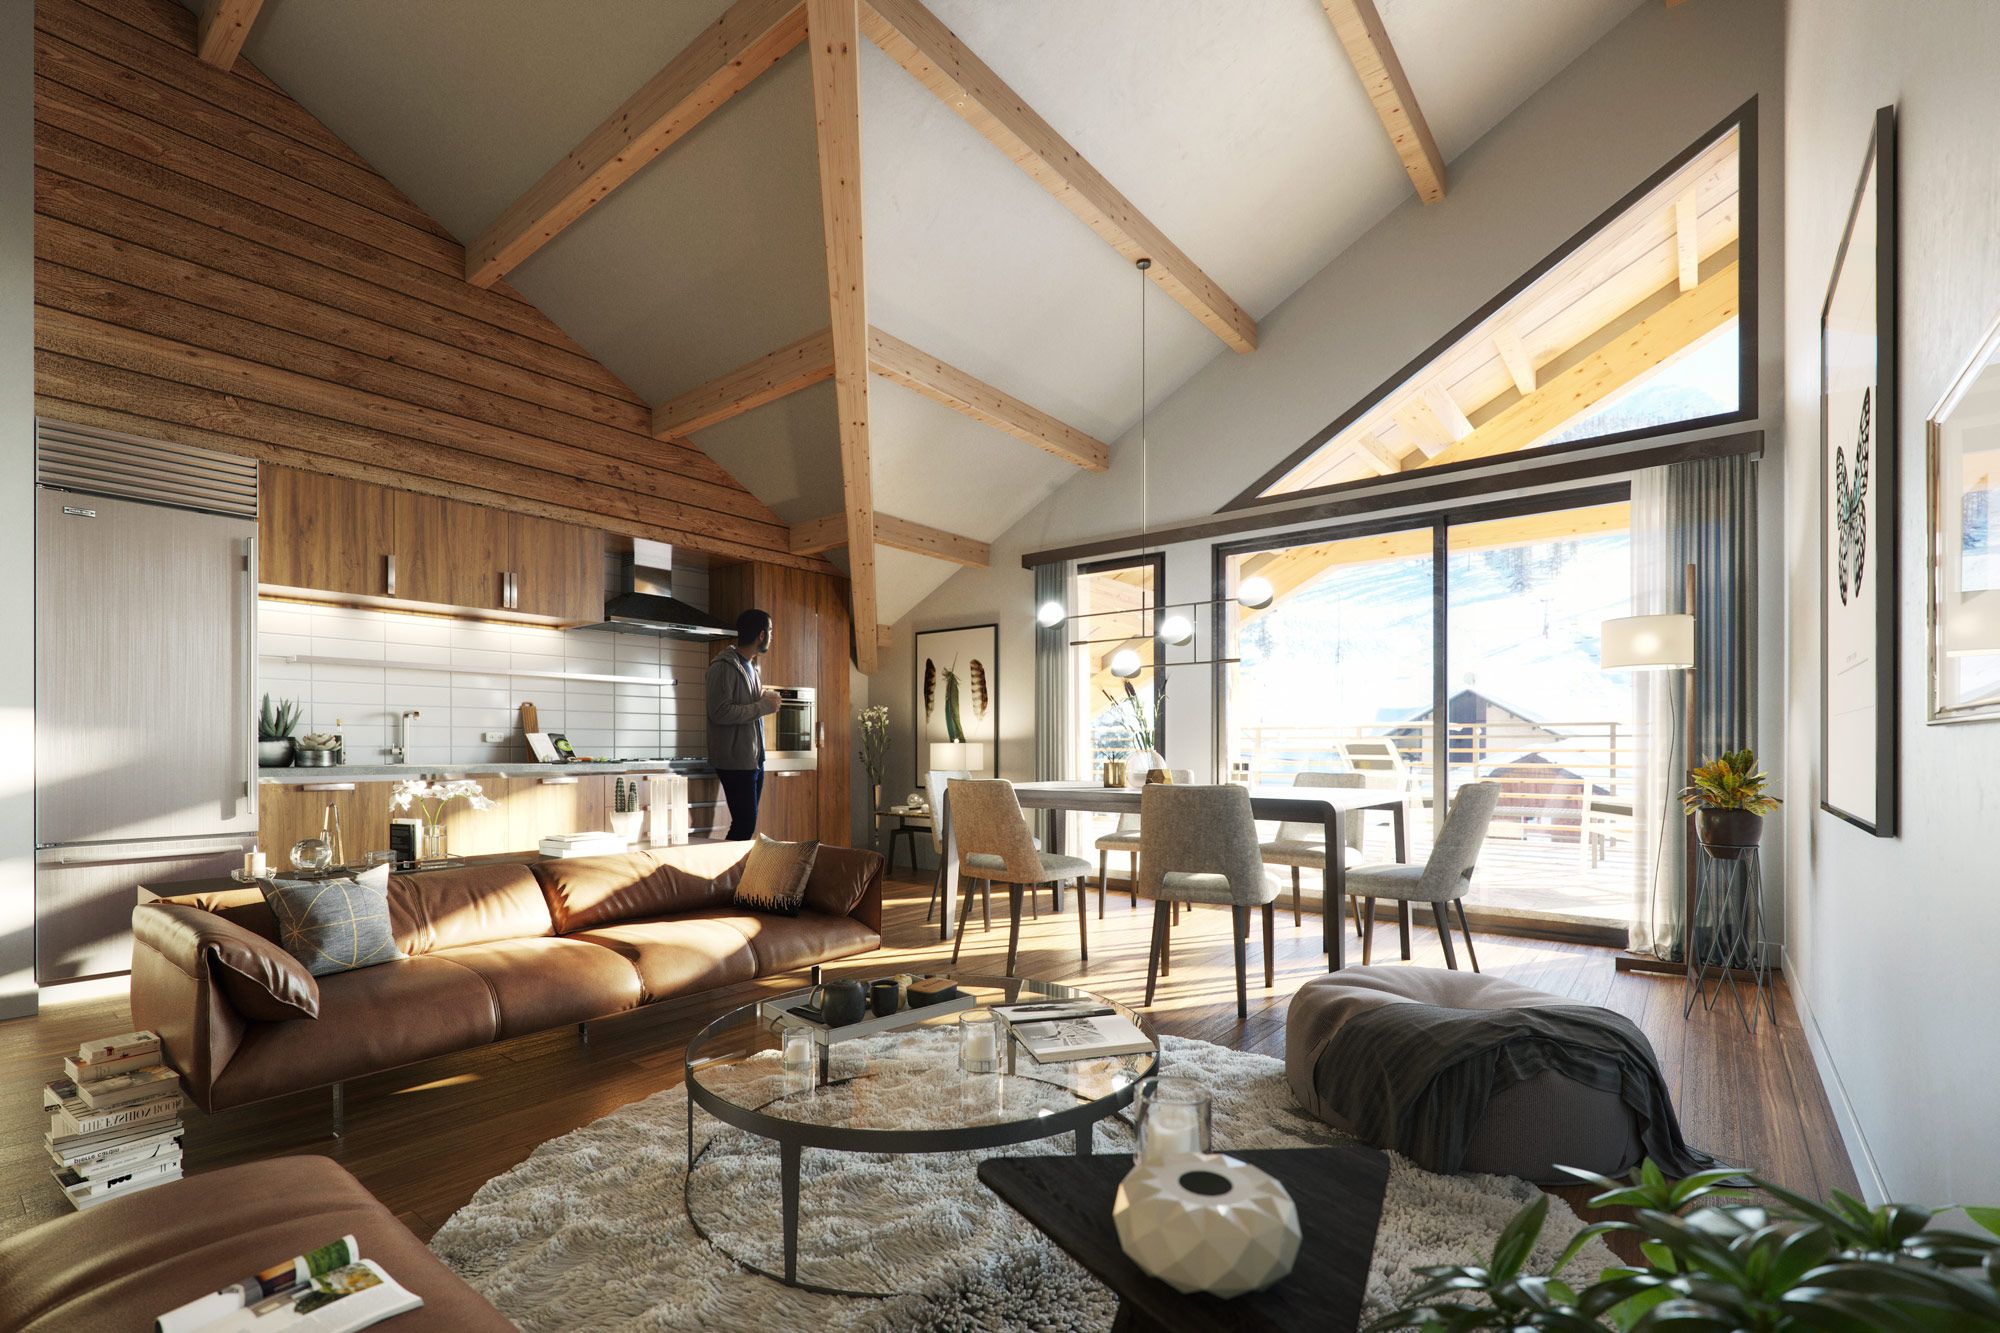 COZY - Housing development, Via Latte. Montgenévre, Nugguy Agency
At which point do you start using Scene Manager on a project?
Almost from the very beginning of the project, once we’ve set up all the models we jump right away into the cameras and the Scene Manager is always open on a second screen.
Well, we think we have a few different approaches in terms of features, but essentially the ability to set up all the cameras that you want, duplicate them and change every single parameter to have a completely new set-up of the same point of view is one of our favorites.
The ability to have all the different suns or HDRIs from the scene in the palm of our hands without having to go around trying to find the one we’re looking for is definitely a time saver.
Also being able to turn on and off layers or objects right in the scene manager is another great feature.
And of course batching the render of all the cameras is super nice!
 RED DOT - New technologies Research Center, Australia
How had you handled your scenes before adopting Scene Manager, can you explain how your workflow changed since?
In the old days, we had to handle everything with layers and write notes to ourselves to know which layer should be active in order to change light settings, features, vegetation, …
When our client had given us the camera selection and mood, we usually split each camera into separate files. This way we could focus on the settings of each camera and work on the given scene safely.
Nowadays, we don’t have to worry about that. We can use one configuration for each camera and store it directly.
This way we keep experimenting with other cameras and moods. Then we do some previous renderings and we can choose the best cameras to start working on.
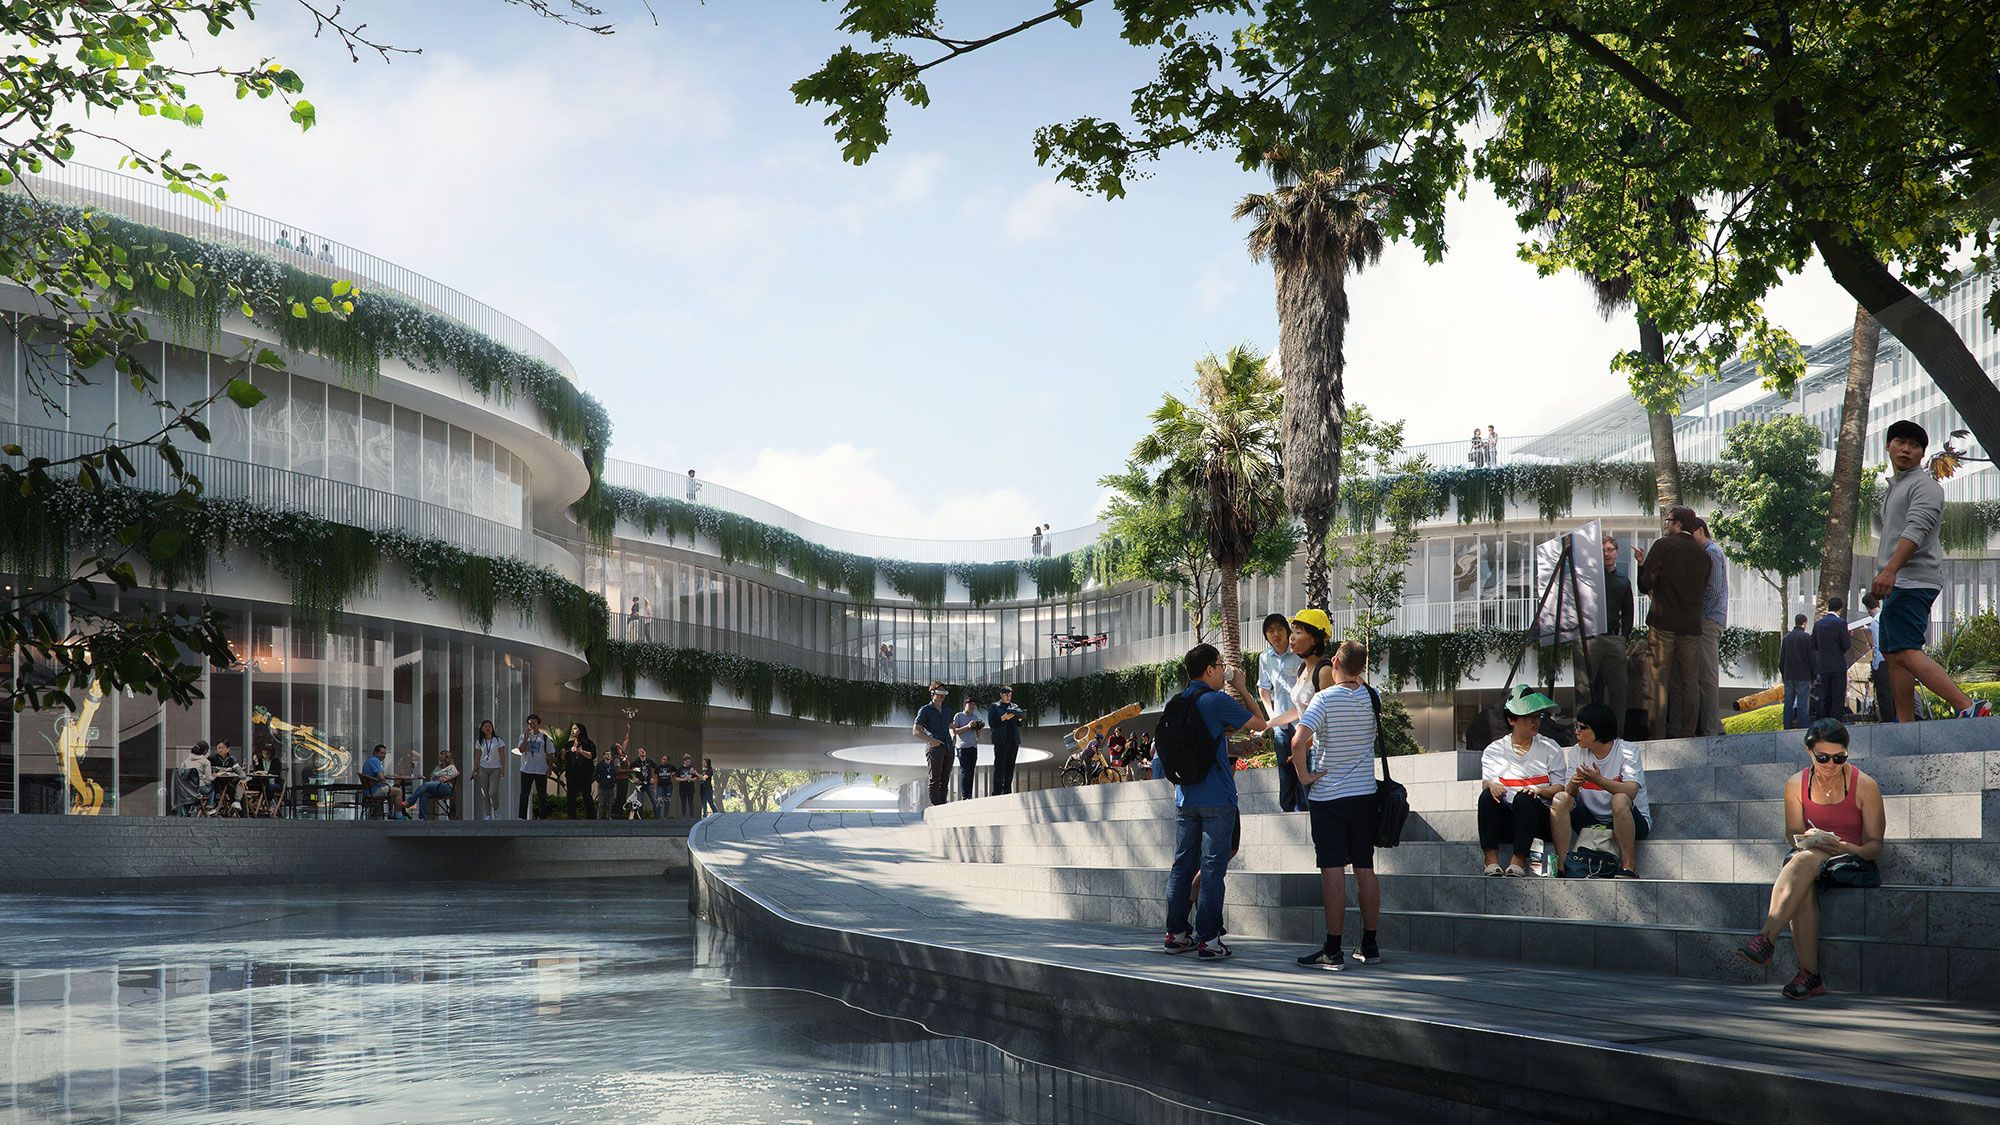 OVAL CANAL - KHUST Hong Kong, Kohn Pedersen Fox.
What is your favorite feature?
Changing the daylight system settings (intensity and size of the sun and time of the day) along with the tone mapping.
Our favorite new feature is import/export. Until now we didn’t have an easy way to pass the Pulze configuration from one team member to another.

Make sure to visit Red Going Blue’s website and follow them on instagram.
Start your 30-day free trial now without any commitment!