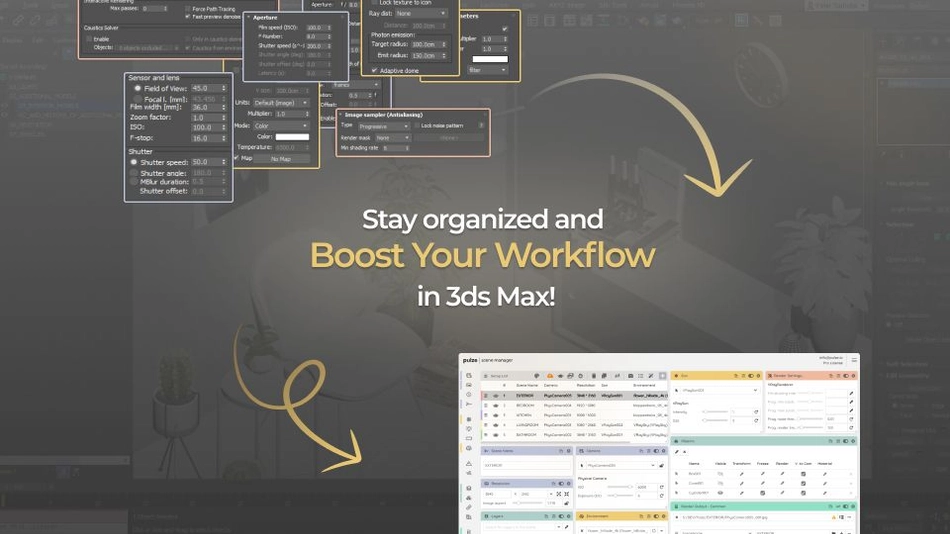
In this article we will go through the most commonly used 3ds Max features that defines your workflow when dealing with multiple angles and lighting conditions. Going through your camera, lights, layers, output and render settings before each render is time-consuming and leaves a lot of room for mistakes. This is the point where Scene Manager can help you a lot.
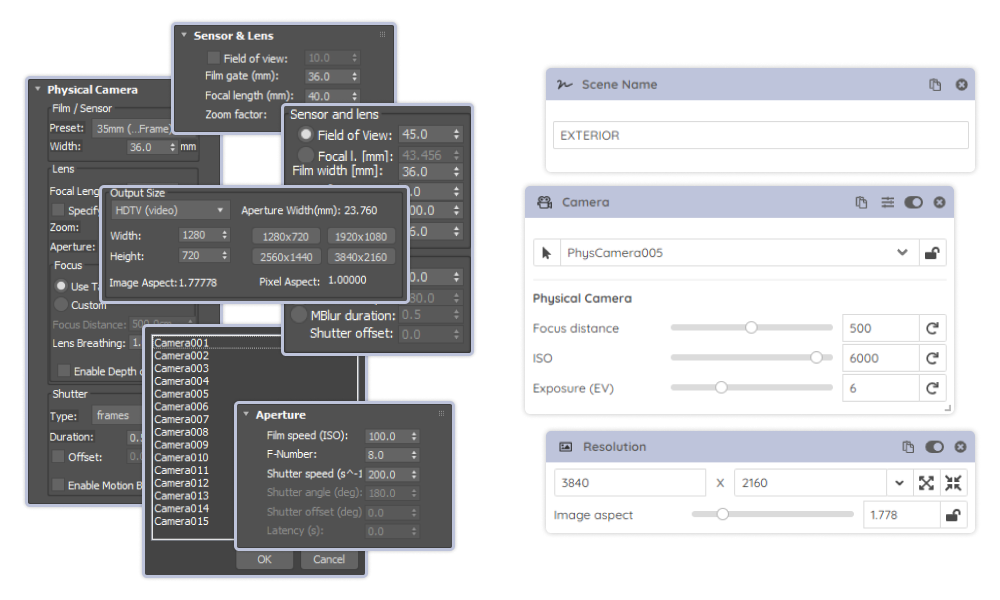
1. Camera/Resolution
While working in 3ds Max you would often want to switch between different cameras paired with the right aspect ratio. Doing this manually could be an annoying process. By using Scene Manager’s camera, resolution and scene name module you can easily manage, identify and switch between dozens of options.
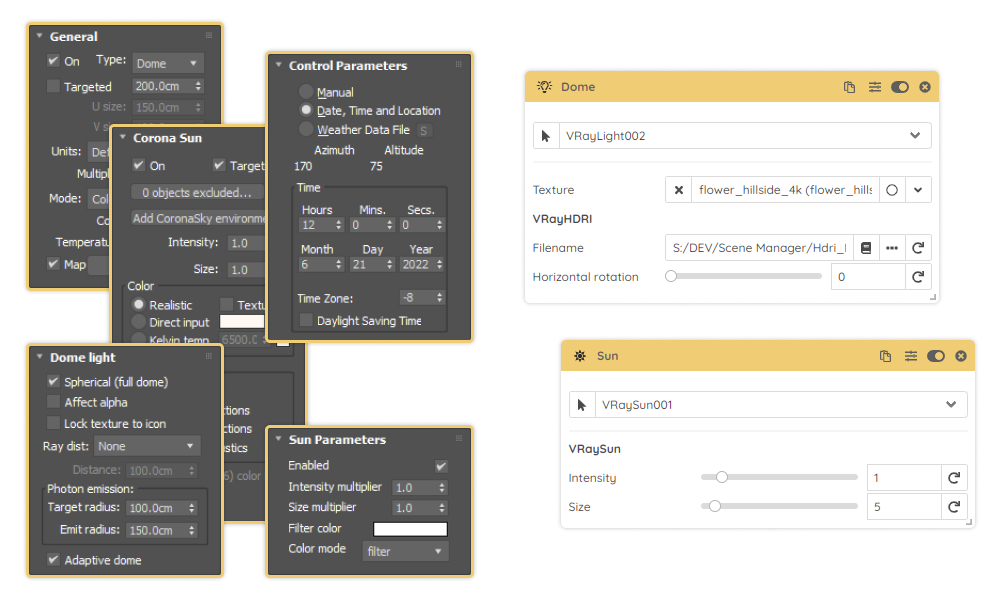
2. Lighting
In most cases, each angle requires its own fine-tuned lighting. Whether you are using sun lights, domes or a daylight system, there are plenty of properties to take care of. Scene Manager allows you to pick the settings that you need and it will automatically turn on or off the lights for you.
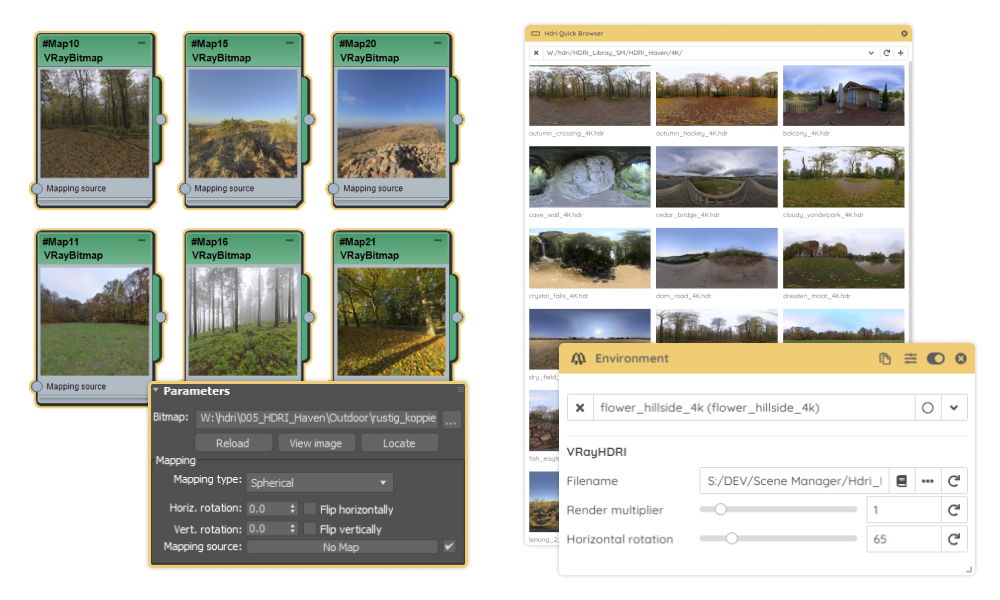
3. Hdri maps
Exploring and managing different hdri maps can be a tedious task that could limit your creativity. With the help of the hdri library and environment modules, you can make quick decisions and choose the best option.
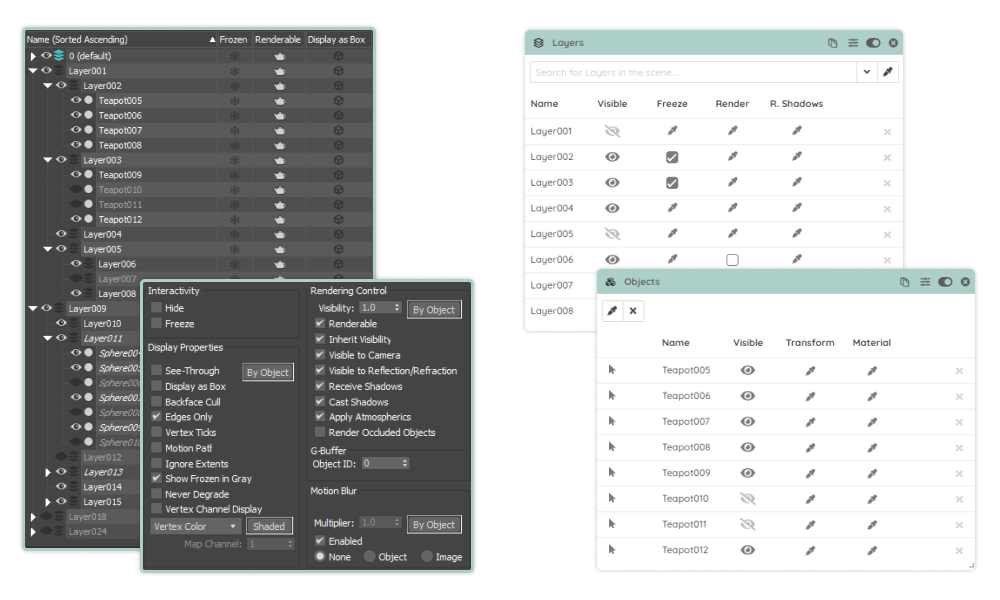
4. Layers/Objects
There are often situations when you need a specific object or layer to appear on one camera but you would like to hide it on another. The layers and objects modules will take care of that for you. Besides the visibility, renderable and other essential properties, there are a few extra ones that will allow you to override the material or the position of an object.
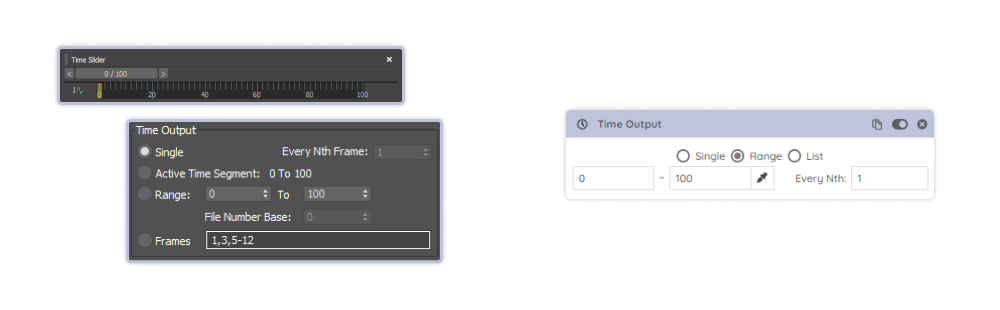
5. Timeline
When working with animations it can be helpful to adjust the frame range per camera. The time output module will do exactly that. It can also fetch the first and last key of your camera animation and will also adjust your timeline to the required range.
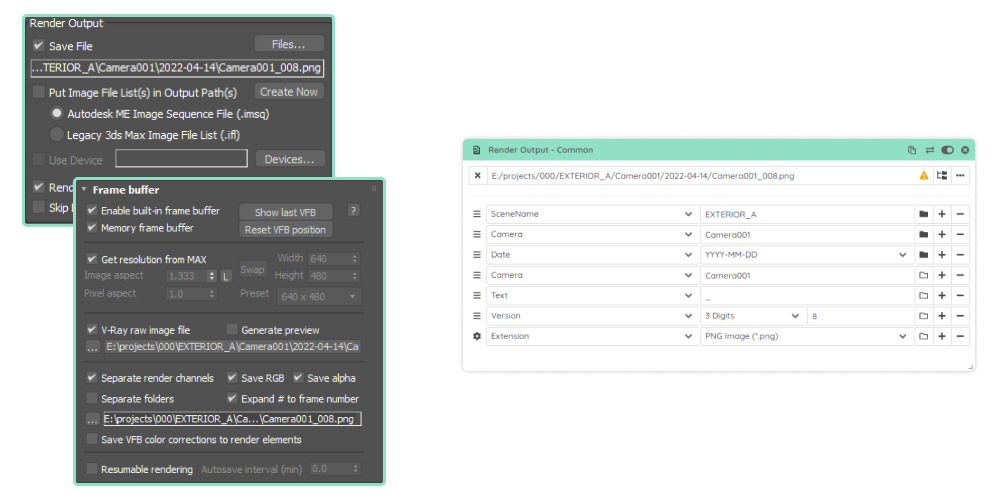
6. Render Output
Saving your outputs to the right place with the right name is essential. Your project will most likely require a naming convention that contains the camera, current date and some sort of versioning. Doing this manually for each render takes away a lot of time and leaves room for mistakes. With the render output module, you can easily create, update and templatize your paths.
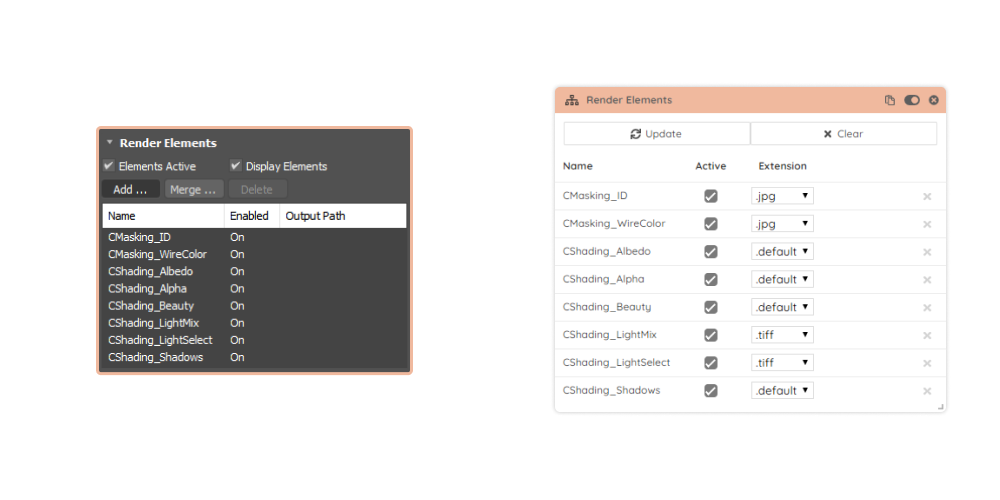
7. Render Elements
There are times when you just don’t want to render and save all your render elements. For example, a ZDepth element that works for one image could be useless for another. You can also save a lot of space by turning off the light select elements that you don’t require. With the render elements module, you can easily do all that.
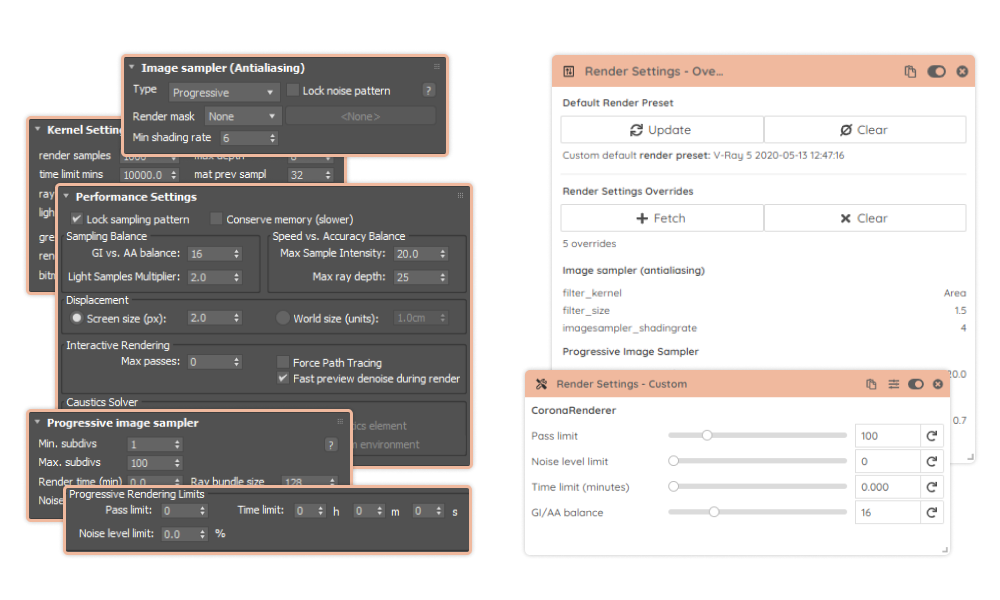
8. Render Settings
Regardless of the render engine of your choice, there are always a few properties that you need to deal with. You would want to adjust the settings for the final render and lower them for previews. Scene Manager has multiple options that will make this process a lot easier and transparent.
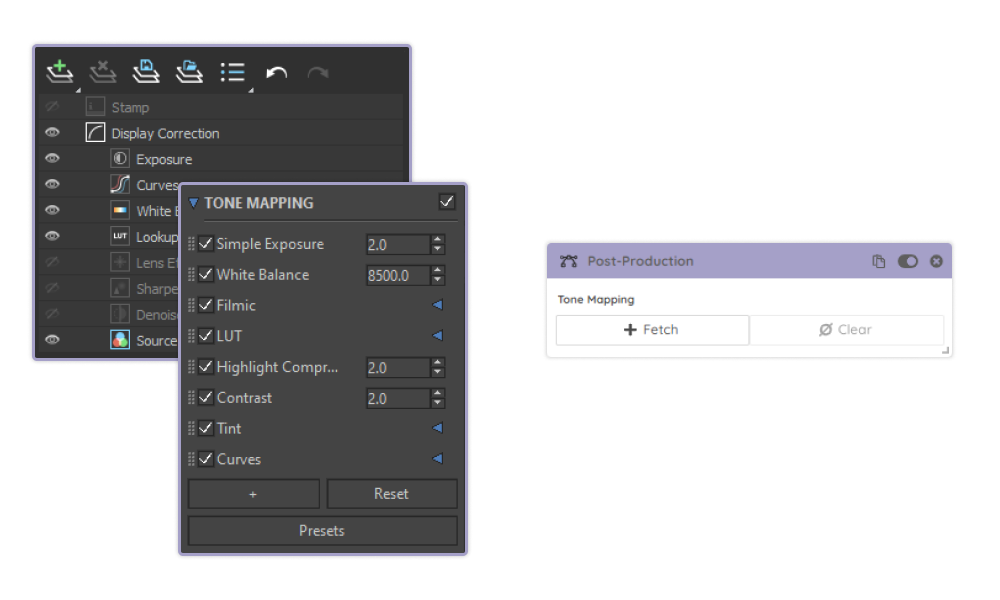
9. Post-production
The ability to adjust your renders directly in the VFB is becoming an important part of the workflow. Whether you are applying a simple brightness/contrast or doing some light mix, managing these settings over multiple camera angles is time-consuming. With the post-production module, you can store and retrieve all your V-Ray VFB Layer and Corona Tone Mapping settings for each camera.
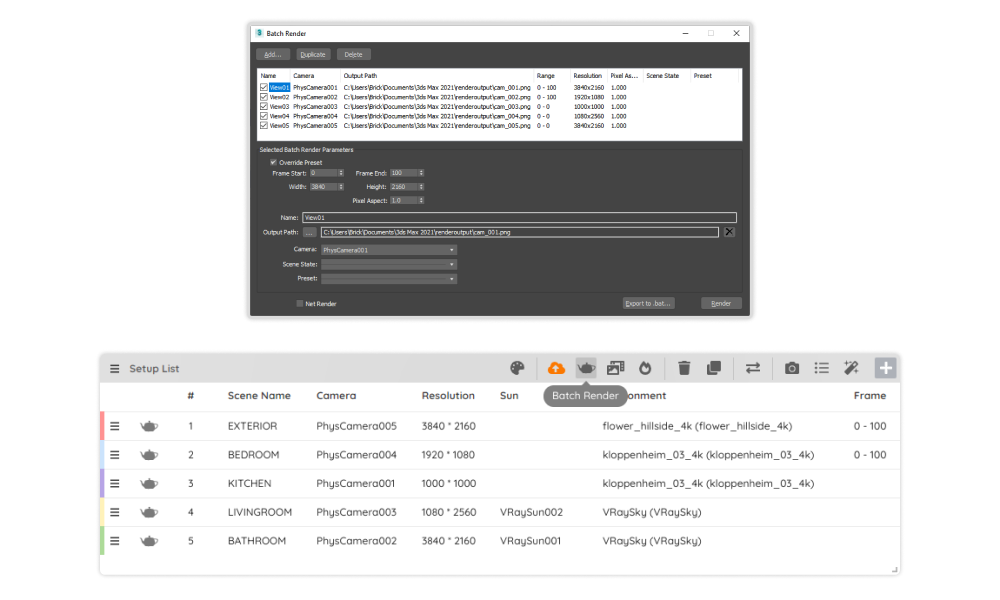
10. Rendering
Sooner or later you will reach a point where you prepared everything and you are ready to render your images. You can choose to do it one by one, use 3ds Max native batch render or you can do it with one click in Scene Manager. It’s easy to review your settings for each render before you start and there is no need to remember and manually adjust everything.
If you would like to try it out yourself sign up for a 30 day free trial. The trial is only limited in time and you will have access to all the features. Our floating licenses will give you enough flexibility to try it out at work and from home.